
Ever wondered how pros turn ordinary photos into jaw-dropping masterpieces? It’s not magic; it’s all about using the right photo retouching tools! Whether you’re fixing blemishes, smoothing skin, or adding that perfect glow, knowing the best retouching tools in Photoshop can make or break your edits. In this guide, we’re diving deep into the ultimate Photoshop retouching toolkit every editor needs. Ready to level up your Photoshop photo editing tools game and create edits that WOW? Let’s go!
Photoshop is the magic box for every photo lover. This is the best friend you need to make your pictures look perfect. The edits you do in Photoshop are worth saving because they turn normal photos into amazing art. Even though people these days click pics with their phones and use filters, Photoshop tools are still the best, whether you use them for fun or professional work.
Also, the retouching tools in Photoshop help fix mistakes and make photos look dreamy. They show the hard work and creativity you put into making a picture special. Friends and family love to see these edited photos, share them online, or even print them for memories. Phone edits or bad-quality fixes are not good for keeping these moments perfect forever.
Retouching plays a crucial role in photography and design, helping enhance images to their full potential. Digital retouching allows artists to correct imperfections, adjust lighting, and improve overall aesthetics with precision. Among the many techniques, common retouching tasks include skin smoothing, blemish removal, and color correction to create polished, professional visuals.
Using the right tools in Photoshop can change everything. They help remove pimples, brighten faces, and even make colors pop. If you haven’t used them yet, you are missing out on making your photos look like pro work. So, start exploring these tools today and see the magic happen!
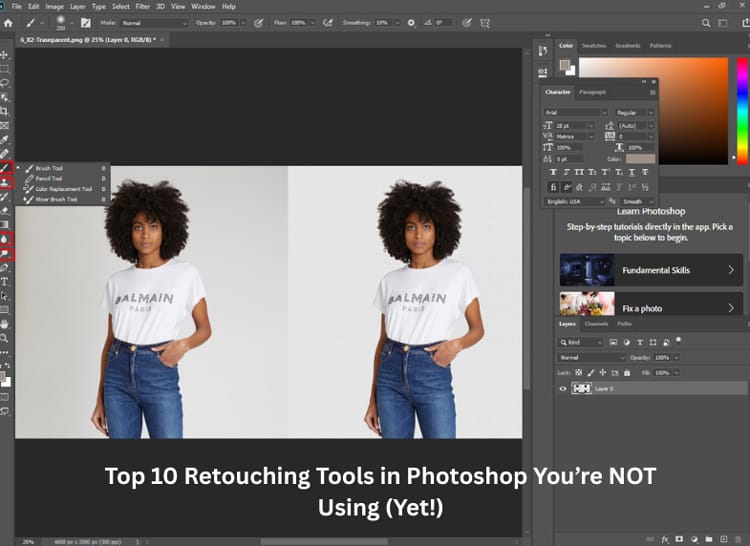
Let’s dive into the Top 10 Retouching Tools in Photoshop!
Healing Brush Tool

Every Photoshop user should try the Healing Brush Tool to make their photos look perfect without any hard work. Now, questions like how this tool can fix bad spots in a photo may come to your mind.
The way the Healing Brush copies good parts of the picture and covers the ugly spots can help you edit photos like a pro. This way, you can feel happier with how your pictures turn out. Also, the time you spend fixing mistakes with this tool makes you better at Photoshop, which is important if you want to be good at editing. Most importantly, the photos you fix with this tool will look so real that nobody can tell you edited them.
A bit of retouching can completely transform an image, whether you’re aiming for subtle enhancements or dramatic changes. Tools like the healing brush and spot healing brush tool are essential for removing imperfections while maintaining texture.
The Healing Brush Tool is a retouching tool used to remove imperfections by blending them seamlessly with surrounding textures, automatically matching color and tone.
- Select the Healing Brush Tool from the toolbar or press J on the keyboard
- Adjust the brush size using the bracket keys so it’s slightly larger than the blemish
- Hold Alt (Option on Mac) and click on a clean area to set the source point
- Release Alt and click or paint over the imperfection to apply the correction
- Resample often by holding Alt and clicking different clean areas near each blemish
Zoom in to 100% to check for natural blending and avoid visible patches
For professionals, non-destructive editing ensures flexibility and preserves the original image during adjustments. Achieving clean retouching requires patience, skill, and precise edits that enhance without overdoing it, proving that even a small bit of retouching can make a big difference.
Using the Healing Brush is easy; just pick a clean area and paint over the bad one. It blends everything smoothly, so no one sees the changes. If you haven’t used it yet, you are missing out on making your photos look flawless quickly!
Spot Healing Tool

You like fixing photos fast? Then you should try the Spot Healing Tool to make ugly spots disappear quickly! Pictures edited with this tool will make you remember how easy it was to fix all the bad parts.
Spot Healing works best when you have small mistakes like pimples or dust spots. Just click on the bad spot and watch it magically go away! Standing against a messy background? This tool can clean it up nicely. You can also use it on photos of your room or outside to make everything look perfect.
The Spot Healing Tool is a simpler version of the Healing Brush Tool, automatically correcting imperfections by sampling the surrounding pixels without requiring you to manually choose a source. It’s ideal for small blemishes or spots.
- Select the Spot Healing Tool from the toolbar or press J on the keyboard
- Adjust the brush size to slightly larger than the imperfection
- Click directly on the blemish or imperfection, and Photoshop will automatically blend it
- For more control, use the “Content-Aware” option in the settings for better blending
- Zoom in to 100% to ensure the correction looks natural and seamless
When working on photos, tools like the spot healing brush tool, healing brush, and clone tool are essential for correcting imperfections and restoring details. To maintain flexibility and protect the original image, professionals rely on non-destructive editing, allowing adjustments without permanently altering the file.
The tool is smart – it looks at areas around the spot and copies the good parts. This way, nobody can tell you to fix anything! If you don’t use Spot Healing yet, you are missing the easiest way to make photos look super clean. Just one click and all problems are gone!
Remember: for big spots, the regular Healing Brush works better. But for quick fixes, Spot Healing is your best friend in Photoshop!
Red Eye Tool

Flash pictures are the worst when people’s eyes turn all scary red! The Red Eye Tool in Photoshop is perfect for fixing this creepy problem fast. The red color in the eyes from the camera flash is the easiest thing to fix with this magic button.
You can use this tool best when people’s faces look good, but their eyes ruin the photo. Just click on the red parts and watch them turn back to normal color quickly! Group photos where everybody blinks at the flash? This tool fixes all their eyes at the same time.
The Red Eye Tool is used to remove the red-eye effect caused by the camera flash in photos. It works by automatically detecting and correcting the red color in the eyes, making them appear more natural.
- Select the Red Eye Tool from the toolbar (nested under the Spot Healing Tool)
- Click on the red-eye area in the photo.
- Photoshop automatically detects and fixes the red-eye by adjusting the color.r
- Zoom in to 100% to check if the correction is perfect
- For stubborn cases, use the brush size slider to adjust the tool size for finer control
Clothes and background can stay perfect, only the red eyes need fixing. The tool is smart – it knows where the pupil should be black again. This way, nobody can tell you to fix anything! If you haven’t used the Red Eye tool yet, you are missing the fastest way to make night photos look natural.
The red-eye tool is a quick solution for correcting eye discoloration in digital images, making it a staple in photo correction. While it’s great for basic edits, combining it with advanced techniques like selective color adjustments and layer masking can take your retouching to the next level.
Remember: for animal eyes that glow different colors, you might need the manual fix. But for human red eyes, this tool works like a magic wand in Photoshop!
Patch Tool

Do you hate when photos have ugly spots you wanna remove? The Patch Tool in Photoshop is perfect for fixing big, messy areas quickly! Places like dirty walls, broken things, or bad skin can all get fixed with this magic tool.
You can use the Patch Tool best when you have a big area to fix. Just draw around the bad spot and drag to the good area – like magic, it copies the clean part over! If you edit face pictures, this tool helps fix acne or wrinkles super easily. Wanna remove trash from street photos? Patch Tool makes it disappear like nothing was there!
The Patch Tool is used for repairing larger areas of an image by replacing unwanted parts with selected textures that blend seamlessly with the surroundings. It’s great for fixing wrinkles, scars, or background distractions.
- Select the Patch Tool from the toolbar (nested under the Healing Brush Tool)
- Choose either “Source” or “Destination” mode in the options bar, depending on your task.
- Draw a selection around the area you want to fix.
- Drag the selection to a clean area you want to use as the replacement text.
- Release the mouse to apply the patch and blend the area automatically
- Deselect the selection (Ctrl+D or Command+D) and zoom in to check the blending quality
The tool works like a band-aid for photos, covering the bad with the good parts. This way, nobody can tell you to edit anything! If you haven’t used the Patch Tool yet, you are missing the best way to clean big spots fast.
The patch tool, clone tool, and clone stamping are widely used for repairing and replacing areas in an image, each offering different levels of control.
For quicker fixes, content-aware features like content-aware fill tools provide automated solutions by intelligently blending surrounding pixels. Whether you’re using a simple technique or combining tools, these methods are essential for seamless photo editing.
Content Aware Tool

Tired of ugly stuff ruining your perfect photos? The Content Aware Tool in Photoshop magically erases things and fills space smartly! Stuff like trash cans, photobombers, or power lines can all disappear easily with this magic button.
For clean retouching, editors often rely on content-aware features like content-aware fill tools to seamlessly remove unwanted elements. Pairing this simple technique with smart objects ensures non-destructive workflows, giving flexibility and precision throughout the editing process.
This tool works best when you have big things to remove from nice backgrounds. Just draw around the bad thing and hit delete – Photoshop thinks hard and fills the space like nothing was there! If you get a beach photo with too many people, this tool helps make the crowd go away. Wanna remove date stamps from old pictures? Content Aware makes it vanish like magic!
The Content-Aware Fill Tool is used to remove unwanted objects or areas from an image by intelligently filling the space with matching background content, making edits look natural.
- Make a selection around the object or area you want to remove using any selection tool.l
- Go to Edit > Content-Aware Fill from the menu.
- Adjust the sampling area and fill settings in the Content-Aware Fill workspace if needed.
- Click OK to apply the fill and automatically blend the area with surrounding pixels.
- Deselect the selection (Ctrl+D or Command+D) and zoom in to refine or retouch if necessary.
The tool looks at what is around the bad spot and guesses what should be there. This way, nobody can tell you to edit anything! If you don’t use Content Aware yet, you are missing the smartest way to clean photos fast.
Clone Stamp Tool

The Clone Tool is like your best friend in Photoshop – it copies good parts to fix bad spots! Whether you have scratches on old photos or dust on new ones, this tool helps make pictures perfect again. You can clone clean areas over messy ones and keep these fixes forever.
The clone stamp tool, often called the clone tool or cloning tool, is essential for duplicating parts of an image to cover imperfections. Successful clone stamping depends on precise brush settings and careful brush control to blend seamlessly. For flexibility and safety, it’s best to use non-destructive editing techniques when working with these tools.
Make your photos look better by copying nice colors and textures. You can clone blue sky over ugly clouds, copy green grass over dirt spots, or even duplicate pretty flowers to fill empty spaces. Just hold ALT to pick a good area, then paint over the bad spot – like magic, it looks the same!
The Clone Stamp Tool is used to copy pixels from one part of an image to another, allowing precise duplication or removal of objects and textures.
- Select the Clone Stamp Tool from the toolbar or press S on the keyboard
- Adjust the brush size using the bracket keys to match the area you’re cloning
- Hold Alt (Option on Mac) and click on the area you want to sample
- Release Alt and click or paint over the area you want to retouch or cover
- Resample frequently by holding Alt and clicking different clean areas for a more natural result
- Zoom in to 100% to check for seamless blending and adjust opacity or flow if needed
For best results, use a small brush for details and a big brush for large areas. The more you practice cloning, the more real your edits look. If you haven’t used the Clone Tool yet, you are missing the easiest way to make photos look perfect without anybody knowing!
Dodge and Burn Tool

The Dodge and Burn tools are like magic wands that make your photos pop! Just like family helps shape who you are, these tools help shape how your pictures look. They make dark spots lighter and light spots darker to show all the good details.
The dodge and burn tool is great for enhancing highlights and shadows, while color balance helps achieve natural tones through color adjustment. Whether you’re doing basic color correction or more advanced color manipulation, exploring different color options ensures the final image looks polished. Together, these techniques create effective and precise color correction in any project.
Use Dodge tools to brighten your favorite parts – like making eyes sparkle or teeth whiter. Use a Burn tool to darken edges and make things stand out nicely. You can make faces glow or hair look extra shiny. Just paint over areas gently and watch the magic happen!
The Dodge and Burn Tools are used to lighten (dodge) or darken (burn) specific areas of an image to enhance highlights, shadows, or add depth and contrast.
- Select the Dodge Tool (to lighten) or Burn Tool (to darken) from the toolbar.
- Choose a soft brush and set the exposure level in the options bar (start low, around 5-10%)
- Select the range: Midtones, Highlights, or Shadow, depending on the area you want to affect.
- Gently paint over the areas you want to lighten or darken, building up gradually for a natural effect.
- Switch between Dodge and Burn tools as needed to balance light and shadow across the image.
For best results, use a soft brush and go slow. Talk to your photo like it’s your friend – “This part needs more light” or “That spot is too bright”. If you haven’t used Dodge and Burn yet, you are missing a secret to make photos look professional!
Blur and Sharpen Tool

Photos are like best friends – some parts need to stand out while others should stay quiet! The Blur and Sharpen tools help make your pictures look perfect together, just like you and your best friends.
The blur tool and blur filter technique are useful for softening distractions and guiding the viewer’s eye, while the sharpen tool enhances details for clarity. Combining these with precise edits allows for better focus control, especially when applying advanced techniques to achieve a professional, balanced result.
Use the Blur tool to make busy backgrounds soft and dreamy, so people look only at your face. Sharpened tools make important things pop, like your eyes or cool details on clothes. They work best when used together, like matching outfits with friends!
The Blur and Sharpen Tools are used to soften (blur) or enhance (sharpen) details in specific areas of an image, helping control focus and clarity.
- Select the Blur Tool (to soften) or the Sharpen Tool (to enhance) from the toolbar.
- Adjust the brush size and strength in the options bar to control the intensity.y
- Gently paint over the areas you want to blur or sharpen, using light strokes to avoid overprocessing.ng
- For portraits, use blur to smooth skin and sharpen to enhance eyes or details.
- Zoom in to 100% to check the effect and avoid visible edges or artifacts
Take many tries with different amounts – little blur here, little sharpen there. Make funny faces while editing to remember which parts need fixing! These tools help show the real you in photos, just like candid shots with friends.
If you haven’t used Blur and Sharpen yet, you are missing a secret to make photos look professional! Remember: good photos, like good friends, need balance – some parts clear, some parts soft. That’s how you make pictures worth keeping forever!
Color Replacement Tool

The colors you pick for your pictures change how they look and feel, just like outfits in photoshoots. That’s why many people ask, “How can I change colors in my photos?” when they start editing.
The color replacement tool is perfect for swapping hues without affecting texture, making color adjustment simple and effective. By exploring different color options and experimenting with color palettes, editors can achieve seamless color matching. Whether subtle or bold, color manipulation opens endless creative possibilities in any design project.
Good photo edits need smart color changes, not just random clicking. So you gotta think about your whole picture before changing colors. Since most edits are for fun, colors should be both pretty and natural-looking.
The Color Replacement Tool is used to replace a specific color in an image while preserving the texture, shadows, and highlights, making it useful for changing colors without losing detail.
- Select the Color Replacement Tool from the toolbar (nested under the Brush Tool)
- Choose a foreground color you want to apply from the color picker
- Adjust the brush size and sampling mode in the options bar
- Set the limits (Contiguous, Discontiguous) and tolerance to control which pixels get replaced
- Paint over the area you want to change, and the tool will replace the original color with the selected one while keeping the texture intact
The Color Replacement Tool lets you swap colors easily – make blue shirts red, or green grass yellow. It works like a magic paintbrush that only changes the color you pick. For best results, choose colors that match your photo style – bright for fun pics, soft for serious ones.
If you don’t use Color Replacement yet, you are missing an easy way to make photos look exactly how you want! Remember: good color changes, like good outfits, make the whole picture look better together.
Pattern Stamp Tool

You can use the Pattern Stamp Tool to add cool designs and textures to your pictures. But don’t just pick any pattern – choose ones that match your photo style! If you are editing nature pics, use leaf or grass patterns. For city photos, try brick or metal textures.
The pattern stamp tool is a powerful feature for adding intricate designs and textures during texture editing, giving designers more control over the visual elements. Paired with other graphic design tools, it allows for unique design techniques that enhance creativity and provide creative control over every detail of the project.
This tool works like a magic sticker that copies patterns over and over. You can make the whole wall have the same pretty design or fill the empty sky with cloud shapes. Just pick your favorite pattern and paint it where you want – easy!
The Pattern Stamp Tool is used to paint a pattern over an image or selection, allowing you to fill areas with predefined or custom patterns while preserving the underlying texture.
- Select the Pattern Stamp Tool from the toolbar (nested under the Clone Stamp Tool)
- Choose a pattern from the pattern picker in the options bar
- Adjust the brush size, opacity, and blending mode as needed
- Click and drag to paint the pattern onto the image
- Use layer masks or different blending modes to control where and how the pattern appears
Remember to think about your whole picture when adding patterns. If you want to make ocean photos better, use wave designs. For school projects, maybe book or pencil patterns look best. The right pattern makes your edits look pro!
FAQs
What is a clipping path, and why do I need it?
A clipping path is a vector shape used to isolate objects from the background, ideal for e-commerce product images and professional photo editing.
What services does Zenith Clipping offer?
We provide clipping paths, background removal, image masking, photo retouching, and other photo editing services.
How long does it take to deliver edited images?
Turnaround time depends on project size, usually within 24 hours for standard orders.
What file formats do you accept and deliver?
We accept and deliver files in JPG, PNG, PSD, TIFF, and other common formats.
Final Thoughts
Having creative control is essential for any designer, and understanding both the core features and key tools of your software helps streamline the process. While basic edits are great for quick fixes, mastering advanced features and advanced techniques allows for more refined and unique results, giving you full flexibility in your creative projects.
You should try different Photoshop tools to make your pictures look perfect, just like trying poses in a photoshoot. Some tools fix spots, some change colors, and some add cool effects – each one helps specially.
Transform your photos with professional, high-quality clipping path services. Try Zenith Clipping today and experience flawless results.


