

You can quickly resize an image in Photoshop. This is done without losing quality easily. Large photos have many pixels. They require a lot of space and take a considerable amount of time to download. You need a smaller file size for digital platforms. Resizing images adjusts the pixel dimensions effectively. This is essential for quickly sharing an image.
Everyone should know how to change their image sizes. It makes your pictures look better and professional. If you have never resized an image before, no problem. Learning this will be a good memory for you and help you every time you have a photo. You can open Photoshop and start to play with the sizes. Seeing your picture get bigger or smaller is fun and makes you feel happy and smart.
Let’s dive below for a detailed explanation!
1. Open the Image in Photoshop
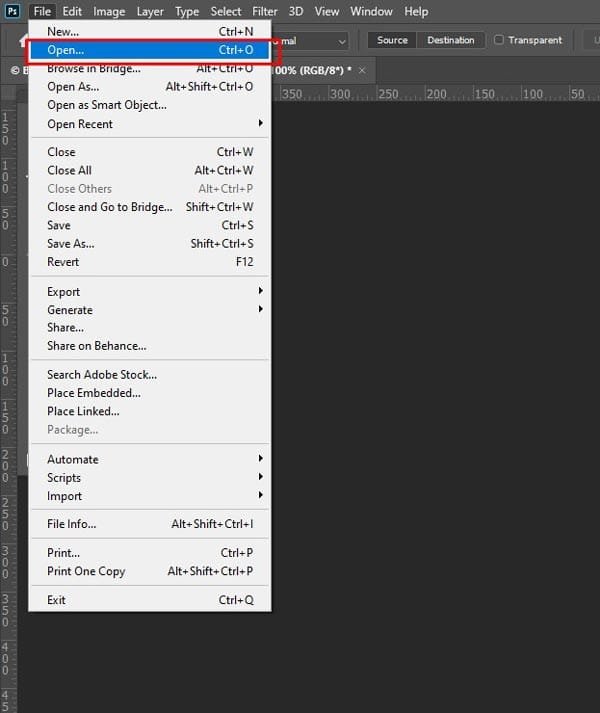
First, launch the Adobe Photoshop application. The Photoshop application runs on your computer. Select File from the top menu bar. Then select Open from the file menu.
A window will appear. Navigate to find your Image file easily. Select the Image file. Click the Open button in the dialog box. The Image is now loaded into the Adobe workspace. It is ready for resizing.
2. Access the Image Resize Option
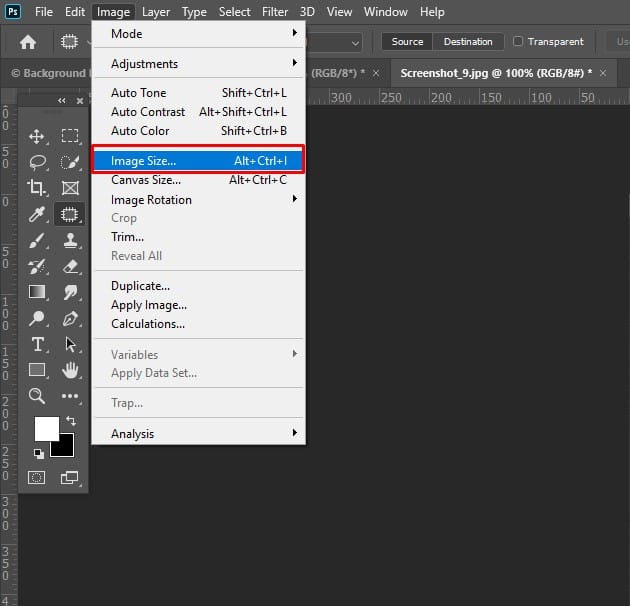
Use the Image Size dialog box for whole document resizing. First, click on Image in the main menu bar. Then select Image Size from the dropdown menu. This opens a dialog box. You can input specific pixel dimensions there.
Use the Free Transform tool for specific layers. Select the target layer in the Layers panel. Click on Edit in the main menu. Select Free Transform from the menu. You can drag the corners to resize the layer.
3. Adjust the Dimensions
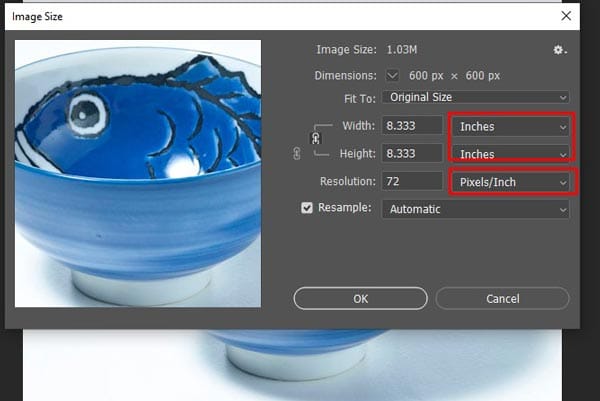
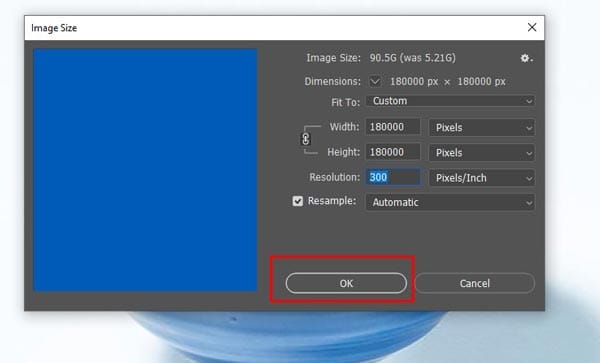
You must use the Image Size dialog box. Go to Image Image Size to open it. Ensure the link icon is selected easily. This maintains the original aspect ratio. This prevents a stretched, squashed look. Select Pixels for web use. Select Inches or Centimeters for printing.
Enter the new Width Height dimensions. The other dimension updates automatically. Ensure the Resample checkbox is ticked. This adds and removes pixels as needed. Click OK to apply the changes. Save the resized image as a new file.
4. Set the Resolution
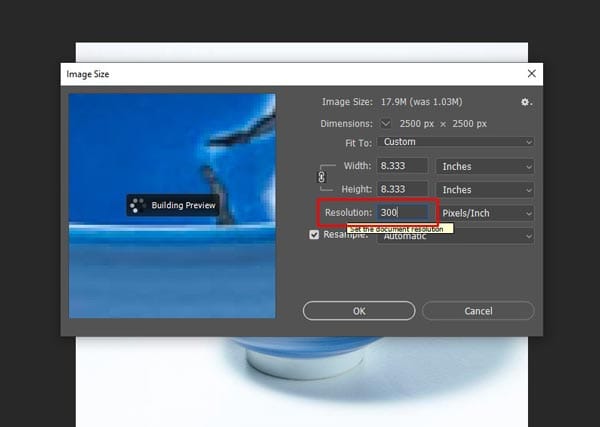
Go to Image Image Size to open the dialog box. Locate the Resolution field easily. Pixels/Inch is the standard unit. Use 72 Pixels/Inch for web digital use. Use 300 Pixels/Inch for high-quality printing.
Type your desired numerical value into the field. Check the Resample box to change the total pixel information. Uncheck Resample to change only the print size. Click OK to apply the new settings.
5. Choose the Resampling Method
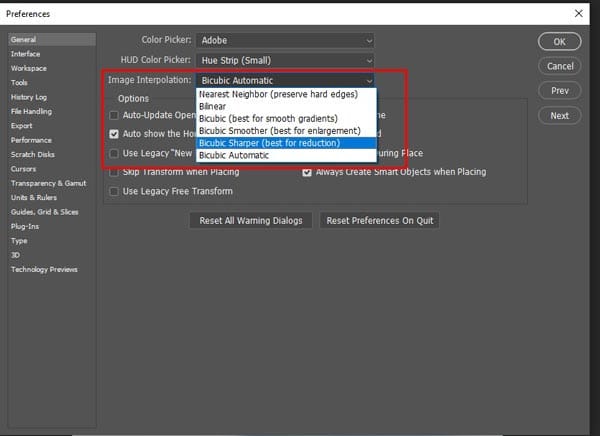
Resampling helps maintain image quality. The Resample checkbox must be selected. This allows you to change the total pixel count. You choose a Resampling Method from a dropdown menu. Automatic Interpolation works well generally.
Bicubic Sharper is best for downsizing an image. Bicubic Smoother works well for upscaling. Preserve Details Preserve Details 2.0 uses noise reduction. Select the appropriate bicubic method for professional output.
6. Final Adjustments and Confirmation
Review the preview window carefully. You can examine specific areas of your image. Double-check the final numbers on the screen. They must match your intended output. Click the OK button to apply the changes.
Photoshop processes the image immediately. Go to File Save As to save the resized image. You must choose a new filename. This protects your original file. Close the document afterward.
7. Save Your Resized Image
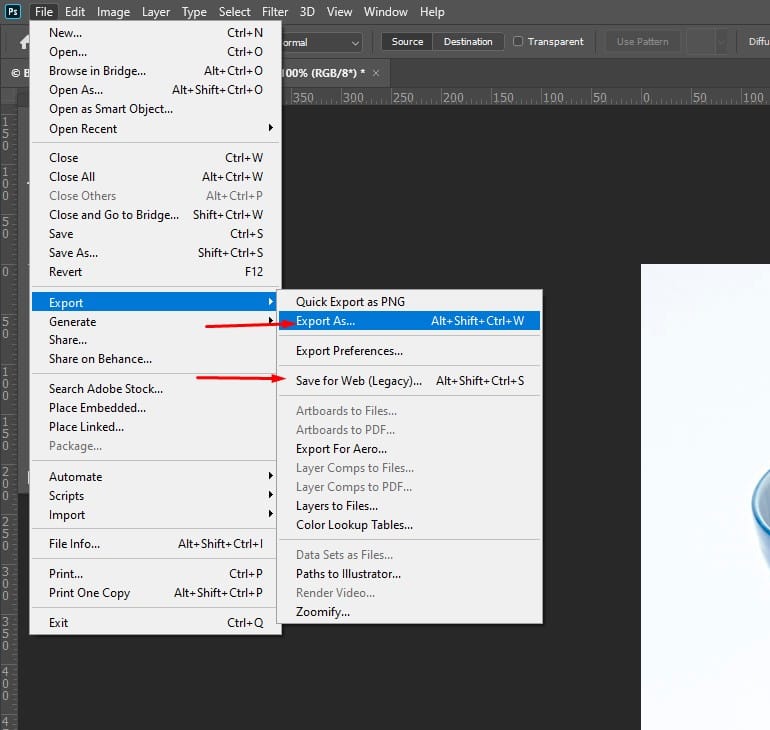
You must select Save As from the File Menu. This prevents overwriting the original file. Choose a destination folder carefully. Enter a new descriptive filename. This distinguishes the resized file easily. Select a suitable file format next. JPEG is the standard for web photos.
PNG format is ideal for transparency. TIFF is used for high-quality print files. Click Save to complete the saving process. Adjust quality settings if a new box appears.
FAQ
How to Resize an Image in Photoshop by Dragging?
To resize an image layer, use the Transform tool. Press Control T on Windows or Command T on Mac. Drag a corner handle while holding Shift. This maintains the aspect ratio. Avoid Pixelation by considering image resolutions and dots per inch.
How to Resize an Image in Photoshop Online in 2026?
Photoshop online offers two methods for resizing an image. Open your image file. Go to the Image menu. Select Image Size to adjust the dimensions. You can also use the drag method. Consider using Smart Objects for quality. Use the Properties panel for adjustments.
How to Resize an Image in Photoshop Without Losing Quality?
Open Image Size from the Image menu. Check the Resample box. Select Bicubic Smoother for enlargements. Choose Bicubic Sharper for reductions. This helps maintain quality. Consider AI-powered upscaling methods like Super Resolution.
What is the Photoshop Shortcut to Resize an Image?
Use Ctrl T or Command T. This activates the Transform tool. Drag the image corners. Hold down Shift to keep proportions correct. You can also input the size manually. Consider using external tools like Topaz for better quality. Use Export to save the image.
Final Thought
This guide helps the user with Photoshop resizing. You may need perfectly prepared images. Consider outsourcing labor-intensive editing steps. Professionals at Zenith Clipping handle background removal. They manage image masking and retouching services. This helps streamline your workflow greatly. You can learn more about their services. Get a quote on the Zenith Clipping website now.


