
About Photoshop layers
Photoshop layers resemble sheets of stacked acetic acid derivation. You can see through straightforward spaces of a layer to the bottom layer. You move one layer with the Move tool to situate the substance on the layer, such as sliding a sheet of acetic acid derivation in a stack. You can likewise change the darkness of a layer to create content mostly transparently.
You use layers to perform errands, for example, compositing different image elements, adding text to a picture, or adding vector realistic shapes. You can apply a layer style to add an enhancement, for example, a drop shadow or a shine.
There is one other option that is helpful to change the selected layer size in Photoshop, and both include the free transform tool. There are possibilities for openly changing the desired size up or down and contributing explicit estimations to get it precisely the size you need. Here’s the way to do it.
Making New Layers
To assist you with understanding the cycle, we will expect that you don’t have a picture to resize layers yet (If you do, jump to the following area). It’s not difficult to construct layers without any preparation from the layer menu.
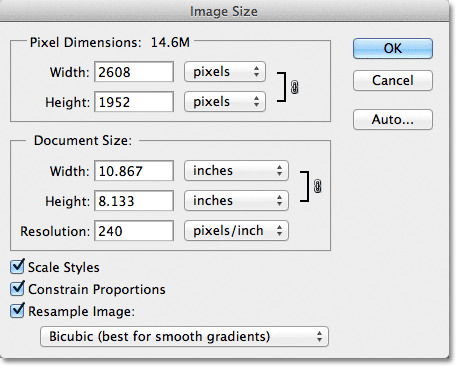
To begin with, go to the main File clicking the file menu icon and snap “New” to make another image file. A discourse box will show up, asking what measurements you’d like for the new record. In case you don’t know, simply enter a width/stature of 600 pixels and simply click OK.
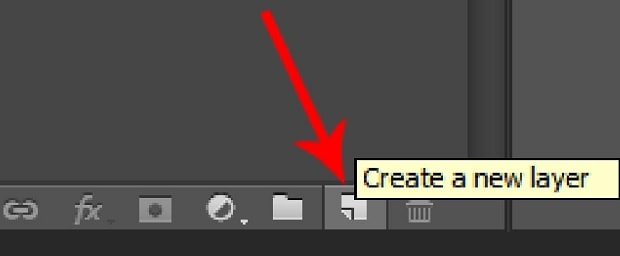
You should now see a fresh start, which will fill in as your “experience” for different layers to be put on. To add another layer, discover the Layers range in the base right corner of the screen and ensure the “Layers” tab is chosen.
Inside the Layers range, you can see a rundown of your present layers, regardless of whether they’re empowered, how they’re coordinated, and significantly more. At the lower part of this range, you’ll see a column of small symbols. Click on the one that resembles a canine eared page to create another layer.
Free Transform
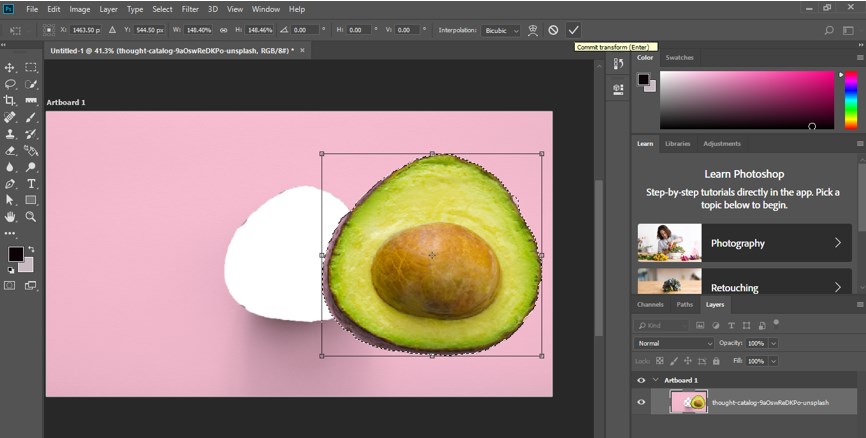
Free transform tools are quite helpful. Select the layer that you need to change the size of in the Layers window. If you don’t see it, select Windows > Layers, or press F7.
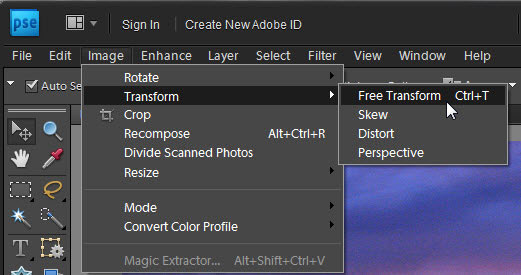
Select Free Transform tools under the Edit menu. Then again, utilize the console alt key free transform Command+T (Mac) or press the Ctrl+T option key (Windows).
Select any side of the layer, or the jumping boxes, and haul toward the path you wish to change the layer size. Drag away from the middle to expand its size using these tools, or drag toward the middle to diminish it.
Press and hold Shift to keep up the perspective proportion. You can pivot the layer by choosing and holding anyplace outside the layer’s bounding box and hauling it clockwise or counterclockwise.
At the point when you’re content with the new size, press Enter or double-tap to settle it. Hope now you have learnt how to resize a layer in Photoshop.
Other Transform Tools
Although these tools reshape the layer however much they resize it, you can utilize a few other change apparatuses. You can change individual elements quite easily.
If you don’t need a straight expansion in size for the layer, need to adjust its point of view, or change its extents, select Edit > Transform, then, at that point select one of the apparatuses recorded there (other than the Free Transform tool). The tools can do various things, so mess with them to perceive what sort of impacts you can summon.
If you don’t care for the aftereffects of the finished resizing, press Ctrl+Z (or CMD+Z) to fix the activity. On the other hand, press Ctrl+Alt+Z (or CMD+Alt+Z) to cause a few to fix steps. But don’t double click on that.
Change To a Specific Dimension
If you would prefer not to freehand change layers yet have some particular measurements at the top of the priority list, you can set its size to precisely that.
- Select the Move tool by clicking the icon.
- Select free transform tools.
- Select the limits around the picked layer and think back up to the top menu bar. Change the rates close to W and H to resize the layer to a particular worth.
- If you would prefer not to keep up a similar viewpoint proportion, select the chain link icon to eliminate the limitation.
- At the point when you’re content with the outcomes, press Enter or select the check blemish on the right side of the menu options bar.
- Press Esc or snap the Cancel button (a circle with a line through it) close to the check imprint to fix your changes.
Instructions to Make a Layer Bigger in Photoshop
If you try different things with the Transform tool, you’ll notice that when you attempt to scale the picture to make it bigger than the first, you may run out of material. Now, your picture begins to disappear along the boundaries.
Here are the ways to add extra pixel space to your material utilizing the Crop apparatus with Content-Aware.
- Click on the Layer you want to resize.
- Press C for the Crop device, and afterwards left-click. Or on the other hand, you can tap on the Crop icon in your toolbar.
- Press C for the Crop apparatus, and afterwards left-click. Or then again, you can essentially tap on the Crop icon in your menu bar.
- Change the crop handles to make your picture greater.
- Mind the Content-Aware box, and press Enter or snap the Checkmark.
Adobe Photoshop normally does a very great job filling in the vacant material by acquiring pixels from somewhere else in the picture. Note that this technique turns out best for images with a great deal of clear space or simple foundations.
You may have seen that we didn’t utilize these objects in this model. That is because the object highlight isn’t accessible when you’re making your images greater (just more modest).
For complex images, visible picture rescaling techniques would almost certainly be expected to expand the size of your picture. You can utilize the Content-Aware Scale comparably to grow your material.
For this option, go to Edit and choose Content-Aware Scale. This is best utilized close by the Crop apparatus to help shape your layers.
Layers and Transparency
At the point when you open a picture in Adobe Photoshop, the photograph turns into the foundation layer of your material.
In contrast to different layers, the foundation layer doesn’t offer transparency, so if you cut an item out of the foundation layer, it’s anything but a dark spot behind.
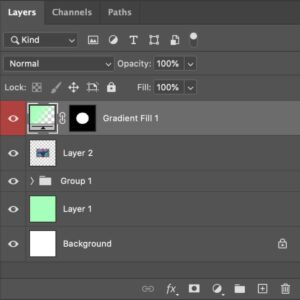
This is especially risky if you are contracting the object. The quickest method to get around this is to drag the “Foundation” layer in the Layers panel onto the “New Layer” icon underneath it.
The lock icon resembles a tacky note. This duplicates the picture into another layer that incorporates straightforwardness, so when you cut an object from the layer, it’s anything but a clear transparent spot behind, not a dark spot.
Choosing an Item
As a rule, the Lasso Tool in the Photoshop Toolbox is the quickest method to follow an object in a picture. Drag the cursor around the article and delivery the mouse button.
You can likewise utilize the Elliptical or Rectangular Marquee Tool for mathematical items. If the object is a solitary tone encompassed by an alternate tone, have a go at tapping the object with the Magic Wand Tool or the Quick Selection Tool.
While you can control the object all things considered after you select it’s anything but, significantly less muddled if you duplicate or cut the item from the Edit menu and, glue it into the picture. This places the object into its different layer over the picture.
Resizing the Object
If you want to resize a layer or a chose object inside a layer, select “Change” from the Edit menu and snap “Scale.” Eight square anchor focuses show up around the item.
Drag any of these anchors focuses to resize the article. If you need to oblige the extents, hold the Shift key while hauling. If you need a more definite strategy for scaling, type a rate in both the “H” and “W” fields to increment or abatement the stature and width by explicit sums.
After you press “Enter,” the resized object is saved and the anchor focuses vanish.
Issues With Scaling
At whatever point you increment the size of an object, you decay it’s anything but a piece. If you increment a layer’s size by 20%, you shouldn’t regularly see a distinction, yet the bigger you increment its size, the blurrier and more pixelated it will show up.
You can regularly make up for this by utilizing the Sharpen Tool or the Unsharpen channel. The exemption for this is vector pictures, which are normally utilized when making logos in raw Photoshop documents shipped off printers, as opposed to in photograph altering.
In contrast to a photograph, vectors are lines and items characterized by numerical conditions. So you can scale a vector multiple times in size, making banners from a single document, without losing quality.
A Better Way Using Smart Objects
Alright, so now you realize how to resize a layer in Photoshop, however, there’s a bonus that you ought to most likely do to improve your work process: convert the layer to an object before you resize.
If you want to resize a single layer down and need to resize it back up later, you’re typically stuck between a rock and a hard place and will destroy the nature of the pixels in the layer.
If you change the layer to a brilliant item first, however, you can resize down and up an endless measure of time without losing quality.
Remember that quality misfortune will consistently occur if you resize a layer to be bigger than its unique size. Yet, at any rate with an object, you generally protect the first layer’s internal pixel quality.
At the point when you’re done with the progressions you need to make to a choice, you should recollect to deselect it before proceeding onward so you don’t make any accidental changes.
To change a single layer over to an object, perfectly click on the layer, and click on Convert to Object. Presently feel free to resize the layer utilizing the Free Transform device (Cmd+T Ctrl+T) as you regularly would. Presently you can resize to your souls content while never losing the inward layer’s unique quality.
Resizing Multiple Layers all at once
Here’s a genuine timesaving tip for Photoshop that empowers you to resize articles or text on other layers all simultaneously.
Simply connect the layers from the layers pan you need to resize, then, at that point press Command-T (Macintosh) or Control-T (Windows) to raise the Free Transform bounding box.
Hold the Shift key (to compel extents), then get any bounding box handles and drag. As you drag, the entirety of the connected layers will resize simultaneously.
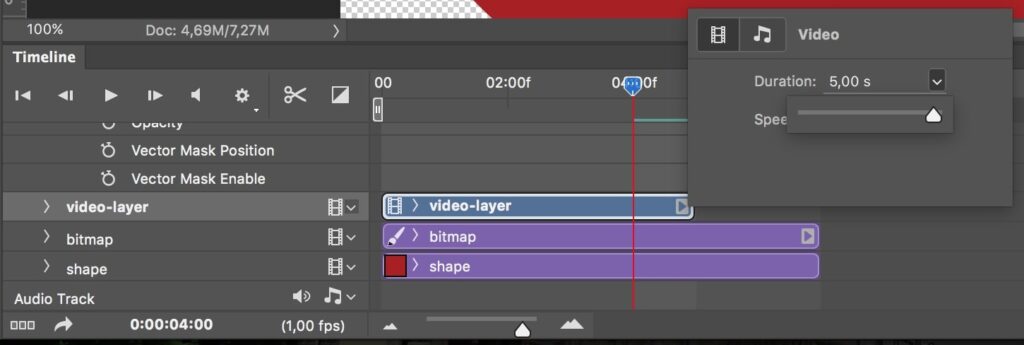
Photoshop layers for non-destructive altering
Sometimes layers don’t contain any clear substance. For instance, an adjustment layer in Photoshop holds tone or apparent changes that influence the layers beneath it. Maybe then alter the picture straightforwardly, you can alter an adjustment layer and leave the fundamental pixels unaltered.
An exceptional kind of layer, called a Smart Object, contains at least one layers of substance. You can change (scale, slant, or reshape) an Object without straightforwardly editing pictures.
Or then again, you can edit the Object as a different picture even in the wake of setting it’s anything but a Photoshop picture.
These objects can likewise contain keen channel impacts, which permit you to apply channels non-damagingly to pictures so you can later change or eliminate the channel impact.
Realizing why you desire to resize your layers will possibly save you a ton of time and exertion before starting your work in Photoshop. The intricacy of the entire image layers and how many you’ll at last need to finish the picture are altogether factors you need to consider.
Frequently Asked Questions (FAQs)
How do I resize an object in Photoshop?
Resize an object in Photoshop by selecting it with the Move Tool, then pressing Ctrl+T (Cmd+T on Mac) to activate Free Transform. Drag the corner handles while holding Shift to maintain proportions. Press Enter to apply the new size.
How do I resize the aspect ratio in Photoshop?
Resize the aspect ratio in Photoshop by selecting the Crop Tool, then choosing a preset or entering custom width and height values in the options bar. Adjust the crop box to fit the composition, then press Enter to apply the new aspect ratio.
How do I resize an image after placing it in Photoshop?
Resize an image after placing it in Photoshop by selecting the layer, then pressing Ctrl+T (Cmd+T on Mac) to activate Free Transform. Drag the handles to resize the image. Hold Shift to maintain proportions and press Enter to confirm the changes.
Final Words
Other Photoshop impacts can be performed essentially and without numerous means. When you get a grip on these essential procedures, you can be a professional in resizing a layer in Photoshop.


