Have you ever taken a great photo only to realize that a cluttered background is stealing attention from your subject? A blurred background can instantly add depth, focus, and a professional touch to your images. But how do you blur the background in Lightroom?
Lightroom offers multiple ways to blur the background, allowing you to achieve the perfect balance between sharpness and softness. You can use AI Masking for a quick edit, the Radial Gradient for a creative touch, or the Brush Tool for precise manual adjustments. Each method gives you control over how much blur to apply and where to apply it.
In this guide, we’ll walk you through each method step by step so you can confidently blur backgrounds like a pro. Let’s dive in and transform your images with ease!
Step-by-Step Guide to Blur Background in Lightroom
Whether you need a quick edit or want to fine-tune every detail, Lightroom offers multiple methods to achieve the perfect blur effect. Choose the method that best suits your editing style and image needs.
Method 1: Using AI masking (Quick edit)
This is the fastest and most efficient way to blur a background using Lightroom’s AI-powered masking tool.
Step 1: Select Your Image and Open Masking Panel

Open your image in Lightroom and navigate to the Masking tool in the right-hand panel. Click on Select Subject to allow Lightroom to automatically detect and select the subject in your image.
Step 2: Invert the Mask
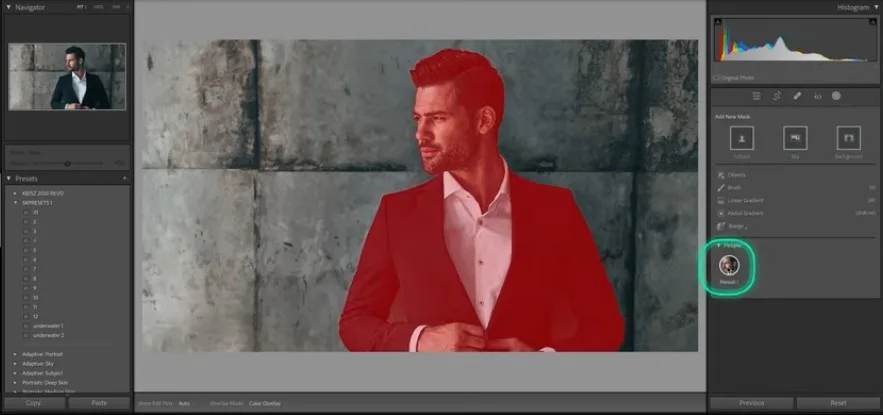
Once Lightroom selects the subject, click on Invert Mask to switch the selection to the background instead of the subject.
Step 3: Apply the Blur Effect
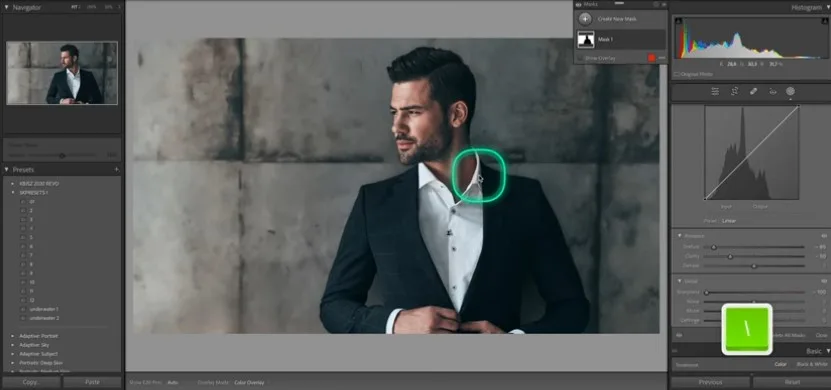
Reduce the Clarity and Sharpness sliders to soften the background. You can also lower the Texture slightly for a smoother look. Adjust these settings until you achieve the desired blur effect.
Step 4: Refine and Export
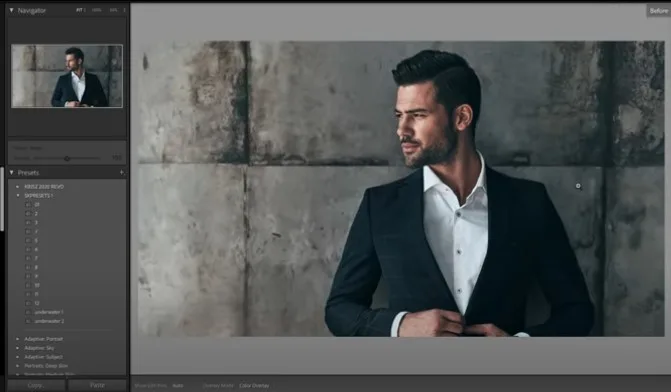
If needed, use the Add or Subtract tool in the Masking panel to fine-tune the selection. Once satisfied, export your image.
Method 2: Using Radial Gradient (Creative Edit)
This method is ideal for adding a natural blur effect around a subject without affecting the entire background.
Step 1: Select the Radial Gradient Tool
In the Masking Panel, choose the Radial Gradient tool. Click and drag to create an elliptical selection around your subject.
Step 2: Invert and Adjust Blur
Click Invert to apply adjustments outside the selection (background). Reduce Clarity and Sharpness while adjusting the Feathering slider to create a smooth transition between the focused subject and blurred background.
Step 3: Fine-Tune the Effect
Modify the Texture and Dehaze sliders for additional refinement. You can also adjust the Exposure slightly to make the subject pop more.
Step 4: Save and Export
Once satisfied with the blur effect, apply the changes and export your image.
Method 3: Using the Brush Tool (Manual Adjustments)
For complete control over your blur effect, the brush tool allows you to manually paint the background blur.
Step 1: Select the Brush Tool
Navigate to the Masking Panel and select the Brush Tool. Adjust the brush size and feathering to ensure smooth transitions.
Step 2: Paint Over the Background
Carefully brush over the background while avoiding the subject. Use the Auto Mask feature to help keep the selection precise.
Step 3: Apply Blur Adjustments
Lower the Clarity, Sharpness, and Texture settings to create a soft blur effect. Adjust the Feathering to ensure a natural blend.
Step 4: Review and Save
Zoom in and refine the edges if needed. Once satisfied, save and export your image.
Common Mistakes When Blurring Backgrounds in Lightroom
Blurring the background can elevate your photo, but certain mistakes can make your edit look artificial. Here are some common mistakes to avoid:
- Over-blurring the background: Applying too much blur can make your image look artificial and detached from reality.
- Blurring part of the subject: Inaccurate selections can lead to a blurry subject, reducing the overall image quality.
- Not feathering the edges: Hard, sharp transitions between the blurred and focused areas can make the effect look unrealistic.
- Using the wrong tool for the image: Choosing the appropriate blurring method based on your image’s composition ensures better results.
- Ignoring the depth of field effect: Natural blur should mimic how a camera lens works, with gradual blur instead of an even effect across the background.
Lightroom vs. Photoshop: Which One is Better for Background Blur?
Both Lightroom and Photoshop offer powerful tools for blurring backgrounds, but which one is the better choice? It depends on your needs, skill level, and how much control you want over the final result.
Let’s have a look at the detailed comparison between Lightroom and Photoshop for background blur:
Ease of Use
Lightroom is designed for photographers who want an efficient workflow. Its masking tools, including AI-based selections, make it easy to blur backgrounds in just a few clicks. Photoshop, on the other hand, has a steeper learning curve, requiring a deeper understanding of layers and selection tools.
Level of Control
While Lightroom allows for general background blurring using masking tools, Photoshop provides pixel-level precision. With tools like Gaussian Blur, Field Blur, and Layer Masks, you can achieve more refined results with complete control over the blur intensity and depth.
Editing Flexibility
Lightroom’s non-destructive editing means you can always revert to the original image. Photoshop, however, offers more complex layering and selection capabilities, allowing for multiple edits within a single project.
While Lightroom offers quick and effective blur options, Photoshop provides more advanced and precise background blurring using layers and depth mapping. If you need a simple blur, Lightroom is sufficient, but for complex background manipulations, Photoshop is the better choice.
Frequently Asked Question
Can I adjust the intensity of the blur?
Yes! You can fine-tune the blur effect by adjusting the Clarity, Sharpness, and Texture sliders in the Masking Panel.
Does Lightroom Mobile support background blur?
Yes, but it has limited functionality compared to the desktop version. The selective adjustment tools, like the Brush Tool and Radial Gradient, can help create a similar effect.
Can I blur only a specific part of the background?
Yes, the Brush Tool allows you to manually selectively blur parts of the background.
How do I make the blur look more natural?
Use the Feathering slider and apply subtle adjustments rather than extreme blur effects.
Final thoughts:
Blurring the background in Lightroom is an excellent way to enhance your subject and add a professional touch to your images. Whether you prefer the quick AI Masking method, the creative Radial Gradient technique, or the precise Brush Tool approach, Lightroom provides the flexibility you need.


