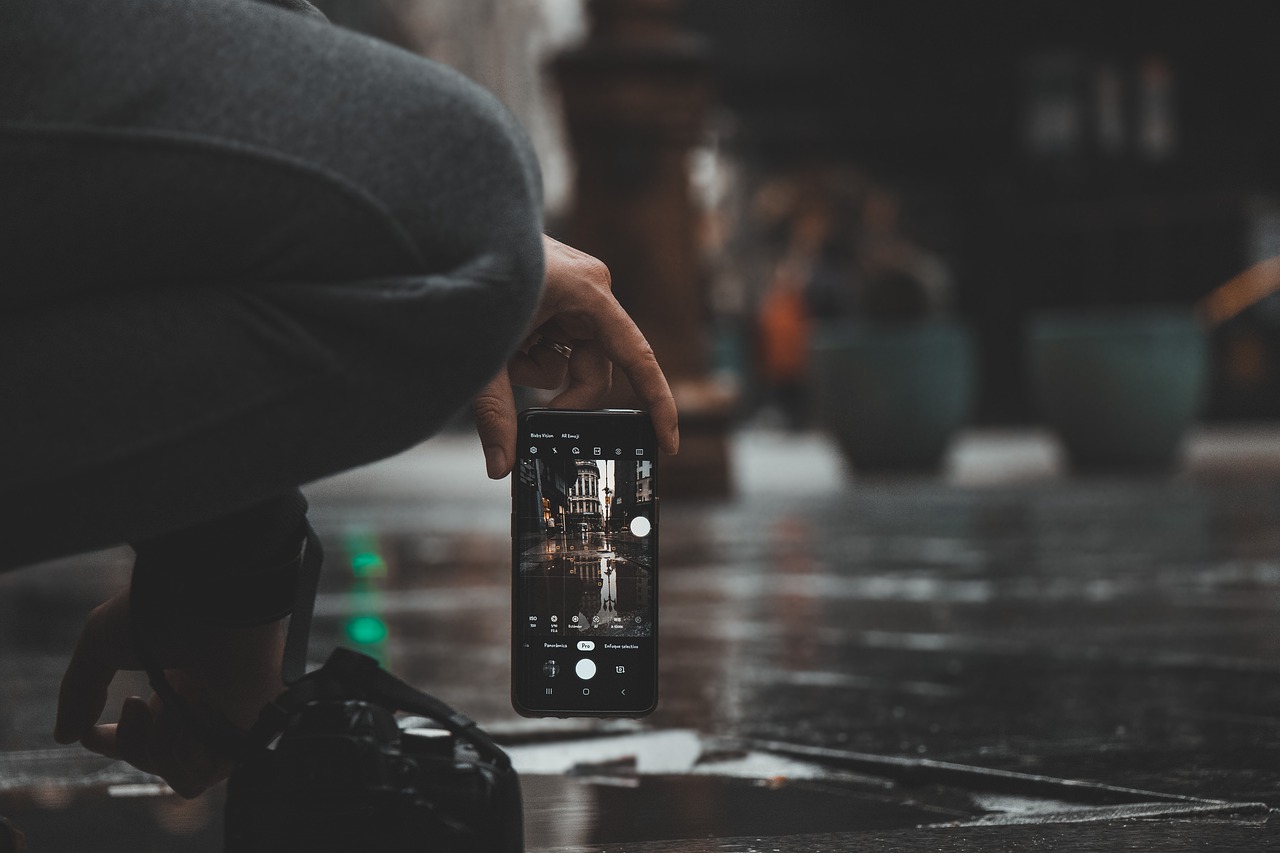
Are you eager to know how to take good product photos using an iPhone? This might sound a little odd, but trust me you can do it quite easily without a professional camera by following a few simple and easy steps. In this blog post, I am going to tell you some exciting tips and tricks that you can use to take excellent product photos using an iPhone.
Most photographers prefer using a DSLR for product photoshoots due to its crystal clear high-resolution photographs. However, if you are a starter, it is costly to get a DSLR at the early stages of business. In these sorts of situations, using an iPhone for product photoshoots is really handy, cost-effective, and impressive option. It’s better than any smartphone camera. Iphones shutter speed is good enough & the final image is excellent.
No matter you want product pictures for social media advertisements or for your online store, iPhone is an excellent option for both. If you have photography skills and an iPhone with a crystal clear lens, you are good to go. Here we shared some product photography tips for you. You can come up with some excellent quality product pictures like a professional photographer by following these easy steps, tips, and tricks. So, let’s get started and check it out:
The camera quality of Apple iPhone has always been loved by customers. The detailing levels and finishing of an iPhone picture are just amazing & better than many smartphone cameras. In fact, if you match it with other camera phones, you’ll get to know the difference quickly. This is very good for natural lighting to take photos of your products. Product images are excellent for e commerce.
Take a look at the latest Apple iPhone 11 Pro which has a triple rear camera array. The rear camera specifications 12 MP 13mm f/2.4, 12MP 26mm f/1.8, 12MP 52mm f/2 are excellent for taking photos at day and night times in natural light or artificial light from. The real plus is that the front camera is also 12 MP f/2.2 and it is equipped with true depth technology. All these cameras have consistent colors, tones, and exposures. The built-in image processing aims to produce natural-looking detail. So, you will not get the usual over-sharpened, over-smoothed, or over-processed looks. So, you can easily use these for taking product photos.
An earlier model iPhone XS offers a wide-angle 12 MP camera with f/1.8 and 2X zooming lens. The color balance of this camera is extraordinary and it gives natural color tones to captured images. Similarly, earlier models like iPhone 8, 7, 7 Plus and others also have superb cameras. One of the best things is that Apple iPhone 6 and all subsequent models are equipped with features like Auto Focus, Feature Detection, and Dual Flash Tone which are excellent for product photography.
Product photos are important for the growth of your business. A picture having excellent product detailing and finishing attracts social media users and increases the chances of your sale. So, here are 16 amazing tips that you can use to take excellent product photos using iPhone:
It is always good to clean up the products before taking photos. Any product, whether brand new or used one, that you’re selling should look neat and clean. Use some sort of soft tissues or cloth to clear out the dust, debris, and dirt from the products.
Gently use the cloth to clean the product so that your product doesn’t get scratched during the cleaning process. If your product is not susceptible to damage with cleaning agents, you can also use these. If you have the product packaging, then including it in one or two photos is handy. Otherwise, click multiple photos of products after cleaning it.
Dust particles or fingerprints on the camera lenses can degrade the picture quality to a great extent. No matter how clean your product is, these sorts of things are going to hit your product photo quite hard. So, looking carefully onto your camera lens is always handy.
You should carefully monitor the camera lens and then try to clean it with the help of cleaning liquid and a soft cloth. I would suggest you not let cleaning liquid dry on lens surface because this can lead to watery spots which are, of course, a noise.
Always try to avoid photographing your products at messy places. On one side, artistic backgrounds make product photos look attractive. On the other side, too much stuff around your products distracts users. However, a clear environment looks attractive, sober, and trustworthy. Secondly, due to less number of objects in the frame, your camera gets excellent focus. Lighting setup is also important for product shots.
You can use matte or foam background or backdrop sheets so that your product appears prominent in photos. For this, pay special attention to the contrast. Try to use a darker background color if your product is light-colored. However, for a darker product, light backdrops are the best. You can use a paper sheet for this purpose. All you need to do is to ensure that the backdrop surface appears smooth.
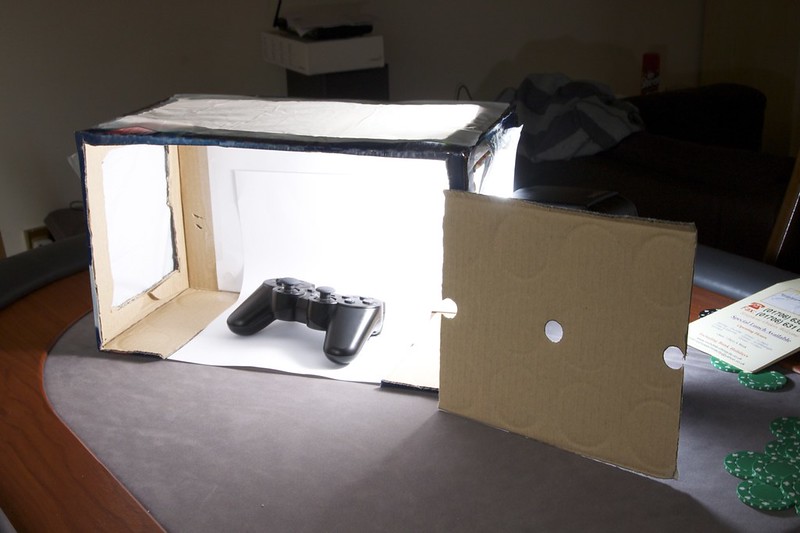
You don’t need photography studio. Photo Studio Boxes are one of the best options for product shoots with iPhone and DSLRs. These boxes are portable and USB powered. These sorts of boxes have high-end LEDs so the light is very much focused. Moreover, you get a number of backdrop color sheets with these. Hence, you don’t need to put the effort into managing the backdrop. Studio boxes have different openings and you can use these to work with many angles. For this to make white background becomes easy.
Light sources with right camera are important for product photography. For capturing product pictures in an open environment, you should have proper lighting with you. Once you have the right lighting, rest will be done by your iPhone camera and of course, you. You can take advantage of artificial lighting for light source rather than direct sunlight.
Don’t rely on a single product photo. In fact, work with different angles and capture pictures all around the product. Take close-ups, overhead shots, back shots, side shots, and tilted angle shots as well. These are handy in revealing each and every corner of your products and customers like it a lot. Take multiple shots for each angle so that you have a chance of choosing the right one.
An iPhone is a smart device and it can easily get slipped out of your hands. That’s the last thing you want when you are right in the middle of your product photography campaign. Even if you grip it well, you’ll need nice and steady hands to photograph your products. So, consider using an iPhone tripod. A tripod not only holds your iPhone steadily but you can tilt it at angles as well for remarkable photography.
There are a variety of tripods are available in the market. If you intend to photograph small-sized products like jewelry, computer mouse, kitchen pots, and smartphone then you can go for any small portable tripod. You can use these sorts of tripods easily with portable photo studio boxes. For large products, there are adjustable tripods that have height anywhere between 36 and 60 inches. These are suitable for open environment photoshoots and best for fashion, clothing, outdoor products, and automobiles.
Normally, you don’t need to use an enhanced lens. However, if you need wide-angle product shoots, then using an enhanced lens is useful. For example, if you want to photograph a group of cyclists standing at a considerable distance, then using a simple iPhone will cause you problems. However, an enhanced lens will provide you a wider aperture and focus.
For capturing the entire cross-section of your products, consider using a turntable. The turntable offers dual mode rotation. To capture products from different sides, you can set the turntable to continuous rotation mode. The studio box, turntable, and iPhone tripod give you the liberty to photograph your products efficiently.
Sometimes using illuminating the environment is just not enough. To give a professional feel to your photos, use reflectors and diffusers. Reflectors give you an excellent opportunity to control the brightness and color temperature of your photos.
White reflectors are an excellent choice if you want to get soft and nice lighting around your objects. For brightness, silver reflectors are the best. However, if you need a warm color tone then you can use gold reflectors.
In order to give a 3D effect to your products, reflective boards are superb. You will be amazed to know that most reflective boards are dual-sided: black and white. The contrast and 3D reflection give neat and tidy finishing to your photos.
Mobile cameras are not good with zoom, flash, and filters especially when it comes to pro product photography. Zooming in disturbs the quality of the image and pixels look shattered apart. Similarly, mobile flash tends to create a little shady and tends to disturb the natural tone. Your iPhone camera has a lot of built-in features however, these features use some sort of image processing techniques that can degrade image quality.
So, you should avoid these things. Instead of zooming in, try to take close shots and this will give a much clearer view of your product without compromising quality. If you want to lighten up the environment, use light lamps or LEDs that give uniform and consistent luminescence. For filters, you can go for third-party apps and software packages. So, keep things natural and simple to get the best out of the iPhone camera.
Editing images using some creepy third party app is not a good option so try to be as professional as you can. Snapseed by Google and Adobe Lightroom for iPhone are available. You can install these easily. Both these provide a hell of functions for your photo processing like cropping, rotation, white balancing, filtering, light back, blurring, and many more. Both of these are self-explanatory software so using these is not difficult at all.
Using mobile phone apps for editing images is not always a good idea due to small screens and limited features. If you want to make your photos eye-catching and give these professional look, then using desktop applications is the best way to go. These packages offer zooming and tons of functions so you can detect & fix minor glitches easily which are quite difficult to detect on mobile phones.
You can use Adobe Photoshop Elements or Adobe Lightroom software packages. Don’t apply unnecessary filters as these can make pictures look fuzzy. If you want to make white background of your product photos simply use some photo editing software. Thus you can improve the quality of your product photo.
Last but not the least, please don’t forget to configure your iPhone camera settings. You can do these quick things to capture high-quality pictures: