
Any brand’s worth is not entirely settled by its items or services and its degree of believability. Hence, every substance’s visual show is imperative, and that implies that top-notch product photography is fundamental.
So it is essential to deliver great quality photographs, but not every organization can hire an expert photographic artist if you’re beginning as an entrepreneur and have to foster product photos.
Your item photography studio for your eCommerce business is a financially savvy choice, alongside getting yourself an eCommerce photograph modifying service provider. This interaction can be more straightforward and less complex if you have the right equipment and the ability to utilize them.
The photographs will decide if your products will be sold or not. If you intend to advance your business on the web, this will be significantly more troublesome because you will contend with many different companies.
For What Reason Is Product Photography Significant?
Clients normally use photograph quality to survey the item’s worth. Thusly, the unfortunate photograph quality will impact your business. Frequently employing proficient photo editing services can be pricey, particularly if you’re a fledgling; nonetheless, there are many tutorials and exhortations online that will show you that item photography should be possible faultlessly at home.
This style of photography isn’t close to as trying as many individuals believe. You can use an assortment of approaches to effectively catch item photographs, for example, one of the most generally utilized is the method to utilize the light streaming in from your windows.
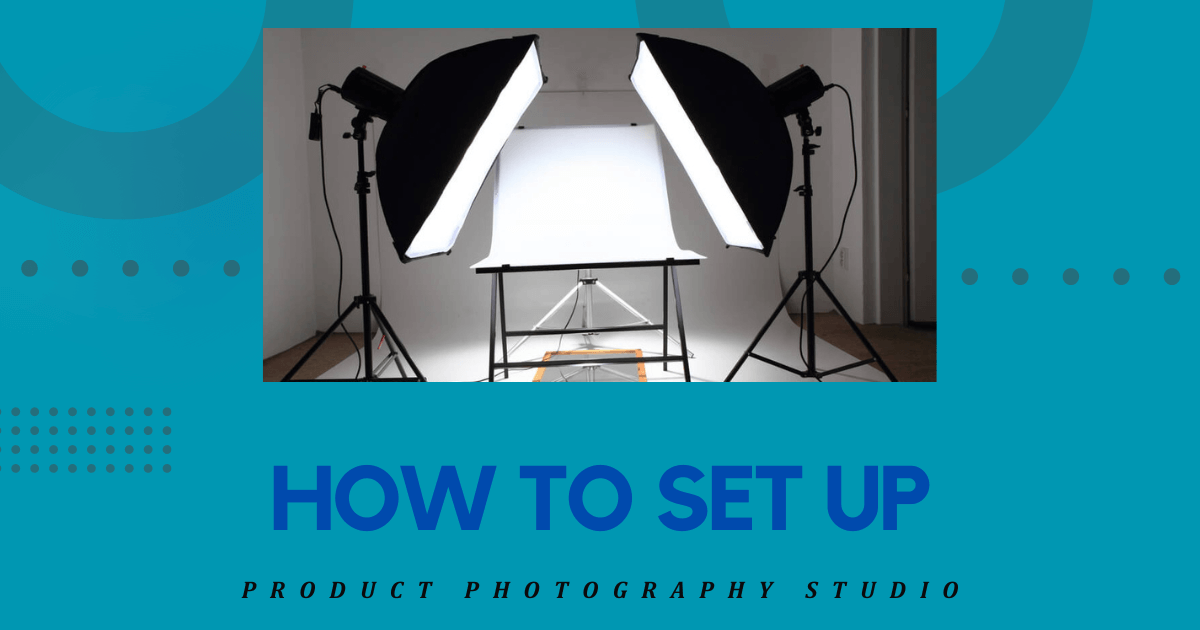
How To Fabricate Your Own Item Photography Studio?
If you’re an entrepreneur on a careful spending plan who needs to do your item photography, the following are a couple of fundamental aides that will show you all that you want to be familiar with stuff, strategies, and tips.
It’s a complete, direct strategy that will help you in taking wonderful expert photos.
1. Room
Alongside a camera and mount, you want various fundamental things to make a photography studio. The initial step to do that is to have the ideal room that fulfills your necessities.
You ought to track down a spot with a window against a divider. By situating your table close to the window, you can rapidly produce a characteristic light impact that is outwardly seriously engaging.
While creating some distance from the window might permit your setup to get all the more light, it will likewise bring about lighter and keen shadows. Be that as it may, fixing it with a bigger window is better since all the more light streams through and fall on the item. To deal with the light spill in a room with a ton of normal light, bring down each shade.
2. Camera
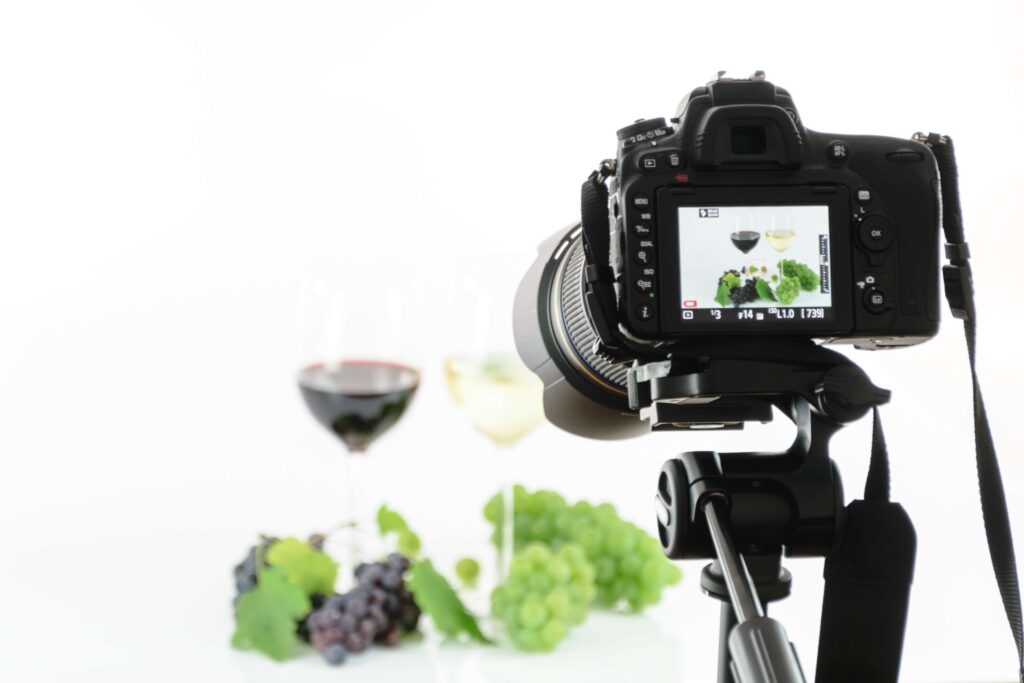
Another fundamental part of a photography studio is to have a decent camera. There are different very good quality digital cameras accessible; you don’t require to purchase a costly camera. To get one, you should initially lead the legitimate exploration to track down the one that satisfies your needs and fits affordable for you. Look into the attributes of a fair camera on the web, then search for those that fit unequivocally for item photography from various sites. If you are utilizing a cell phone rather than a camera, you can search for helpful techniques appropriate for cell phones.
3. Table
To put and arrange your merchandise suitably, you’ll require a photography table to keep your items on it. If your item is excessively high or low, you will not have the option to take photographs of it easily or rapidly. Simple-to-utilize collapsing card tables are the most ideal choice you need to accomplish an effective shoot with the greatest proficiency. A collapsing table’s compactness assists you with taking care of your responsibilities far better since you can change areas and carry them alongside you to utilize. You will effectively observe tables like these in shops or online for under $50.
4. White Skip Cards Made Of Foam Board

While you’re lighting with window light, there will be a splendid side where the light is striking the item and a shadow side. This shadow side will regularly be excessively dull thus we use something white to mirror the light once more into the shadows and light it up. Foam board makes an incredible skip card since it’s inflexible and white.
Then again, you can utilize a dark foam board to make the shadows further. This is especially useful if you’re shooting a white item on a white foundation. Adding a dark foam board to the sides, right outside of the photograph behind the item will make a dull edge on the white item. Consolidate a white skip card on the front and dark bob cards behind the item for a more complex lighting arrangement.
You can purchase foam sheets on Amazon or at a nearby pharmacy. Remember, this is only a white card, so you could adjust a sheet of white printer paper or utilize a piece of banner board.
5. Stand
This moment is a decent opportunity to discuss support. Supporting your lights ought to be painstakingly thought of, and you want to guarantee you don’t hold back here. I have a story to assist with representing this point. While doing an item shot for a client I was moving about the studio, and I brushed past my lights returning to my camera. Before I could pivot and take a gander at the scene I heard about an accident.
My light had overturned, hit the table, thumped the item wobbly, and it hit the floor and broke. It was a jug of wine. I was left with a colossal wreck to tidy up, a messed up bottle that should have been supplanted, and a bill from the client for the unreturned item. It might have been more regrettable, yet just barely. Put resources into your light stands. Get great ones and overload them appropriately with barricades.
The stand is a significant part of any home photography studio since it empowers the gadget to be steady and work in faintly lit regions. You don’t have to buy a stand for an enormous amount of cash. There are various kinds of stands to pick from, and you can get a brilliant one for just $20 from any shop or online web page.
A more excellent mount will give greater dependability, which is a prerequisite when you photo little things where you need as little development as conceivable to forestall fluffy pictures, particularly during focus stacking.
6. Lighting
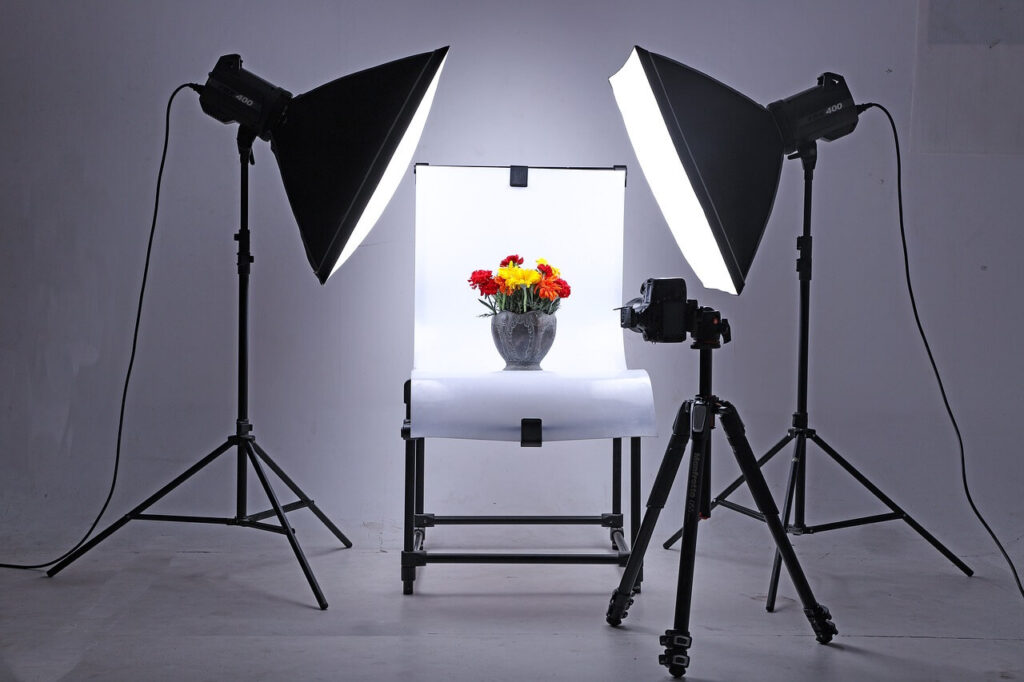
Lighting is the following interesting point. The kind of framework you pick will have a quite huge effect with regard to shooting your real items. You will, at last, be picking between two primary sorts of light; a steady (consistent) light framework or a studio strobe (streak) framework.
A steady light arrangement will be a lot easier if you’re simply beginning with item photography. With a consistent light framework, it is dramatically more modest to learn to bend. I will put it all on the line to offer a wide expression and say that if you are perusing this article to assist with your item photography, you probably don’t have the experience expected to utilize studio strobes as your light source.
Regardless of whether you have some involvement in strobes, except if you have a few years or a greater amount of shooting strobes in an item climate, help yourself out and get consistent lights. You will be astonished at how much, and how rapidly you will realize when you utilize steady light. Furthermore, there are a few added advantages of utilizing a consistent light:
- No tie gear. You don’t need to control the lights with a radio transmitter, by putting the light in optical slave mode, or by a link as you do with studio strobes. They will generally be on, prepared to take pictures.
- You can involve them as video lights if you have any desire to have into the movement for item shots.
- They are a far predominant light learning device, in any event, for further developed photographic artists. As I would see it this reason alone is the reason you need to go with a steady light.
OK extraordinary, you will take my recommendation and get some steady light. My proposal would be the Westcott Spiderlite TD6 framework for the accompanying reasons:
- They are splendid.
- The bright light bulbs stay cool. A colossal arrangement when you are full in a studio without any windows.
- The included bulbs are sunlight adjusted and can be blended in with the light from a window.
- Option to utilize tungsten incandescent light (not certain why you would because those bulbs run so hot).
- Westcott has a lot of light modifiers for forming your light.
- The light result is controllable in 33% augmentations with three switches.
- The strong form, with every single metal head and quality light modifiers.
At the point when I purchased the unit from Westcott, it accompanied the Spiderlite TD6 head, six 50w bright light bulbs, a tilter section, and the 36×48 softbox. I paid $700 per light and purchased two of those packs for a fantastic all out of $1400.
My TD6 lights are utilized basically as my key (principle) and fill lights. I actually should have the option to light my shooting table. For that, I went to certain reflectors.
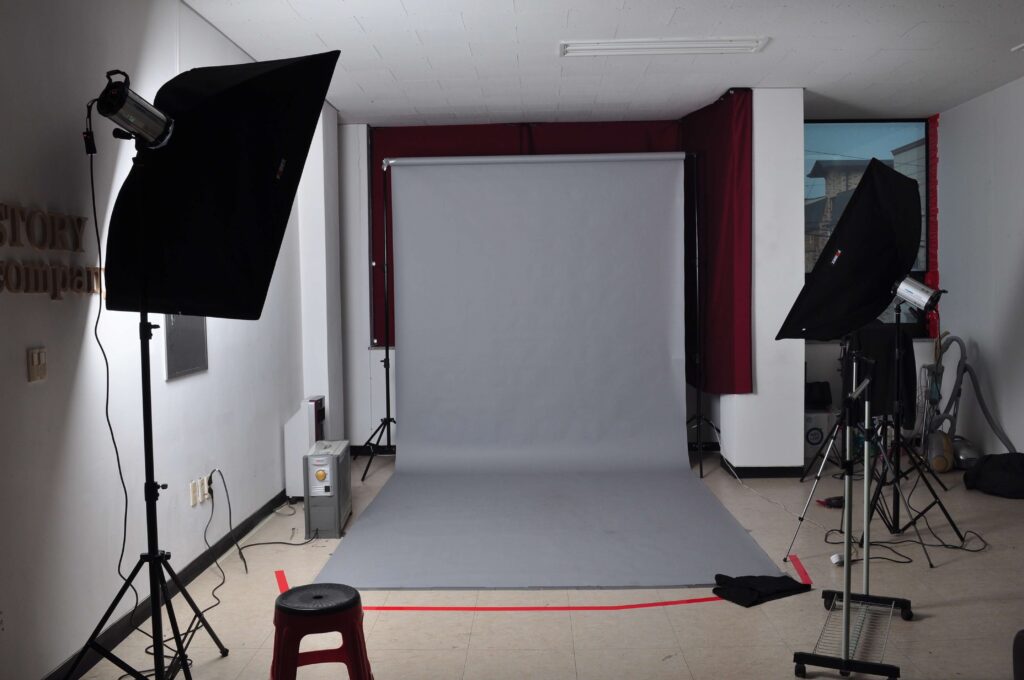
7. Background
One of the most essential pieces of a photo is an all-around-picked foundation that upgrades the subject’s appearance. It further develops the general review insight of the picture. Observing the right foundation is advantageous because it makes the altering system substantially more direct over the long haul. With regards to item photography, what you ought to generally go for is a white setting.
There are various techniques for shooting your products against a white foundation. There are two techniques for acquiring a white foundation photography shoot. The main way is that you can photo your item against white scenery.
The subsequent benefit is that you can photo your item against any foundation and afterward, in the after-creation process, eradicate the foundation from the photo in Photoshop.
8. Utilizing A Reflector
You can further develop item permeability by utilizing reflectors. While capturing an item, can be valuable for expanding the nature of the picture.
However proficient reflectors can be expensive, shoddy reflectors like white froth sheets do the occupation impeccably. Moreover, these tools make controlling the light with reflecting materials, for example, metal and glass more available.
What Software Do You Require For Your Diy Product Photography Studio?
A normal DIY item photography studio utilizes accounting sheets and data sets to assist with dealing with the item photography work process. Whenever the photographic artist catches an item picture they rename the picture record to the item number and picture view. They record the item number and picture view in an accounting sheet so they can keep track of the items they have taken. This interaction is slow, inclined to human blunder, and doesn’t scale when a large number of item pictures are involved.
Product photography workflow software is intended to digital numerous item photography assignments including entering item numbers, renaming picture documents, overseeing picture perspectives, and following which products have been shot and which have not.
Tips For In-House Product Photography
While the aide referenced above is fundamental, they quite often need extra help and attempt to be completely used. Here, we have gathered a list of a couple of additional tips that are vital to remember and use alongside the fundamentals:
Additional Lens
An amazing macro lens is something you ought to look at if you’re taking pictures of things that are more modest than an inch expansive. The 18-55mm turns out extraordinary for all the other things however it is likewise prescribed to have an assortment of focal points as it permits you to have more options for use. For online business and item photography, a modestly high measure of clearness of subtleties is adequate.
Lighting
Lighting is perhaps the main method of know about photography. For minuscule items, utilize an expert lightbox for more significant subtlety and better quality. While normal light is the top decision, it is suggested that you cautiously pick your counterfeit lighting like studio and ring lights.
Memory Backup
Continuously have additional memory cards close by to ensure your creation isn’t stopped because your memory card ran out of space. An unobtrusively measured SD card (+16GB) ought to cost something like $10 nowadays.
Backgrounds
While the white foundation is the norm in item photography, in some cases taking artistic freedoms assists with breaking the speed and expands clients’ advantage in the item and your business.
Utilizing different hued settings or even printed sceneries logically with the items upgrades the picture’s visual allure. A phenomenal choice for foundation settings is to involve a roll of strong-hued paper for a consistent foundation.
Numerous Angled Shots
Take pictures according to different points of view. Head-on pictures are utilized for straightforwardness, however, elective perspectives can help clients see and see a greater amount of the item. Utilizing a sideways situation to photo an item draws out the item’s surfaces and qualities.
Use Clamps And Tape
It might appear to be superfluous, however, these are indispensable as these little things help to keep up with the set. Moreover, conduit clamps and tapes are helpful to hold the backgrounds and props set up.
Post Production Method
Regardless of whether your item shot is faultless, you can’t present it to your clients without post-handling. To make sense of why, this is because crude photographs may be loaded with flaws, including scratches, imperfections, and unfortunate lighting. Picture modifying is the best way to fix these imperfections and make them all the more outwardly engaging.
If you can’t make these alter yourself or recruit proficient visual planners. All things considered, there are numerous web-based business photograph editing services Like Zenith Clipping that give you top-notch picture altering at exceptionally reasonable rates.
Notwithstanding, observing an eCommerce photograph editing service can be trying to take special care of what you want. Subsequently, you can begin with the Zenith Clipping eCommerce photographs service provider which is notable on the lookout for their exclusive requirement services and cost ranges.
FAQs
How do I set up my product photography?
Displaying your products in your e-commerce store with great pictures can be the triumphant contrast between a conversation and no sale by any means. This is especially true if you’re distributing your items on a commercial marketplace like Amazon, where they are shown close to those of your rivals, or via social media, where individuals communicate with your image. There are heaps of strategies to set up effective product photography,
- Set up your table.
- Set your compass.
- Set up your camera.
- Set up your item.
- Set up your reflector card.
- Snap the photo and assess.
- Edit your photos.
- Optimize photos for your site.
What equipment is used in product photography?
Whether you are taking product photography for establishing an online business store, brand publicizing, or print advertising, it is critical to have the ideal photography equipment set up. Product photography is crucial for both enormous and private ventures with regard to advancing and selling their products. Having extraordinary item photography and a great studio arrangement can support delivering probably the best pictures for your online store.
The best product photography equipment incorporates a full-outline Nikon or Canon camera, a great and reliable tripod and discretionary ball head, professional software, a white background, a strong PC, and amazing lighting.
When you have the legitimate arrangement to take stunning product photography, you will see an expansion in viewership and possibly an expansion in sales.
How much should I charge for product shots?
Well, you can set your price according to your skill. Sometimes, it depends on the complexity of editing the image as well. Normally, you can charge $10 to $25 per image.
What type of photography is most profitable?
All types of photography don’t have the same value. Some of the sectors are quite highly demanding, for example, Landscape, Wildlife, Architectural, Fine Art, Corporate Photography, Photojournalism & Street, Macro Photography, Mono (black & white), etc.
Do you need a tripod for product photography?
Having a consistent tripod will assist us with lessening shutter speed and ISO. If you have low light in the spot you shoot still-life photography, then, it is essential to have a tripod to enhance picture quality.
How much light does a product photographer need?
One light ought to be 45 degrees behind the item, and the other 45 degrees before it on the contrary corner. Make sure that the lights are as high as possible and pointing lower, yet at the subject. This will decrease the length of your shadows.
Which camera is best for product photography?
For product photography you can use Canon 90D, Panasonic Lumix FZ80K, Fujifilm GFX 100, Sony Alpha 7R IV, Canon EOS 5DS, Nikon D850, Sony a6400, etc are remarkable.
How do product photographers make money?
There are plenty of ways of making money from product photography. For instance, photographers can publish their photos online, at exhibitions, and in other places to sell them. Besides, they can open a studio and start a photography business. Also, they can do a job as a professional photographer in a photo studio.
What is product photography called?
Product photography is a picture of a product that highlights the visual image of that picture from various angles, product details, features, ingredients, product description, price, etc.
How do product photographers find clients?
Product photographers can find clients in the following ways,
- Get references from family and friends
- Contact other industry experts and build a portfolio
- Display your work at local exhibitions
- Become an associate with an expert photographer
- Shoot photographs of the wedding and other events.
Final Words on How to Setup a Product Photography Studio
At the point when you’re a novice in photography, beginning from setting up your studio to the after-creation process will be a bit challenging. This large number of cycles might appear to be overpowering, yet everything will work out for the best when you get to shoot.
In any case, it is vital to note that nobody gets everything right on the primary attempt, particularly in photography; the interaction takes time and practice to consummate. We trust this article has helped you comprehend and begin with your photography studio or made you mindful of things you weren’t previously.


