Photoshop has incredible features to make borders that go beyond an essential line around your image. Photo borders are an extraordinary method for adding a feeling of class and style to a picture. Furthermore, adding a line is simple once you know the means. Sometimes picking an essential border is ideal. Whether you need to stay with exemplary white or pick a color that sets off components of your picture, a solid border can add a ton to a photograph.
Step-by-step Instructions to Create a Solid Border
Step 1: Open Your Image in Photoshop
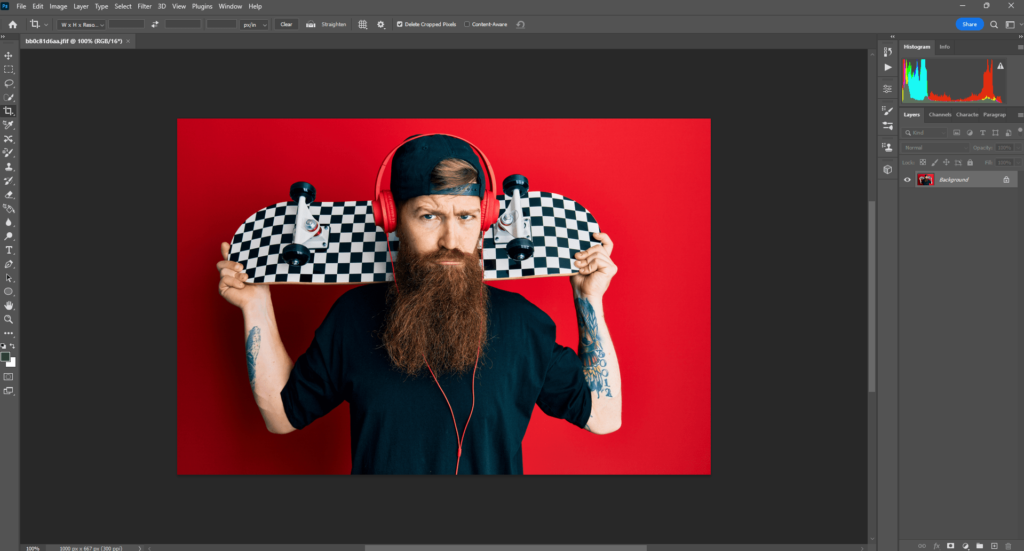
Before adding a border in Photoshop, ensure you do any altering you need for your photograph. If no altering is essential, make a beeline for step three.
Step 2: Flatten The Altered Image
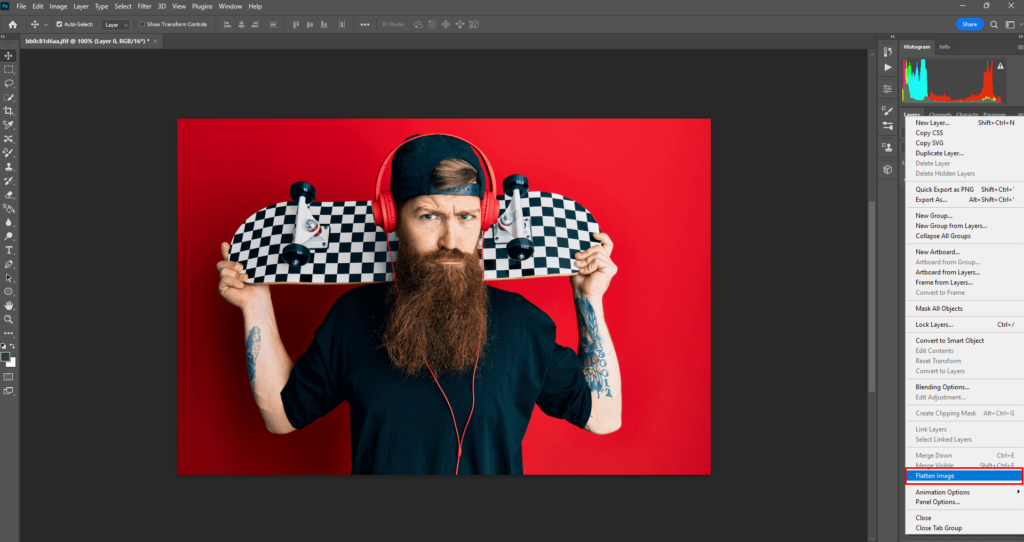
If you altered your photograph, your document has various layers, so you need to combine or straighten them. Go to the Layers Panel (base right side) and click on it. At the point when the drop-down menu shows up, you need to pick “Straighten Image.”
Step 3: Unlock The Layer of Your Image

To add a border, you might have to open the layer of your photograph. If necessary, do this through the Layers Panel.
Click on Layers Panel (base right side) and the quest for your photograph. A little lock ought to show up close to the photograph. Click on the lock. When you select the layer with your photograph, it ought to show up as Layer 0, yet you can rename it.
Step 4: Adjust Your Picture Canvas Size
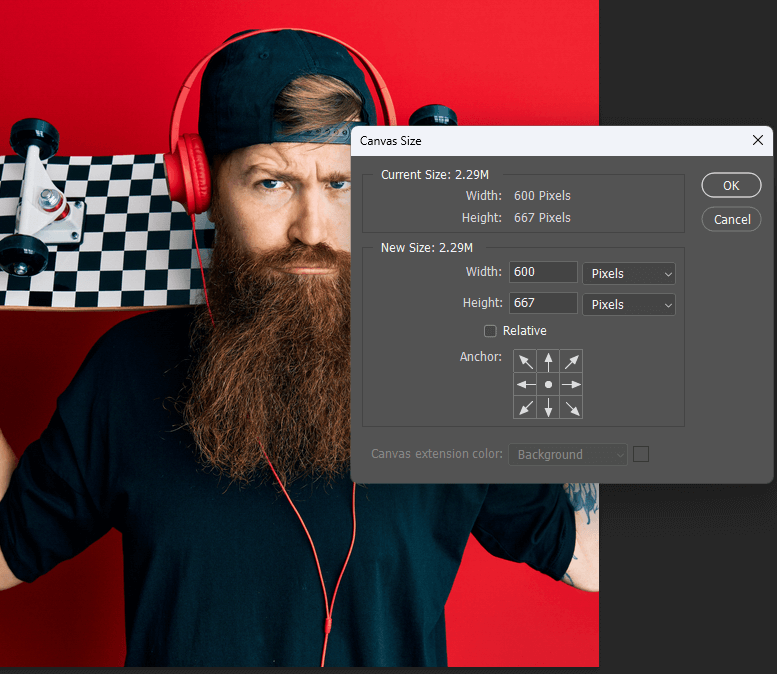
Presently you need to make room for the border. Go to Image (at the highest point of the toolbar) and click on Canvas Size in the drop-down menu.
Step 5: Fill Out the Dialog Box Accurately
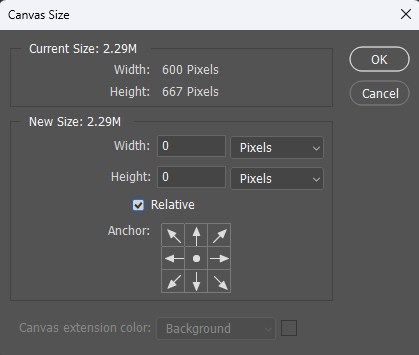
A “Canvas Size” discourse box ought to show up. There are a couple of significant steps to take here yet start by choosing “Relative.”
Step 6: Choose Your Border Dimensions
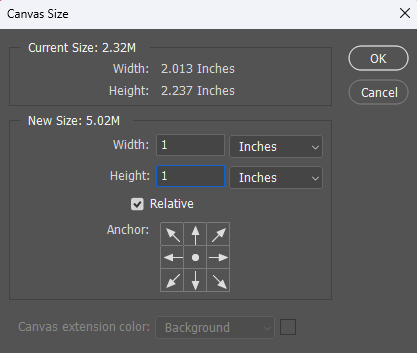
The following thing to set up in the Canvas Size discourse box is the width of your border. For the most part, a couple of inches works best, however, you can change your picture canvas size to view as the best fit.
Step 7: Pick a Border Color
At long last, you need to pick the shade of your line. At the lower part of the Canvas Size exchange box is “Canvas expansion tone” close to a drop-down box with a variety of color choices. Click on your ideal color.
Step 8: Click Ok
Click Ok at the upper right of the exchange box to acknowledge the progressions and appreciate your border. Remember to save your picture after you click alright!

The Most Effective Method To Create A Custom Photoshop Border
Is it true or not that you are exhausted by the plain line? If you have any desire to step up a score, attempt a custom line in Photoshop.
Step 1: Open the Image in Photoshop
As usual, begin by opening your photograph in Photoshop. If you like your picture as is, continue to stage two.
Ensure you complete any photograph altering you believe should do to your picture before adding a custom line. Rehash, the customs line ought to be the absolute last thing you do to a picture!
Remember to level your layers. If you failed to remember how to do this, see step two in how to add a plain line.
Step 2: Create a Strong Layer
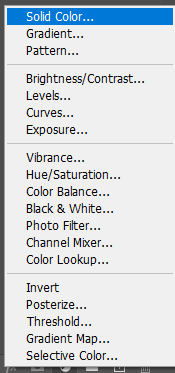
This is where the method involved with adding a border moves somewhat. You need to make a layer mask for your picture to cloud portions of it without controlling the photograph any further.
Click on the Adjustment Layer button at the base part of the Layers Panel in Photoshop. A menu ought to show up in the Layers Panel with many options.
Step 3: Choose Your Border Color
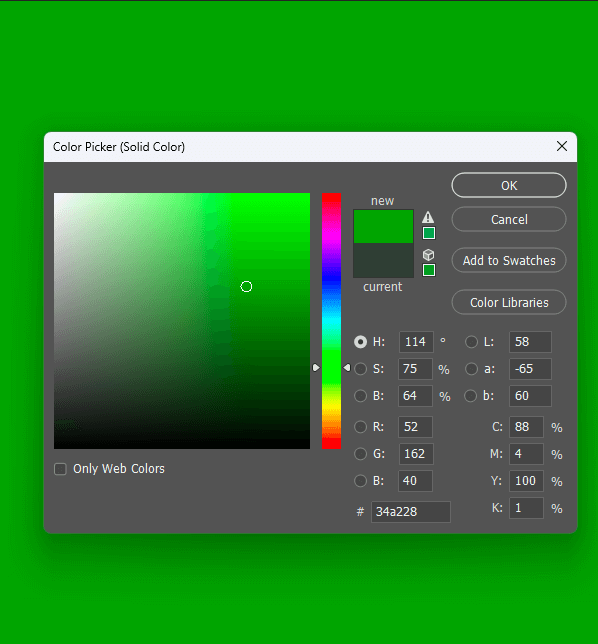
From the Adjustment Layer menu at the Layers Panel, select Solid Color. Pick a color for your line. That tone ought to apply to the whole layer.
Step 4: Invert The Layer Mask
Try not to overreact because your whole picture is a strong color! It’s simply a layer, and your photograph is still there. Simply double-tap on the mask (color layer) and select Control +I or Command +I. Two things occur as of now, your mask becomes dark, and you can see your picture once more.
Step 5: Select a Brush to Paint Your Border
You’re not done customizing yet! Click on the brush tool through Photoshop’s brush symbol. There are plenty of brush options, yet you can constantly make your own.
Step 6: Paint The Border on The Image
Utilizing the brush tool, paint over the picture where you need to see a line. The brush strokes at first look white on the dark veil, however when you see your photograph, the border will be the color you picked.
At the point when you’re happy with the appearance of your line, click save to protect your changes.
Making a Grunge Border in Photoshop

Grunge borders add a stylish vibe to any picture. An inventive elective finds a way only a couple of ways to make a grit line for Photoshop.
Step 1: Choose An Image of a Skyline
It doesn’t make any difference assuming the photograph is metropolitan or nature-based. Open the document in Photoshop.
Step 2: Prepare Your Image to Create the Grunge Border
Believe it or not, you utilize the Skyline picture to make the grit line. On the top menu, click on Image, select Adjustments then Threshold. Set the edge to an extremely large number to make a high-contrast picture.
Step 3: Open a New Blank Canvas
Select the picture (use Control/Command + A) and duplicate it (Control/Command + C). Glue the picture (Control/Command + V) in another fresh start.
Step 4: Transform The Skyline Image
At the top menu, select Edit. Pick Free Transform from the menu and crush the whole highly contrasting picture to one of the edges. You have a single edge of your Grunge Border.
Step 5: Make A Copy of The Skyline Image Into More Layers
To make different sides of the border you want to copy the layer. Go to the Layer board and select copy layer to make three additional sides.
Step 6: Build Your Border
Select a layer and utilize the Transform menu to rotate and resize it to fit a side of the picture. Rehash until you have a rectangular line.
Step 7: Blend The Layers
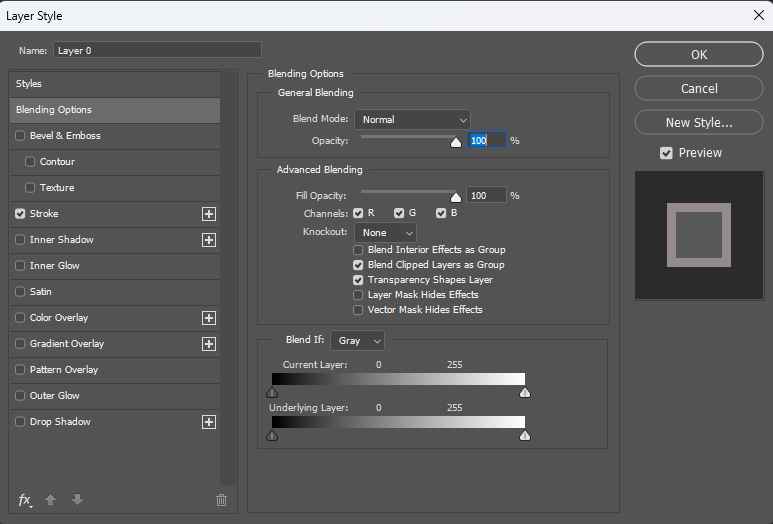
To make a genuine Grunge Border, you want to control each side of the square shape, so it doesn’t look consistent. In the Layer board, select Layer Style and Blending Options. Mess with each layer to make marginally various sides until you accomplish the outcome you love!
Remember to save your work!
How to Add a Border Using Photoshop Components
Photoshop components make it simple to add a border to any photograph. You could pick the ideal tone and thickness for your Photoshop outline.
Step 1: Prepare The Image
Open your picture in Photoshop Elements. Utilize the Select menu to pick “all” or attempt the keyboard shortcuts (Command-A for Macs and Control-A for PCs). It ought to choose your whole photograph with a casing of run lines.
Step 2: Open The “Stroke” Dialog Box
Click on the Edit menu. Pick “Stroke (Outline) Selection.” You have three segments in the exchange box, however, we just have to stress over two-stroke and area.
Step 3: Set The Desired Stroke and Color
Begin with setting the stroke. You can pick how wide you need your stroke and what color you like. The width can go from 1 to 250.
To pick a color other than dark, just snap on the dark square shape then, “select stroke tone,” and another discourse box shows up. Pick the color you need and snap alright?
Step 4: Choose The Area
You have three area decisions – Inside, Center, and Outside. It’s the relationship of your stroke to the chosen picture. You might need to mess with the choices to figure out which you like.
Step 5: Save The Changes
When you select your stroke, area, and color, click Alright.
Step 6: Deselect
You presumably don’t need the specked line around your image, so you need to deselect the picture. Use Command-D on Mac or Control-D on PC to dispose of the spotted line.
Step 7: Alter The Border Size And Additionally Color
If you don’t adore the line, you can in any case make changes through the “Alter” menu. Click on Revert and rehash stages one through three until you make a border you love.

Final Words
A Photoshop border permits anyone to add an inventive, individual touch to any picture. Indeed, even proficient photographic artists use Photoshop to correct pictures. Best of all, it’s quite easy for fledglings, and anything is possible with regard to modifying choices.
FAQs
How do you put a white border around a picture in Photoshop?
To make a white border, click the Create a New Fill or Adjustment Layer button on the Layers board and pick Solid Color. In the discourse box, set the color as white and click OK.
How to add a border to a rectangle in Photoshop?
Right-click the Rectangle Marquee Tool and select the ideal shape for your line. Snap and drag the mouse until the marquee is in the ideal shape for your line. A moving dashed line shows up around your choice.