Photoshop Actions offer many benefits for creatives. They automate repetitive tasks. This significantly reduces your editing time. You can increase your productivity greatly.
Following this guide gives a clear understanding of the process. You will learn to create a Split Color Effect Action. This process works well in Photoshop CC 2026 or any recent version. Photoshop 2025 users will find this especially useful.
Let’s dive below for a detailed explanation!
What Are Photoshop Actions?
Photoshop actions are a great and powerful time-saving feature. They record a series of steps. These steps include filter and image adjustment tool selections. They save these steps as a single command quickly. This feature enables efficient automation. You avoid manually performing many steps for every photo.
The recording process logs every change you make. This sequence is logged in the Actions panel. You can replay the saved actions on any other image. This ensures consistency across a batch of images. You can create customized user-created actions. Actions are saved as ATN files. They can be shared with other users readily. They function similarly to a complex preset. Actions are organized into an Action Set. Modern Photoshop versions include AI-powered Suggested Actions.
Know More: Photoshop Actions seamlessly combine automation with AI-powered tools. Nevertheless, the core functionality of the ActionScript remains intact. Moreover, the reimagined Actions Palette features live previews. Actions suggested by AI, therefore, integrate automation seamlessly. Natural language text prompts serve as dynamic actions, thereby enhancing interaction.
One-click quick actions, therefore, are optimized for achieving quick results. Cloud processing, therefore, enhances the quality of many actions. To access the panel, simply use the F9 key, which serves as the shortcut for the Actions panel. To load traditional ATN files, simply use the Load Actions command. It is quite simple to save as an .atn file; thus, you can share or restore actions effortlessly.
Why Use Photoshop Actions?
Photoshop Actions not only save time, but they also significantly increase productivity. They streamline the process by automating repetitive editing tasks. You record the steps once only. You reply to them instantly on other images. This saves several minutes per photo. This improves workflow efficiency significantly. Actions allow batch processing of many images.
You can apply the same steps to an entire folder. This ensures consistency across all your photos. This is vital for professional work. Actions apply complex effects with one click. They preserve detailed editing knowledge. You do not need to remember intricate steps. Actions are also used for sharing and collaboration. This adds value to the Photoshop ecosystem. Actions always help you work smarter.
Know More: Run the action using the Play button. Customization is done using editable layers. Layer Blending Modes ebook. You can use the Content-Aware Patch tool within actions. The Photoshop Discover Panel helps you find relevant actions. Actions work with PSD files and brush presets. Advanced users might use ActionToScript xtools. This helps manage Action FX. Actions ensure content authenticity in the Edit Mode.
Setting Up Your Photoshop Workspace for Actions

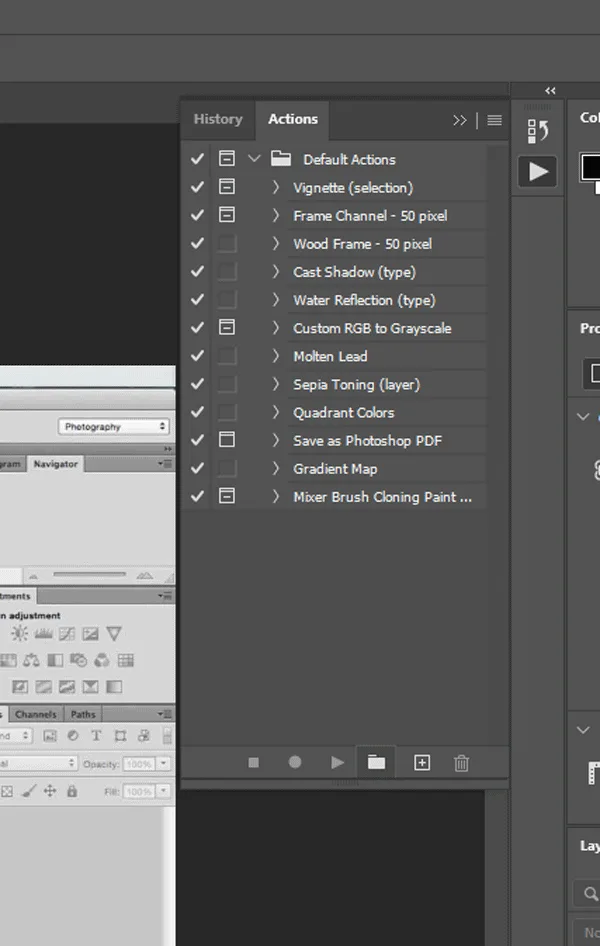
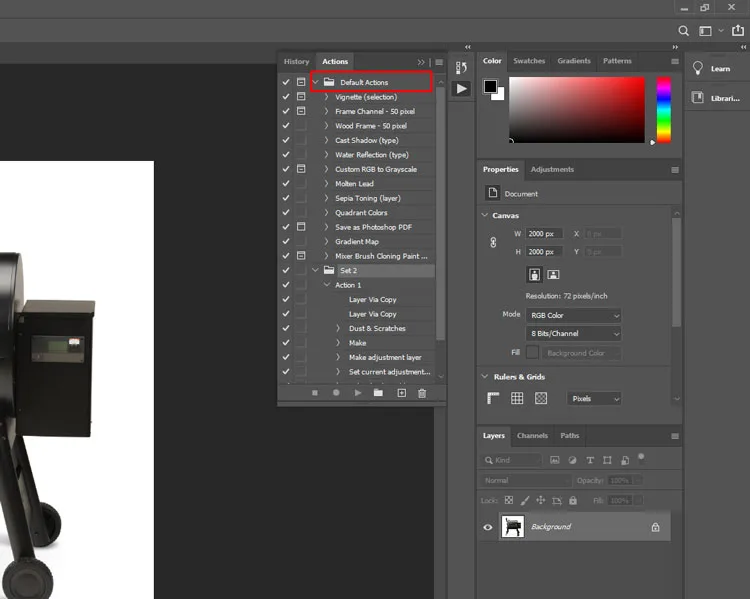
Setting up an efficient workspace is crucial. You must arrange the necessary panels for easy access. Key panels to display include the Actions panel and the Layers panel. You need the History Properties panels too. The Actions panel is always the core panel. It manages recording and playing actions. The Layers panel monitors changes. The History panel allows you to undo mistakes. Start with a base workspace like Photography. Open and arrange the required panels efficiently.
The group docks them on the right side of the screen. Minimize panel clutter to save space. Resize the panel groups for clear viewing. Save your custom workspace using Window Workspace. Give the layout a descriptive name. This layout ensures your tools are always ready. You can use a keyboard shortcut to play actions. You can view actions in Button Mode. Click the play button for execution. The Actions palette is another name for the panel.
How to Apply Photoshop Actions to Your Images
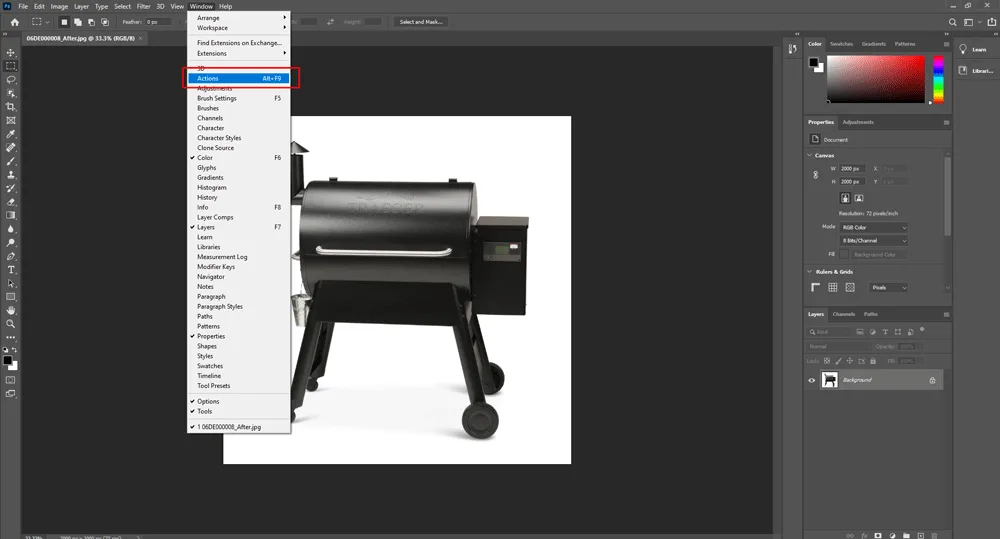
You must first load the action into Photoshop. Open the Actions panel using Alt + F9. Use the Load Actions menu to install the ATN file. To apply a single action, first upload images. In Photoshop, open the picture you want to work on. Find the Action Set and choose the Action you want. In the Actions panel, click the Play button.
The action runs automatically. Alternatively, use Button Mode for quick clicks. Modern versions offer AI-suggested actions too. These apply effects as non-destructive adjustment layers. Layer masks. This is similar to using Smart Objects. For multiple images, use batch processing. Select File > Automate Batch. Set the Action Source Destination folders. Click OK for automatic processing. Actions often use features like Content-Aware Fill.
Managing Your Photoshop Actions Panel
Managing the Actions panel efficiently prevents clutter. This keeps your workspace greatly organized. Organize actions into action sets quickly. Action sets function like folders. Create a new set using the folder icon. Drag and drop actions into your new folder. Collapse sets to keep the panel tidy. You load action files using the panel menu. Save Export custom actions as ATN files.
You can delete single actions or entire sets. Editing recorded actions is possible, too. Delete unnecessary steps. Rearrange steps by dragging them up and down. Record new steps into an existing action. Use the checkboxes next to steps to disable them temporarily. Streamline the panel view using Button Mode. This turns actions into clickable buttons. Maintain your Actions panel for maximum efficiency.
How to Install Third-Party Photoshop Actions
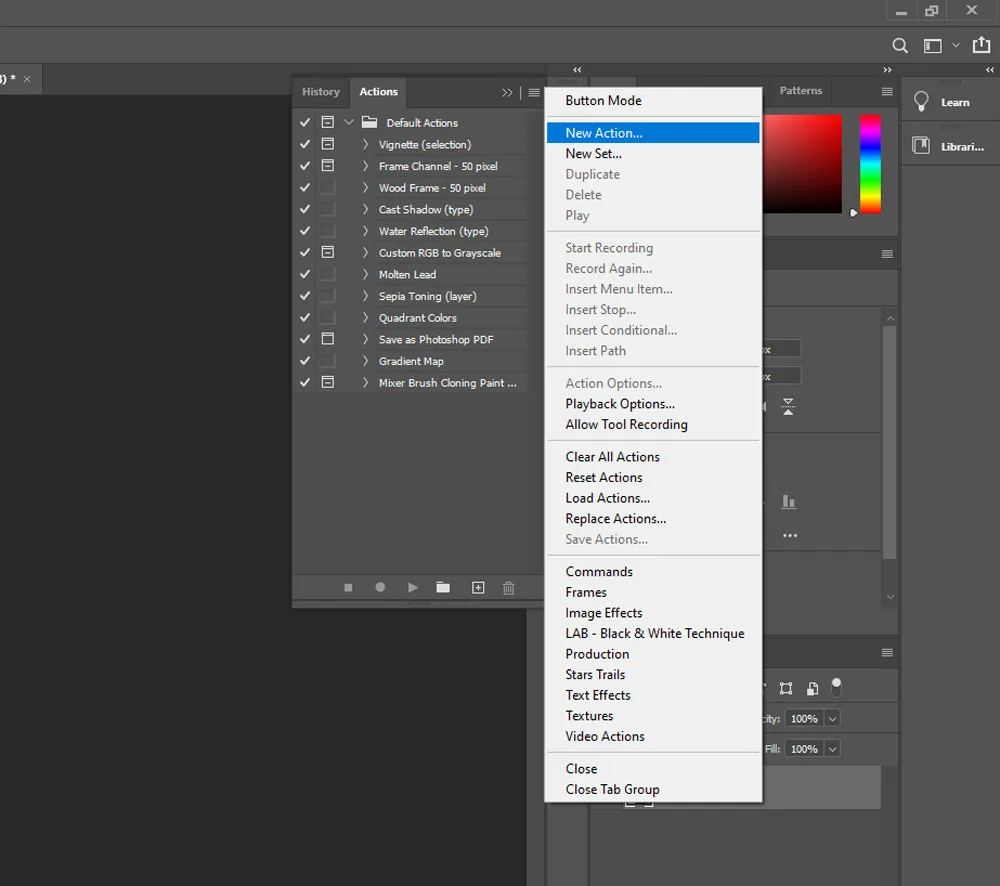
Installing third-party Photoshop Actions loads the ATN file. First, download the action file from the community or vendor. These usually come in a zip archive. Extract the file and locate the ATN file. Open the Actions panel in Photoshop using Window Actions. You can load the ATN file using two methods. The recommended method uses the panel menu. Click the menu icon and select Load Actions.
Navigate to the file and click Open. The fastest way is to double-click the ATN file directly. Photoshop automatically loads the action set. You can search for more actions online. Services like the PHLEARN PRO subscription offer many actions. The new actions should appear in the Actions panel now. You can then run them on your images. You do not need to place the ATN file into the application folder.
Using Photoshop Actions for Batch Processing
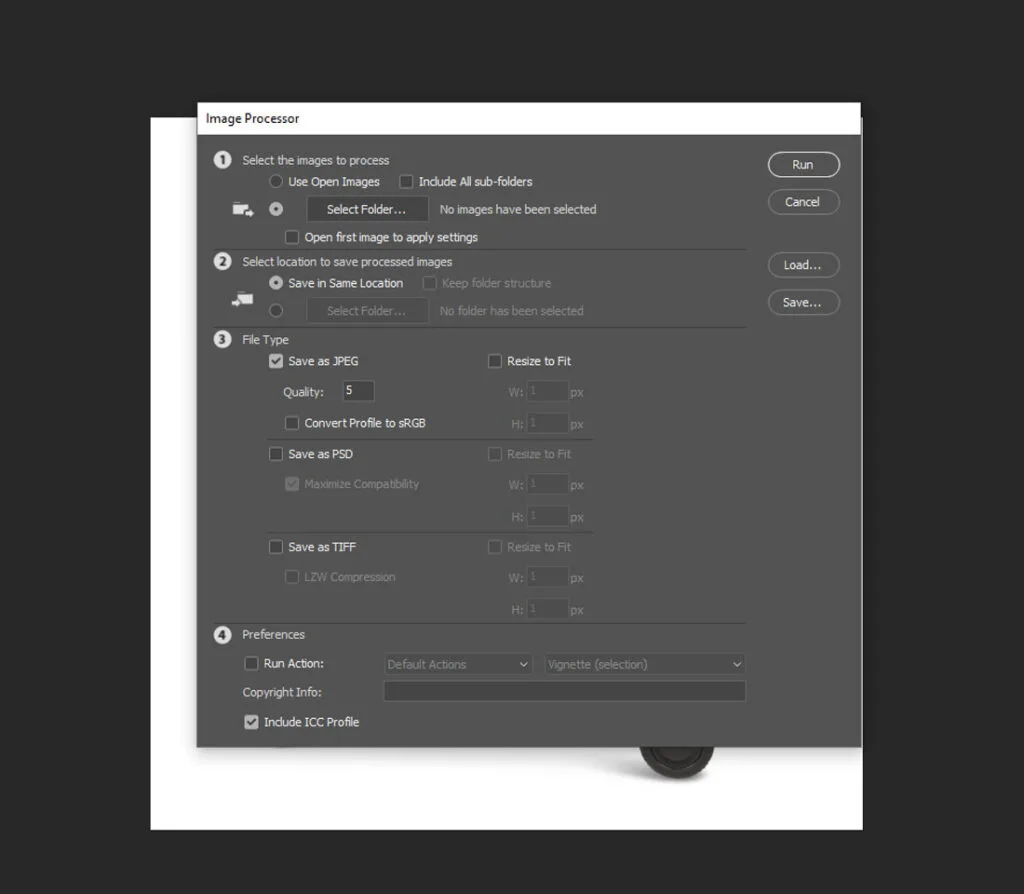
Photoshop Actions are powerful with Batch Processing. This applies one action to thousands of images automatically. You must prepare your action folders first. Organize input images in one source folder. Create a separate destination folder for exporting files.
Open the Batch dialog using File Automate. Select the correct Action Set Action. Define the source folder and destination folder carefully. Do not save processed files in the source folder. Set a clear file name convention for output. Click OK to start the automatic process. Photoshop opens, applies, and saves each image automatically. Adobe Bridge can also be used for batch processing. A droplet offers another automation method. This allows continuous work efficiently.
How to Save and Share Your Photoshop Actions
You save custom Photoshop actions as a transferable ATN file. First organize your actions into a single action set. Open the Actions panel in Photoshop. Select the specific action set you want to save. Click the menu icon in the top-right corner.
Select the Save Actions command from the menu. Ensure you have an action set selected. Choose a convenient location to save the file. Give the file a clear descriptive name. Click Save to create the ATN file. You can then share the saved ATN file. Use email, cloud storage, or a USB drive for sharing. The recipient installs the action by double-clicking the ATN file. It automatically loads into their Actions panel.
Combining Multiple Photoshop Actions for Advanced Results
Combining multiple Photoshop Actions creates complex workflows. This achieves sophisticated visual effects quickly. You can manually chain actions on the same image. Run one action, verify results, and run the next action. This offers flexibility for refining effects. A more advanced method is nesting actions. You build a master action that calls other actions.
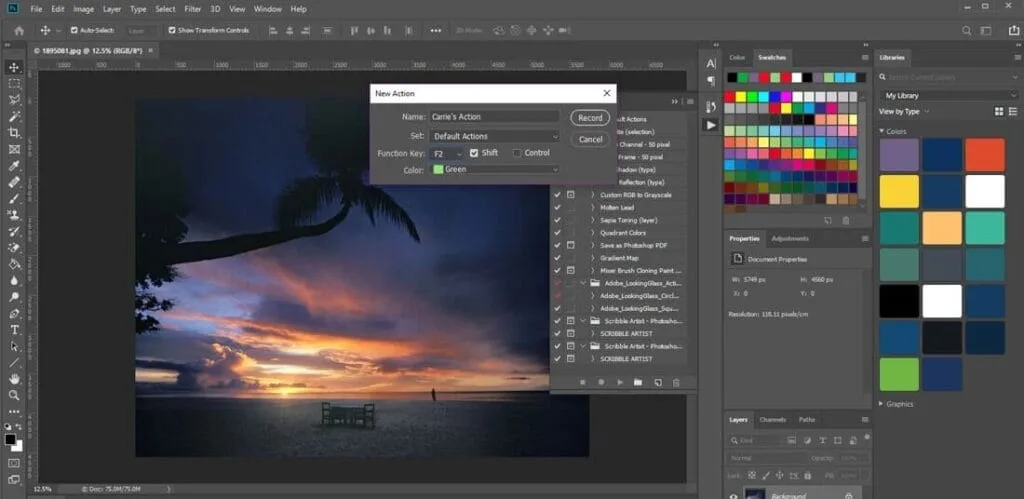
Create a New Master Action. Click Record. While recording, play the first nested action. The Play command is recorded as a single step. Stop recording the master action. Playing the master action executes all nested actions. This feature works similarly to a complex scripting function. You can integrate this master action into a batch process. This allows fully automated complex processing. You use the single master action instead of a detailed script.
Advanced Photoshop Action Techniques for Professionals
fessionals create robust, flexible, non-destructive workflows. Use adjustment layers instead of destructive image adjustments. Use Smart Filters and Smart Objects to keep your data safe. Use different layers to make it easy to retouch without damaging the image. Use generic tactics to avoid failures. It is vital not to depend on certain layer names. Use selections and layer masks to make specific changes. Incorporate pauses to allow for essential user engagement. Enable dialog interaction, so users can easily make adjustments to filters, such as the Blur filter.
Use Insert Conditional for logic-based steps. Integrate actions with scripting for complex file handling. Record actions that use generative AI features. This includes Adobe Firefly workflows. Ensure cross-platform compatibility between macOS and Windows. Note the impact of GPU-accelerated steps on performance. The Canvas Size command is useful for composition. Actions do not typically handle metadata changes. These techniques maximize the use of CPU cores.
FAQs
How to use Photoshop actions for beginners?
Open the Actions panel. Load the downloaded ATN file next. Select the action name and click the Play button. Review and adjust the layers afterward. You can also record your own basic action quickly.
How to use Photoshop actions with a free download?
Find a free action pack and download the zip file. Extract the ATN file quickly. Open Photoshop and use Load Actions to install the file. Open your image and click Play in the Actions panel.
How to use Photoshop actions online?
You cannot use traditional Photoshop actions online. They require the full desktop software. Use web-based alternatives like Photopea and Pixlr E. These offer similar one-click automation features. This mimics the action functionality.
How to use Photoshop actions for free?
Use the 7-day free trial of Adobe Photoshop. Alternatively, use a free desktop alternative like GIMP. The web-based editor Photopea also supports ATN files often. Download free actions from reputable sources only.
Final Thought
Zenith Clipping guidelines let you use the full power of Photoshop Actions. Learn to streamline your workflow. Enhance your designs effortlessly in 2025. Start mastering Photoshop Actions quickly today.