
There are many spots inside Photoshop where gradients are utilized. The Gradient Tool, for instance, allows us to draw gradients across layers or selections, or across layer masks to make smooth advances starting with one layer and then onto the next.
We can fill text and shapes with gradients. We can colorize a photograph utilizing a Gradient Map picture change, or add a variety of impacts with a Gradient Overlay layer style, and the sky is the limit from there! Gradients are important in Photoshop, and they’re an extraordinary method for adding more interest and life to what might have been a level-looking picture or plan.
In this tutorial, we’ll cover the basics of how to make a gradient utilizing the least complex (and conceivably the most helpful) of Photoshop’s angle-related features, the Gradient Tool. We’ll take a gander at alternate approaches to applying gradients in different instructional exercises, yet you’ll find that they all work the same way, so whenever you’ve taken in the nuts and arrows with the Gradient Tool, you’ll have the option to exploit the wide range of various gradients includes that Photoshop brings to the table!
Drawing Gradients Photoshop
Making A New Document
We should begin by making another Photoshop record. That’s what to do, I’ll go up to the File menu in the Menu Bar along with the highest point of the screen and select new.
This opens a new discourse box. For this tutorial, I’ll set the width of my report to 1200 pixels and the height to 800 pixels. There’s no great explanation for why I’m utilizing this size, so if you’re working alongside me and have an alternate size as a primary concern, go ahead and use it. I’ll leave the Resolution esteem set to its default of 72 pixels/inch, and I’ll ensure background contents are set to white. I’ll click OK when I’m finished to finish off of the discourse box, so, all in all, another white-filled report shows up on the screen.
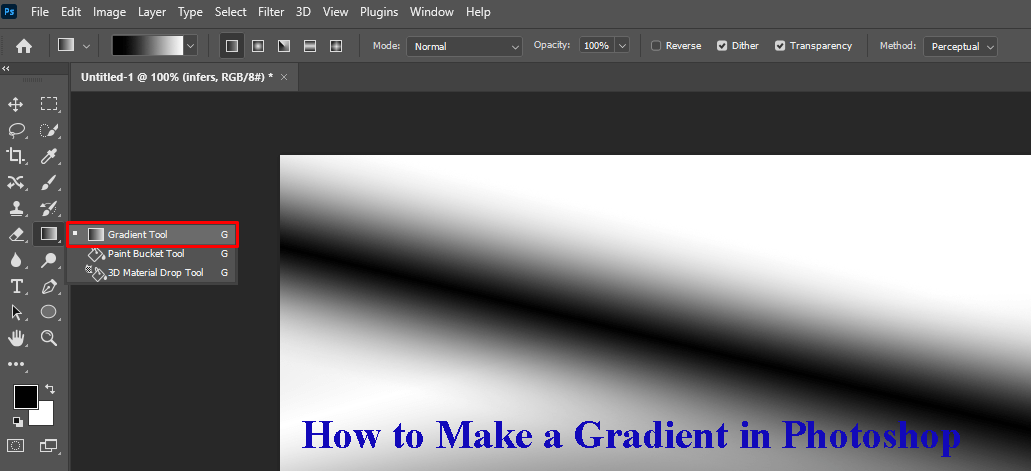
Photoshop’s Gradient Tool is found in the Tools board along the left of the screen. I’ll choose it by tapping on its symbol. You can likewise choose the Gradient Tool essentially by pressing the letter G on your keyboard.
The Gradient Picker
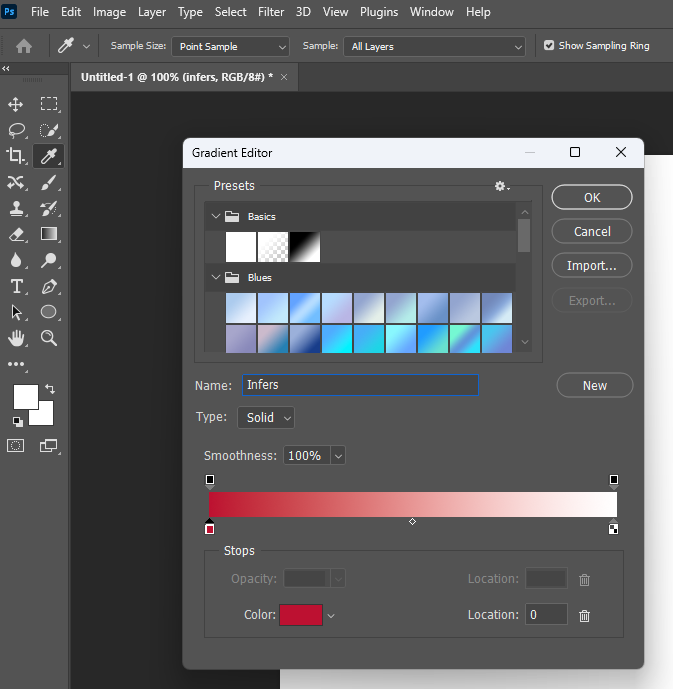
With the Gradient Tool chosen, the following thing we want to do is pick a gradient, and there are several different ways we can do that. One is by opening Photoshop’s Gradient Picker; the other is by opening the bigger gradient editor. The contrast between the two is that the gradient picker just permits us to browse instant preset angles, while the gradient editor, as its name infers, is where we can alter and modify our gradients. For this tutorial, we’ll focus on the gradient picker itself. We’ll realize about the gradient editor in the following instructional exercise.
At the point when you simply need to pick one of Photoshop’s preset gradients or one that you’ve recently made all alone and saved as a custom preset (once more, we’ll figure out how to do that in the following instructional exercise), click on the little arrow to one side of the gradient preview bar in the options bar. Ensure you click on the actual arrow, not on the preview bar (tapping the preview bar will open the gradient editor and we would rather not go there at this time).
Tapping the arrow opens the gradient picker, with thumbnails of the relative multitude of preset gradients we can browse. To pick a gradient, click on its thumbnail, then, press Enter (Win)/Return (Mac) on your keyboard, or snap on any unfilled space in the options bar, to close the gradient picker. You can likewise double-tap on the thumbnail, which will both select the angle and close out of the gradient picker.
Loading More Gradient
As a matter of course, just a few preset gradients are available, yet Photoshop incorporates other gradient sets that we can browse. We should simply stack them in. That’s what to do, click on the stuff symbol in the upper right.
If you search in the base portion of the menu that shows up, you’ll find the rundown of extra gradient sets, each because of a particular topic, similar to the color of harmonies, metals, pastels, and so on. If you’re a picture taker, the Neutral Density and Photographic Toning gradients are especially helpful.
To stack any of the sets, click on its name in the rundown. I tapped on the Photographic Toning set. Photoshop will inquire as to whether you need to supplant the ongoing gradients with the new ones. If you click Append, as opposed to supplanting the first gradient, it will essentially add the new ones beneath the firsts. As we’ll find in a second, it’s not difficult to reestablish the firsts, so I’ll click OK to supplant them with the Photographic Toning set.
Also, we find in the gradient picker that the first gradients have been supplanted with the Photographic Toning angles. The first gradients have been supplanted with the new set.
Restoring the Default Gradients
To keep us focused on the rudiments, we’ll stay with the first default gradients for the present. Yet again to reestablish them, click on the stuff symbol in the Gradient Picker. Then pick Reset Gradients from the menu.

Photoshop will inquire as to whether you need to supplant the ongoing angles with the defaults. Click OK. The default gradients have been re-established.
The Foreground To Background Gradient
Before we figure out how to draw gradients, we should rapidly take a gander at one angle specifically – the Foreground to Background gradients. It’s the one that Photoshop chooses for us of course, however, you can likewise choose it manually if you want to by tapping on its thumbnail (initial one on the left, top column).
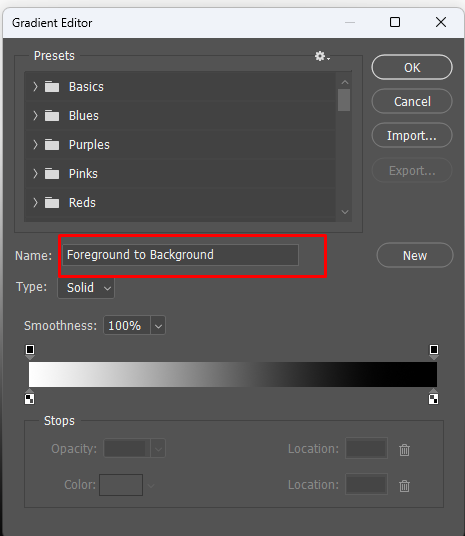
As you might have speculated, the Foreground to Background angle gets its tones from your Foreground and Background tones. You can see your ongoing Foreground and Background colors in the colors samples close to the lower part of the Tools board. The pattern in the upper left shows the Foreground tone, and the one in the lower right shows the Background tone. As a matter of course, the Foreground tone is set to dark and the Background tone is set to white.
Since it depends on your ongoing Foreground and Background tones, the Foreground to Background gradient is the least demanding of the relative multitude of angles to alter and the one that is frequently demonstrated is generally valuable. We should utilize it to assist us with figuring out how to draw a gradient, and en route, we’ll perceive the way simple it is to change its tones to anything we need.
Drawing A Gradient With The Gradient Tool
Drawing a gradient with the Gradient Tool in Photoshop is essentially as simple as clicking and dragging your mouse. Click in your report to set a beginning stage for the gradient, then keep your mouse button held down and drag away from the beginning stage to where you believe that the gradient should end. As you’re dragging, you’ll see just a flimsy line demonstrating the course of the gradient. At the point when you release your mouse button, Photoshop finishes the gradient and draws it with your picked colors.
For instance, I’ll tap on the left half of my record, and then, with my mouse button held down, I’ll drag it over to the right side. Notice that up to this point, all we can see is a slender line between the beginning stage and the endpoint. If you have any desire to make it simpler to draw an entirely flat gradient, press and hold your Shift key as you’re dragging, which will restrict the point wherein you can drag. Simply make sure to hold on until after you’ve delivered your mouse button before delivering the Shift key or it won’t work.
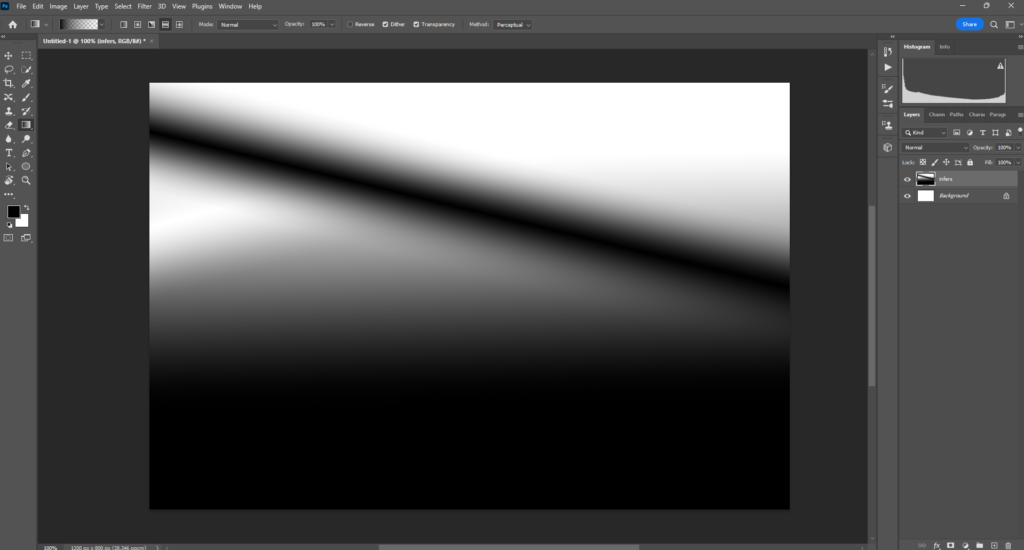
At the point when I release my mouse button, Photoshop draws the angle. Since my Foreground tone was set to dark and my Background tone was set to white, I end up with a dark-to-white gradient.
Turning Around The Colors
You can turn around the colors in your angle by choosing the Reverse choice in the options below. With Reverse selected, if I draw precisely the same angle, we see that this time, the tones show up on inverse sides, with white on the left and dark on the right. This is a helpful component, however, try to uncheck the Reverse option when you’re finished, generally, the following gradients you draw will likewise be switched.
Gradients don’t have to run evenly this way. They can run toward any path you pick. I’ll draw another gradient, this time top to bottom. Notice that I don’t have to fix or erase my current gradient. Photoshop will supplant the ongoing gradient with the enhanced one. I’ll click close to the highest point of my report, then keep my mouse button held down and drag descending towards the base. Similarly likewise drawing an even gradient, it’s a lot simpler to draw an upward gradient if you press and hold your Shift key as you’re dragging, trying to hold on until after you’ve delivered your mouse button before delivering the Shift key. Here once more, we see just a meager blueprint from the beginning.
At the point when I release my mouse button, Photoshop finishes the gradient, supplanting the underlying even one with an upward dark-to-white gradient.
Changing The Default Gradient’s Colors
Since the default angle gets its tones from the ongoing Foreground and Background tones, all we want to do to change the shades of the gradient is select various colors for the Foreground and Background. For instance, I’ll pick an alternate Foreground tone by tapping on the Foreground color pattern in the Tools board (the one that is at present set to dark).
This opens Photoshop’s Color Picker. I’ll choose red for my new Foreground tone, then, at that point, I’ll click OK to finish off the Color Picker. Then, I’ll change my Background tone by clicking its color pattern (the one right now loaded up with white).
This indeed opens the Color Picker. I’ll change the Background tone from white to a dazzling yellow, then I’ll click OK to finish off the Color Picker.
Notice that the color samples have been refreshed to show the new colors I’ve decided on for the Foreground and Background. The samples have been refreshed with the new colors. The gradient preview bar in the options bar has additionally been refreshed to show me what the new angle colors will resemble.
The gradient preview bar generally shows the ongoing angle tones. I’ll draw the angle, this time corner to corner, by clicking in the base left of my record and dragging to the upper right. Once more, there’s a compelling reason to need to fix or erase the past gradient. Photoshop will supplant it with the enhanced one.
At the point when I release my mouse button, Photoshop draws the red to yellow angle corner to corner across the archive.
Resetting The Foreground And Background Colors
Notice that if I open my gradient picker in the options bar, the Foreground to Background gradient’s thumbnail is additionally showing my new red and yellow tones.
You can change the colors for this angle any time you like by tapping on the Foreground and additionally Background tone patterns in the Options Bar and picking various colors. However, if you want to immediately reset the colors back to their defaults, making the Foreground color dark and the Background color white, just press the letter D (think “D” for “Defaults”) on your keyboard. You’ll see the patterns in the Tools board return to the default highly contrasting.
What’s more, you’ll see that both the gradient preview bar in the options bar and the Foreground to Background angle’s thumbnail in the Gradient Picker are showing the default tones again. Everything is currently back to how it was at first.
Drawing A Gradient On Its Layer
If we thoroughly search in my Layers board, we see that as yet, I’ve been drawing my angles straightforwardly on the Background layer.
The Layers panel shows the angle on the Background layer. Drawing on the Background layer might be fine for our motivations here, yet a vastly improved method for working in Photoshop is to exploit layers and put everything in our report on its different layer. That’s what to do, I’ll initially clean up my angle by going up to the Edit menu at the highest point of the screen and picking Fill.
At the point when the Fill discourse box opens, I’ll set the Contents choice at the top to White, and then, I’ll click OK.
Then, I’ll add another layer for my angle by pressing and holding the Alt (Win)/Option (Mac) key on my keyboard and tapping the New Layer symbol at the lower part of the Layers board.
Adding the Alt (Win)/Option (Mac) key while tapping the New Layer symbol advises Photoshop to initially open the New Layer exchange box where we can name the layer before it’s additional. I’ll name my layer “Gradient”, and then, I’ll click OK.
Photoshop adds another clear layer named “Gradient” over the Background layer. I can now draw my gradient on this new layer and keep it separate from all the other things (even though “all the other things” for this situation is simply the Background layer, however, it’s as yet a decent work process propensity to get into). I presently have a different layer for my gradient.
The Transition Area
One thing that is vital to comprehend with regards to drawing angles is that it’s not only the course in which you drag that is important; the distance between your beginning and end focuses likewise matters.
The explanation that you’re drawing with the Gradient Tool, alongside the bearing of the gradient, is the change region between the colors. The distance you drag from your beginning stage to your endpoint decides the size of the change region. Longer distances will give you smoother, more slow changes, while more limited distances will make crueler, more sudden advances.
To show you what I mean, I’ll utilize the Foreground to Background gradient set to its default highly contrasting. In the first place, I’ll draw a gradient from left to right, beginning close to the left edge of the report and finishing close to the right edge. The region between my beginning and end focuses will turn into the progress region between my two tones (for this situation, high contrast).
I’ll release my mouse button to allow Photoshop to draw the gradient, and because there was a wide hole between my beginning and end focuses, we’re seeing a smooth, exceptionally continuous progress between dark on the left and white on the right.
I’ll fix the gradient, just to make things more straightforward to see, by going up to the edit menu at the highest point of the screen and picking Undo Gradient. I could likewise press Ctrl+Z (Win)/Command+Z (Mac) on my keyboard. This time, I’ll attract my gradient to a similar bearing (left to right) however with a lot more modest hole between my beginning and end focuses.
At the point when I release my mouse button, we see that while this angle attracted a similar bearing as the one preceding, the progress between dark on the left and white on the right is considerably more unexpected and sudden. As may be obvious, the distance between your beginning and end focuses is just as significant as the heading about the general appearance of the gradient. A comparable gradient yet with a lot more modest progress region.
Before we continue, let’s have a look at my Layers board where that’s what we see, since I added another layer before, my angle is currently being drawn on the different “Gradient” layer as opposed to on the Background layer. Once more, it’s anything but an immense issue for this situation, yet getting into the propensity for keeping all that on its layer will make working with Photoshop much a ton simpler. The gradient currently sits on its layer over the Background layer.
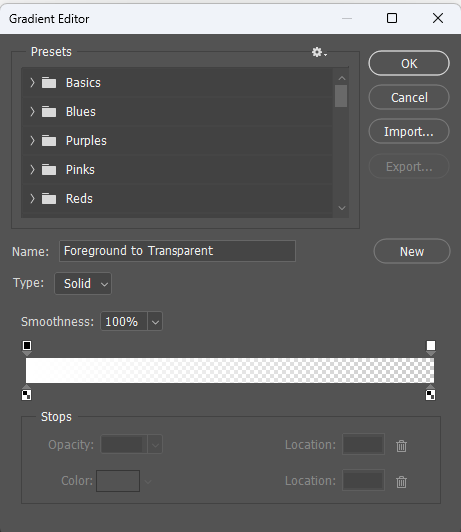
The Foreground to Transparent Gradient
Up to this point, we’ve taken a gander at Photoshop’s default Foreground to Background gradient, however, another that is frequently extremely helpful is the Foreground to Transparent gradient, and it merits taking a gander at because it acts as a piece uniquely in contrast to the others. I’ll choose it from the Gradient Picker by double tapping on its thumbnail. You’ll find it straightforwardly adjacent to the Foreground to Background thumbnail.
The Foreground to Transparent gradient is like the Foreground to Background angle in that it gets its tone from your ongoing Foreground tone, and that implies you can without much of a stretch change it by picking an alternate Foreground tone. What makes it extraordinary, however, is that there is no subsequent color. All things considered, it changes from a solitary tone into straightforwardness.
I’ll fix my ongoing gradient by going up to the Edit menu and picking Undo Gradient. Then, I’ll pick a color by tapping on the Foreground color pattern on the Tools board. Right now, it’s set to dark.
When the Color Picker opens, I’ll pick purple, then I’ll click OK. With my Foreground color currently set to purple, we find in the gradient preview bar in the Options Bar that I’ll attract a purple to the transparent gradient (the checkerboard design you can see behind the purple is how Photoshop addresses transparency).
The angle will currently run from purple to straightforward. I’ll draw an upward gradient from close to the highest point of my report down to the middle. At the point when I release my mouse button, it seems to be something I’ve drawn an essential purple to the white gradient. Notwithstanding, the white we’re seeing is really from the Background layer beneath the gradient. It’s not a part of the actual gradient.
The purple is from the gradient, yet the white is from the foundation underneath it. To demonstrate it, I’ll briefly switch off my Background layer by tapping on its permeability symbol (the eyeball symbol) in the Layers panel. This conceals the white foundation in the record, uncovering simply the actual gradient, and presently we can see that it’s a purple to straightforward angle. Once more, the checkerboard design is how Photoshop addresses transparency.
One more reason why the Foreground to Transparent gradient is unique from the others is that Photoshop doesn’t overwrite the past Foreground to Transparent gradient if we draw another over top of it. All things considered, it just adds the new gradient to the first. I’ll attract a second Foreground to the Transparent gradient, this time from close to the lower part of the record up to the middle.
I’ll release my mouse button, and instead of overwriting my unique angle, Photoshop adds my second one to it. If I drew a third or fourth gradient (perhaps one from the left and the other from the right) it would add those too. Now I’ll turn my background layer back by clicking again on its permeability symbol.
Furthermore, we’re back to see what resembles a purple-to-white (to purple) gradient, although we realize that the white is simply the Background layer appearing through the transparency.
The Transparency Option

The Foreground to Transparent gradient in Photoshop is perfect for things like obscuring the edges of a photograph or obscuring the sky in a picture to bring out more detail (which we’ll perceive the way to do in another tutorial). In any case, for the transparent part to work, you need to ensure the Transparency option in the Options Bar is chosen.
Ensure Transparency is turned on while drawing a gradient that utilizes transparency. If the Transparency option is switched off while attracting a Foreground to Transparent gradient, all you’ll wind up doing is filling the layer or determination with your picked Foreground tone. With the Transparency option switched off, Photoshop can’t draw the transparent part of the gradient.
Final Words
So this is all on how to make a gradient in Photoshop. In this instructional exercise, we took in the fundamentals of how to draw gradients in Photoshop with the Gradient Tool. Hope you have enjoyed our blog.
FAQs
How would you do a gradient blend in Photoshop?
Select the Gradient apparatus in the Toolbar. In the Options bar, pick the Linear angle style. Ensure the Reverse tones checkbox is unrestrained. Open the Gradient Picker from the Options bar and pick the third gradient pattern from the left, a dark to-white gradient.
Where is the gradient tool in Photoshop?
To utilize the gradient tool go to the Options bar and snap on the gradient ramp to choose a gradient option, for example, Foreground to Background tone, or snap on the little arrow to one side to open the angle list.
Where is the gradient tool in Photoshop CC?
Go to the Layers board, click on the Adjustment Layer button and select Gradient. This will add a gradient that fills the entire layer and has a vacant layer mask.


