While you’re making business designs or client projects in Adobe Photoshop, you might have to transform the colors on the whole or part of a document. How you make your change relies upon whether you need to change the colors in your report for all time or consolidate a modification that itself becomes flexible. Despite which sort of change best suits your project’s requirements, Photoshop tools, and methods can oblige your modifying objective.
Photoshop has different ways of applying color inversion. You can rearrange the shades of a single picture and different pictures. Here, we’ll tell you the best way to do both with the color inversion tools in Photoshop.
What Is Color Inversion?
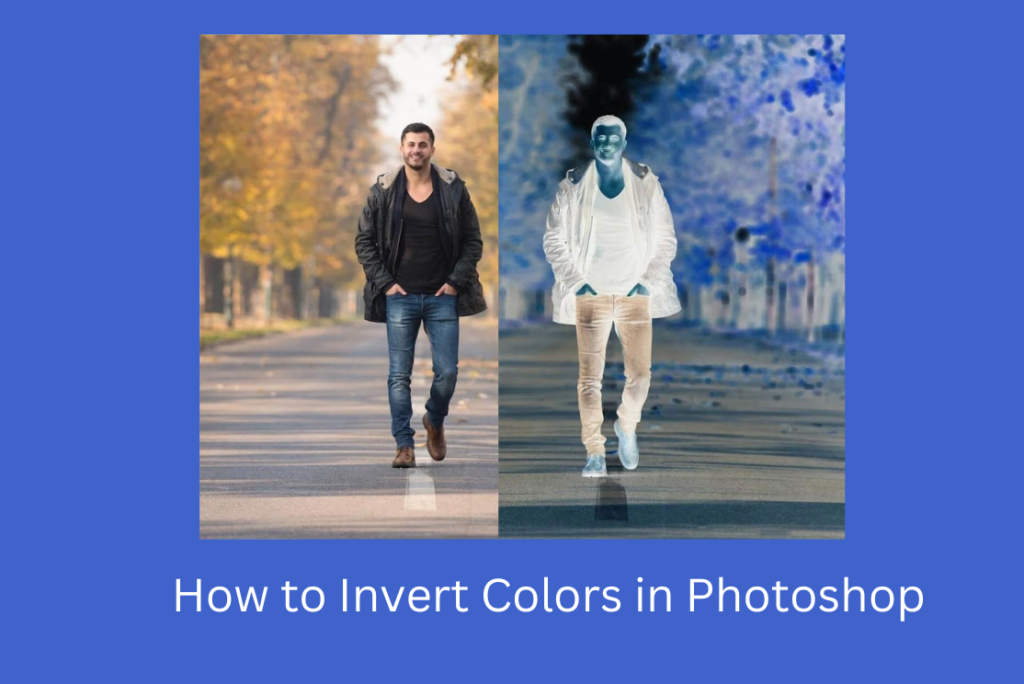
Color inversion is the most common way of applying the contrary colors in the range of the chosen colors in a picture. There are many tools available for modifying the shades of a picture including Photoshop.
Photoshop offers various ways of altering the shades of a picture. Here we will portray a couple of ways you can apply color inversion in Photoshop.
Step 1: Select Any People In The Image And Place Them On A Separate Layer
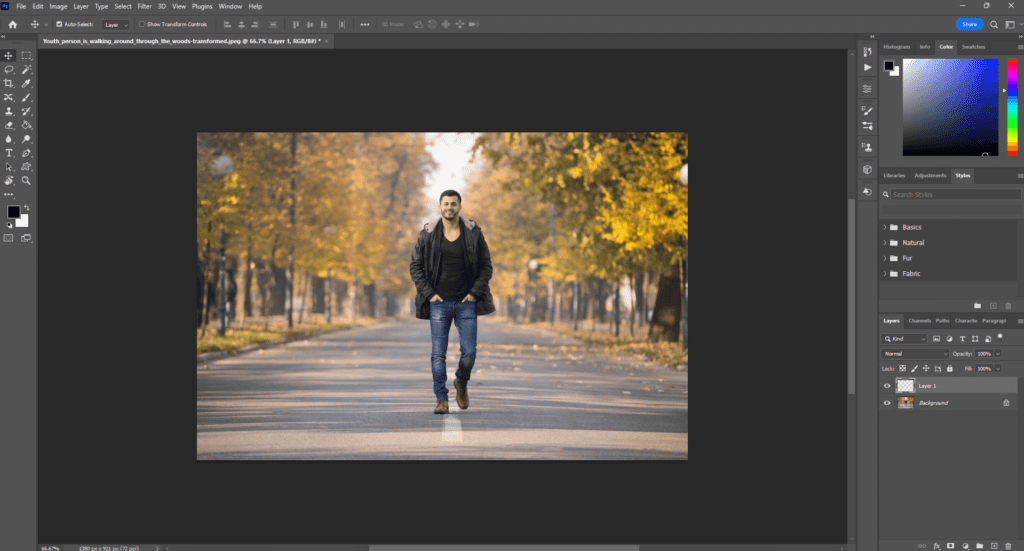
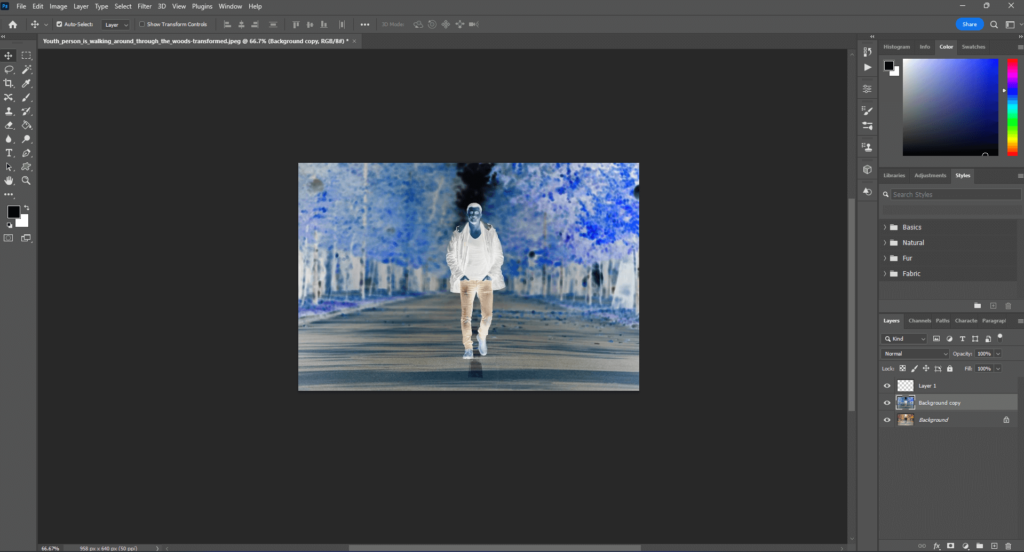
In my picture, a young person is walking around through the woods. I will rearrange the colors in the timberland, however, I believe that he should keep his unique tones, and that implies I’ll have to choose him and put him on his layer. That’s what to do, I’ll get the Lasso Tool from the Tools range.
Then, with the Lasso Tool chosen, I’ll draw a selection frame around him. A selected diagram shows up around the individual in the photograph in the wake of drawing a selection with the Lasso Tool.
When I have him chosen, I’ll go up to the Layer menu at the highest point of the screen, pick New, and afterward pick Layer using Copy, or I could essentially utilize the keyboard shortcut Ctrl+J (Win)/Command+J (Mac). Go to Layer > New > Layer using Copy.
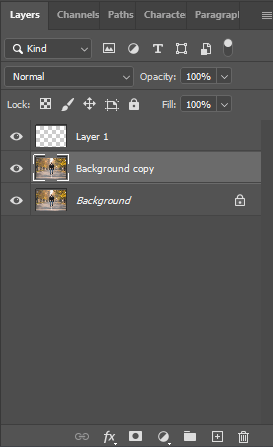
One way or the other advises Photoshop to duplicate my selected region of the photograph onto its layer, and we can find in the Layers range that the person presently shows up on his layer straight over the Background layer. Photoshop has naturally named the new layer “Layer 1”.
The selected region has been duplicated to its layer over the Background layer.
Step 2: Duplicate The Background Layer
Then, we need to copy our Background layer. Since we now have “Layer 1” chosen, we’ll have to choose the Background layer by tapping on it in the Layers range. You can see which layer is chosen because the right now chosen layer is constantly featured in blue. Click on the Background layer to choose it.
Then, to copy the Background layer, I’ll utilize a similar strategy we utilized a second before duplicating the selection to another layer. Be that as it may, this time, instead of going up to the Layer menu, picking New, and afterward picking Layer utilizing Copy, I’ll utilize the quicker keyboard shortcut Ctrl+J (Win)/Command+J (Mac).
At the point when you have something on a layer chosen as we did before, Photoshop duplicates just the chosen region to another layer. When nothing on the layer is chosen, Photoshop believes everything on the layer to be chosen and duplicates the whole layer to another layer straight over the first. We can find in the Layers range that a duplicate of the Background layer currently sits between the first Background layer and “Layer 1”.
Step 3: Invert The Background Copy Layer
To modify the colors in the picture, with the duplicate of the Background layer chosen, I’ll go up to the Image menu at the highest point of the screen, pick Adjustments, and afterward pick Invert:
Go to Image > Adjustments > Invert.
This alters every one of the tones on the layer, making each color its definite inverse tone, supplanting the greens and browns with fuchsias and blues. Notice that the individual in the picture has kept his unique tones, and that is because he’s perched on his layer over the layer that we recently upset.
Step 4: Change The Blend Mode Of The Inverted Layer To “Colour”
Tragically, modifying the picture not just rearranges the colors, it additionally transforms the iridescence (daintiness) values, making light regions dim and dim regions light. All I believe should do is change the colors while letting the brilliance values be, so to do that, with the altered layer chosen, I’ll go up to the Blend Mode options at the highest point of the Layers range and change the mix mode from “Typical” to Color:
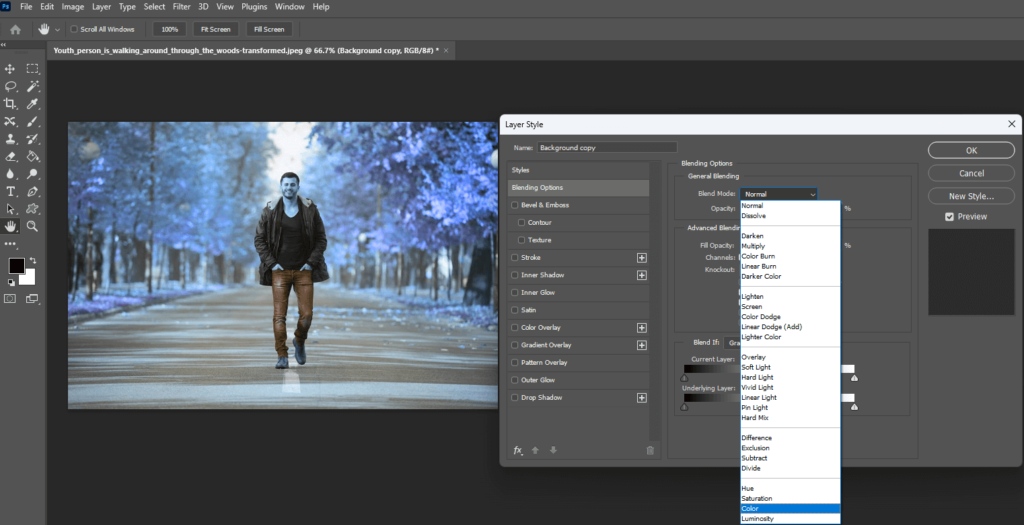
The Color mix mode reestablishes the first brilliance values in the picture, leaving just the tones inverted. The fundamental impact is currently finished, yet I will add a smidgen, even more, of a magical focus on the picture to finish it off.
Step 5: Merge All Three Layers Onto A New Layer Above The Inverted Layer
I want to combine all of the four layers into another layer, yet I need to safeguard the current layers. Photoshop offers us an order called Merge Visible, which we would ordinarily access by going up to the Layer menu at the highest point of the screen and picking Merge Visible from the list of options.
The issue is, of course, the Merge Visible order levels the picture, consolidating the different layers into a solitary layer, and that is not the very thing I need to do. I need to combine the layers onto another layer while keeping each of my different layers set up. That’s what to do, I should simply press my Alt (Win)/Option (Mac) key, then, while as yet holding the key down, I’ll go up to the Layer menu and pick Merge Visible:
To combine all noticeable layers while watching out for the different layers, hold down Alt (Win)/Option (Mac) while choosing the Merge Visible order.
Adding the Alt (Win)/Option (Mac) key while choosing the Merge Visible order advises Photoshop to keep the different layers set up, and we can find in the Layers range that each of the three layers has been converged on to another layer, which Photoshop has named “Layer 2”. Of course, Photoshop puts new layers straight above whichever layer was chosen. Since I had the duplicate of the Background layer chosen, the new blended layer shows up straight above it.
Step 6: Change The Blend Mode Of The Merged Layer To Overlay
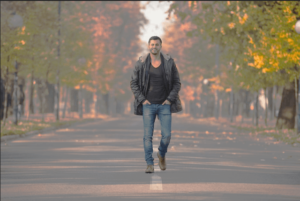
The Overlay mix mode helps contrast the picture by making light regions considerably lighter and dull regions significantly hazier, and we can see by taking a gander at the picture that the timberland presently has substantially more differentiation to it.
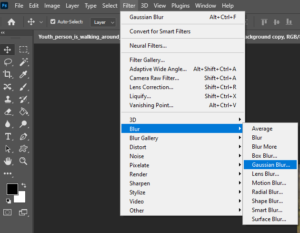
Step 7: Apply The Gaussian Blur Filter
With the mix mode set to overlay, we’re prepared to apply some obscuring to the layer. I’ll go up to the Filter menu at the highest point of the screen, pick Blur, and afterward pick Gaussian Blur.