The process of changing color in the changing color tool “Photoshop” is the basic need of any product photo designer, especially if you have a bulk of the same products. In addition to that, some personal and commercial photos have inappropriate and dull colors that have the power to distract viewers. So, the question pops up immediately, “How to change product photo color in Photoshop”
It is important to change color in Photoshop to avoid the mismatched effect of your commercial product photos on your sales and revenue service. More importantly, bad-color photos can seriously ruin your personal product photos and brand image. However, Photoshop gives you complete control of dynamic elements no matter if you completely transform the color of your product, selectively adjust specific areas, or even format other photo basic elements.
So…let’s bring your product photos to life and boost sales with Photoshop’s color editing magic. But before that, you ought to understand the storyline of aspects of design and colors.
Colors Speak Volumes:
Target colors or accurate colors are crucial element in photographic storytelling. This is because they have the power to evoke emotions and set the tone for an image. Cool blue colors can cast a somber mood, while warm yellow color intensity can transport viewers to a sunny beach day. However, photographers can be constrained by the colors in objects present in the scene even with a perfectly composed image. That is why color casting techniques are essential in unlocking the full potential of a product photography.
Let’s understand it with an example. A stunning image can be compromised by distracting background colors (or dull and lacklustre hues) on an overcast day. It can completely shift the mood and impact of an otherwise exceptional photograph. In such cases, color editing techniques can change the game and allow photographers to refine and enhance the color palette. Ultimately, they rescue an image from being overshadowed by unflattering color corrections.
The good news is that photo editing color software (color variation tool) like Adobe Photoshop can help you revive the vibrancy you initially saw through your lens or add excitement to your images. This process, known as color grading, helps in the selective colors enhancement process or alter the color properties of an image to achieve a specific and aesthetic color. With Photoshop, it’s superbly easy to select, change, and replace colors using simple color adjustments to the hue and saturation adjustment layer settings.
Steps to Change Product Photo Color in Photoshop
It’s time to make your commercial product photo color stand out with just a pop of color! This easy-to-follow tutorial will guide you through changing a portion of a wall frame’s complete color in Photoshop. In this way, you will transform your product image with the help of just a few steps. Here we go!
Step 1: Open Your Product Photo
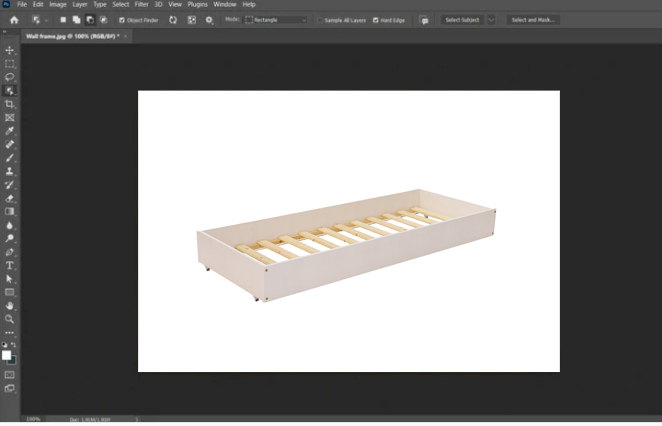
In the first step, you just need to open your product photo in the canvas of your first project of changing photo color in Photoshop. However, you need to choose the right image for which you intend to change its color. Here, you have three options while opening your product photo:
- You can open a single product photo/image to change its color.
- You can select multiple product photos and open them all on the canvas of Photoshop.
- You can change multiple elements of a single product photo and you have the option to even choose that element from a single photo (not an entire photo).
Have you selected your product photo(s)? If Yes then move towards the next step of the solution of “How to change a color in Photoshop?
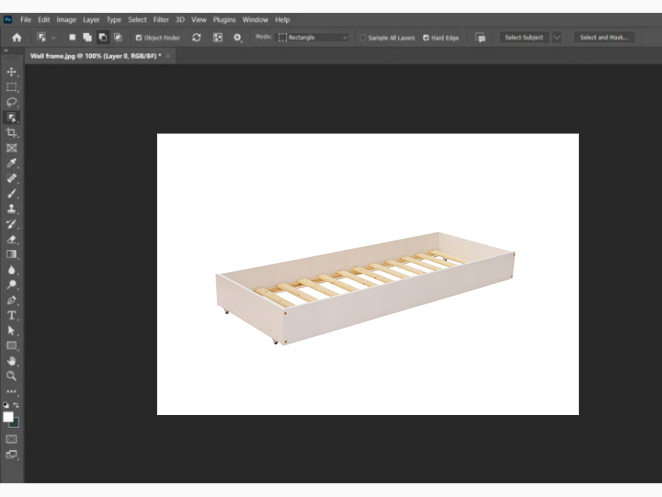
Step 2: Activate the Object Selection Tool

So…the next step in changing the color scheme of your product photo in Photoshop is very simple. Just grab the Object Selection Tool from the left sidebar. However, make sure it is set to “Rectangle” mode.
This is because the Rectangle mode will give you a rectangular selection. I think this saturation tool is your new best friend for making precise selections to change color in Photoshop.
Step 3: Frame Your Product Photo or Part of it!
Draw a rectangular shaped box around the product’s gorgeous photo or part of that photo that you want to change color in Photoshop. So, immediately draw a rectangular selection around the area you want to recolor without giving it a second thought.
Remember, this selection might include parts you want to keep unchanged. But you don’t need to stress about this because we will tackle that in the next part of this step!
If you want to exclude a part of the selection where you don’t want to apply changes, hold down the Alt key or select image option “Subtract from selection” under Options. Then, click on that part and drag around the area/part of your photo(s) you want to remove. This step will ensure that your color change does not affect that area. Simple!
Step 4: Pick a Solid Color Given in the Adjustment Layer
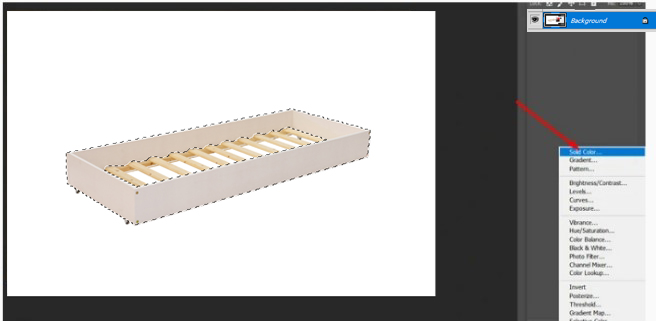
Now it is time for Step 4!
Move to the Layers panel and select the Adjustments panel layer for color replacement. From there, choose the solid color option from the list of items. This step will apply a solid / original color fill to the selected area of your product, and a handy color picker will appear too.
With this color picker, you can easily select a new color for your product. Remember, this solid color fill will only affect the area you selected earlier. So, you can make precise color changes with ease by following these mini steps.
Step 5: Change Color in Photoshop / Modify Color of the Selected Area

Now, you need to get creative with color accuracy! You can use the color picker to select your preferred shade for the product. The vertical slider or menu bar on the color picker allows you to browse through a color range and find the perfect one for your product.
So, you need to simply click on the desired color mode that you want to apply in your product photo. Then, your product photo will transform instantly and your product color profile will immediately change. According to my recommendation, you can experiment with different shades/auto colors until you find the one that suits your vision and needs and creates special color effects.
Once you have found the perfect color shade, click the OK button to apply the changes. This will confirm your color selection and apply it to your product. You will now see your product transformed with the new color card.
Important Note: Fine-tune your color selection!
Simply move the small circle on the color picker horizontally to adjust the saturation or intensity of the color. This process is called color adjustment. Similarly, you need to move the circle left or right if you want a more vibrant or muted tone.
To make the background color light or dark color, move the circle up or down. This movement of small circles in different directions will allow you to precisely control the color shade and achieve the perfect color for your product in Photoshop’s color panel.
Step 6: Change the Blending Mode
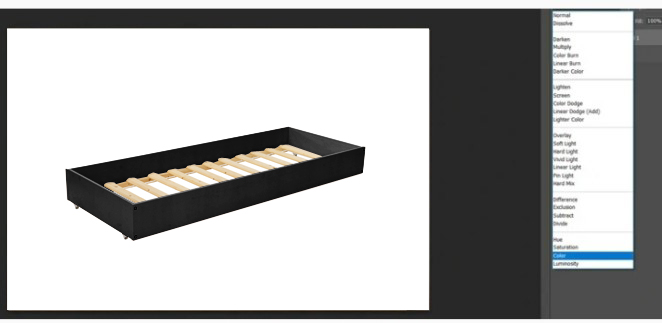
Next, let’s make the contiguous color cast rock and pop in Adobe Color Picker tool! Even though the color is now applied to your product, the details might be missing. To fix this problem, you need to simply change the blending mode of the solid color from “Normal” to “Color”.
This simple base color change will ensure that the color print is applied and the product’s original details and texture are also maintained. This ‘Normal’ Blending mode, that has built-in color value utility, will give you a more realistic and professional-looking result of image with color balance.
Step 7: Final Output
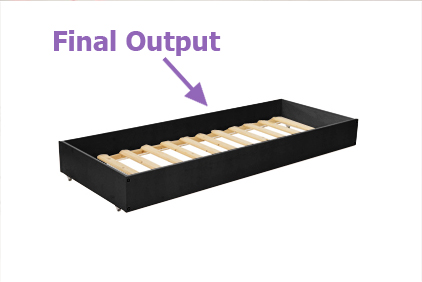
And that’s it about changing product color using a cohesive color story process while doing color adjustments precisely. We have successfully changed the color of our product photo while maintaining its details and texture. In your case, the final output should show your product with a modified color that looks realistic and vibrant along with all the details and clarity intact. You can now use that edited image or rich graphics for your design, marketing, or e-commerce needs after going through the color customization process.
Use Brush Tool in Photoshop to Change the Color of Photo:
I have another method to change the color of a photograph in Photoshop. I’m talking about using a Brush Tool. It’s also a worth-using way to change the color of your photos. So…here we go with the steps:
- Firstly, upload the product photo for which you want to change the color.
- Then, immediately create a new blank layer.
- Now, it’s time to choose the foreground color.
- After that, select the brush tool by pressing the B icon.
- Now, you can use the brush tool to paint the area you want to recolor. It will look unnatural at first glance but don’t worry. Move to the Layers panel and switch the blend mode from Normal to Hue. As a result, the new color will seamlessly blend with the original image. The result is a natural-looking color change that enhances your image.
- Lastly, fine-tune your image using the brush tool until you are completely happy with the result. Once you are satisfied, save your edited product image and admire your handiwork.
That’s all about accurately changing color formats, color fiend, color feature, color displays, and color differences in your products’ photos.
Frequently Asked Questions (FAQs)
1. Can I edit my product photo color in any palette?
Absolutely Yes! You can edit your photo color in any color palette. In fact, there are endless possibilities no matter if you are working in RGB, CMYK, or grayscale because every color meaning is different. Interestingly, you can utilize any color palette or mode that suits your design needs, or even create your custom palette while using color mix techniques and so on.
The Eyedropper color range tool makes color matching (range of colors) a superbly easy thing. In addition to that, there are numerous other methods at your end to change the color of objects that can help you effortlessly capture the exact shades you require. So, enjoy the flexibility and precision to bring your creative vision to life.
2. Why change the color of an object or product photo?
It’s a very simple color square – changing the color of object can enhance the image’s aesthetic appeal, enrich brand consistency, draw the attention of potential customers, evoke a specific mood, build customer trust, and accurately represent product photography in the commercial printing world.
It can also enable creativity and make an image stand out in marketing materials to suit an individual taste. In this way, you can transform the image’s look and feel just by altering the color. How cool is it? And thanks to Adobe Photoshop!
3. Why should I use Photoshop to change the color of my product photo?
There are many benefits of Adobe Photoshop as an image editing tool. However, I like it because Photoshop can change the color of your product photo for precise color editing down to the pixel level. Moreover, you can make exact curve adjustment layers to hue sliders, saturation levels, brightness, and other color settings with Photoshop.
In simple words, it allows you to change colors with a high degree of detail and accuracy. Thus, this level of precision while editing your image will give you a natural and professional edited image.
Final Word of Change Product Photo Color in Photoshop
After completely understanding and following the above-mentioned steps to change photo color in Photoshop, it’s your turn to change your product image. I would like to compliment that this photo color change method is non-destructive. It means you can easily toggle the edit ON or OFF whenever you want. Plus, you have the flexibility to make further adjustments to the color cast at any time by simply clicking on the adjustment layer and using the vertical slider. These types of flexible features allow you to experiment and fine-tune the color requirements to your heart’s content. And the best part is that you can do this without worrying about damaging the original image. So, choose a product photo you would like to recolor and follow the steps outlined in this tutorial. You will be able to change the color of your product image in less than 15 minutes with these easy-to-follow instructions. Go ahead, pick your product photo, and get started with the image or video edit process. If you find any issues, just let me know in the comments section.