
Adding drop shadows around objects makes photographs look realistic and professional. Do you know how to give your photos genuine settings? Or do you know what is the most ideal approach to get definite lighting to get the shadows you need? Here we will guide you to add a drop shadow in photoshop step by step. Indeed, with the assistance of Photoshop innovation, you can effectively do it without utilizing any equipment and lighting gear. In Photoshop with aptitude and tolerance, you can get the real settings and careful lighting that can give your product images an expert look. The whole method needs time, professional skill, and comprehension of how shadows work. Kindly stay with us until the finish of this article to know the whole process in depth to add a drop shadow using Photoshop tools. We will utilize Adobe Photoshop CS6 in this tutorial however you can easily do it in Photoshop CC.
So let’s start.
Photoshop Shadow Effect: an Overview of Drop Shadow
The image drop shadow is the ideal arrangement for advanced product photos. there are different ways to do it. But this method can be applied to add to visual wonderfulness for regular scenes. The essential inclusion is with an item photograph.
To achieve the drop shadow, an alternate layer style is made and the image is high over the base layers, then, at that point, the resolution of the photograph is grown up to 72 pixels for each inch, and another photograph document is made. The drop outline impact is implied in the photo to make the shadow. It is difficult to choose the right angle of the shadow layer styles. It is typically passed on to the right alignment id picked for the images to look proficient and sensible. At the point when it is not difficult to make the drop shadow layer styles for bigger things, it is difficult to make something very similar for the fine things like hairs, and so on However, the risky occupation lies in the subtleties. By the by, with a lot of professional services accessible, one can rely upon them for the picked services. The nature of the drop shadow impact depends on how the shadow is joined with the object. A genuine drop shadow (DS) impact should ensure that the shadow should not seem segregated to the item. The drop shadow (DS) strategy has changed the way that the photograph of the products of lifeless things shows up. As of now, it has been demonstrated that performed with precision can give an enchanting appeal to the photo. You can watch a video tutorial to learn more.
What Are Drop Shadows Used For?
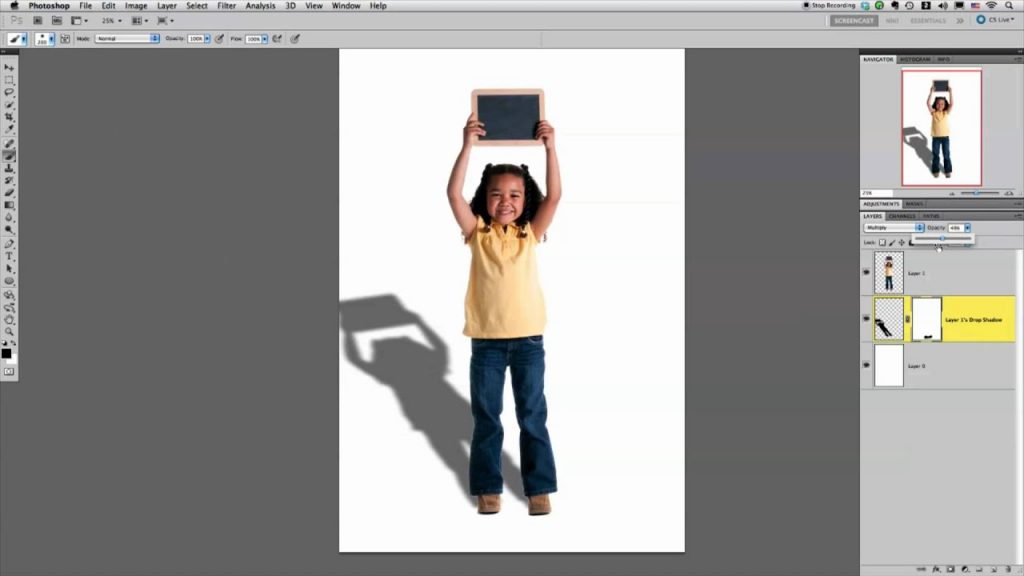
Making Photoshop Shadow Effect Under Object or Person
With regards to embeddings an individual or articles into another image with Photoshop, it is important to add a drop shadow to that individual or object to make objects trustworthy and practical. So how about we present such things first to display products on the live site. Drop shadow is a Photoshop instrument, that when used to a photo can give it an entire expert look. It is the most common way of acquainting shadow with photos that don’t have. You need to place the shadow at the right angle. This strategy is expected to foster the shadow impact of the item that includes wrong or weak impact. Likewise, it is exceptionally pertinent while the foundation needs to be changed to keep the nature of the shadow. Accepting this modern innovation helps to accomplish the best work for the client. It is one of the best approaches to make the photos look more alluring to the buyers by adding different effects. You can also try text effects. In a word, it is an intelligent fix to carry another appeal to the photograph when utilized at the right angle and with the right visual source. In a word, it is an intelligent fix to carry another appeal to the photograph when utilized at the right angle and with the right visual source.
Pros of Drop Shadow:
- Genuine Photo: You can give your photograph a more sensible look by adding the drop shadow effects.
- Upgrade polished methodology: It is critical why your photograph is more realistic than the others in the opposition.
- Work on quality: It is the most demonstrated approach to work on the nature of your item photo.
Cons of Drop Shadow:
- Drop shadow effects are appalling and not reviving any longer
- Drop shadows cause your design to feel out of date
- It effects give copying issues
Best Drop Shadow Settings in Photoshop:
1. Cast shadow:
2. Structure shadow:
- The bearing of the light.
- The distance of the light from the product.
- The complete number of light sources.
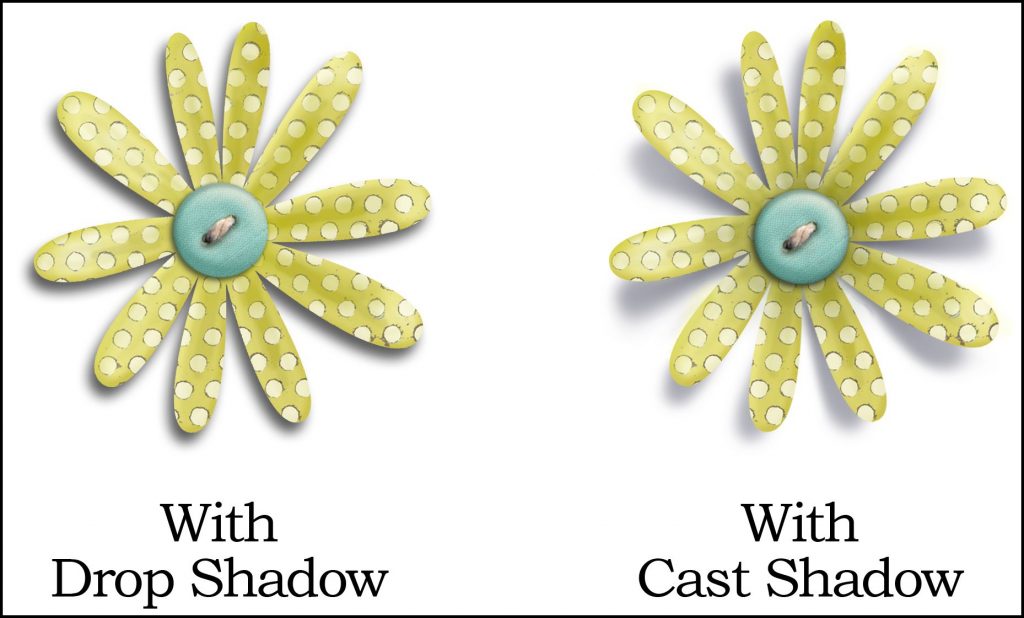
The distinction: Drop Shadow Vs Cast Shadow:
Adding a sensible shadow is an advantageous process. Then again, adding a drop shadow is a bit simpler than the sensible shadow to an article. A drop shadow is an unpleasant show of a shadow containing a similar size and measurement of the item. So changing your image into a three-dimensional cast shadow, it is fundamental then, at that point to follow the above-depicted strategy so your shadows consistently look extremely reasonable and proficient as well. Are you searching for a fast way that can help you boost your online business item and generate more sales? Well, assuming indeed, you are here at the ideal spot. Here you will get information about shadows in your photos for an online business that can expand your deals.
How to Add a Drop Shadow in Photoshop:
You can find different Photoshop tutorials online. But in this instructional tutorial, I will attempt to clarify adding a realistic shadow in Photoshop by discussing in-depth the following things-
- The drop shadow layer style: It characterizes how to shadow will mix with the background pixels.
- Change apparatuses: It permits to turn, resize, reflect, and misshape the object.
- The gradient tool: Use to draw all inclinations. It can bring any spiral, precise reflected, or jewel inclination into the shadow of your object.
- BlurTools – Critically need to paint a haze impact to your shadow. A paintbrush is available in this tool by which you can draw the haziness of the image or the shadow. You can adjust the blur size.
- Layer veils – It is a central instrument in shadow control. It specifically adjusts the straightforwardness of the layer style. Also, you can find blending modes.
- AlphaChannel – Use to decide the straightforwardness setting for a specific region or colors.
Adding a Drop Shadow in Photoshop
- Separate your object from the background.
- Add another background behind your separated item
- Select your cast shadow color
- Add a drop shadow effect
- Add a layer from your drop shadow
- Mutilate the drop shadow
- Add an alpha channel
- Add an inclination inside your alpha channel
- Obscure determination
- Add a layered veil
- Use global light and tidy up shadows
Step-1: Separate your objective item from the background
- At this level, select your photograph and adjust the size(which you need to add the shadow color).
- Open your layers (go for another document from where you were and afterward go for window and make the adage type layer)
- Remove your ideal item from the primary photograph.
- Adjust the size of the image on another white layer.
- Rename your unique record, (for example, disconnected one or background eliminated one and so forth) to lessen disarray with various layers palette since you make your shadows.
- To make the foundation undetectable snap on the eye icon close to the foundation layer. The eye icon is a great function.
Step - 2: Add a unique foundation behind your free object
- Pick your hidden background layer (in your layers palette).
- Go to Layer>New layer, or you can type shift+ control + N to add another layer
- This layer will proceed as your extraordinary foundation.
- Fill the new layer with a shading (by clicking to Edit>Fill)
- Select a custom brilliance from the DropDown Menu whenever needed to add a custom color design.
Step - 3: Resolution of your cast shadows color
- Shadows might show up in different colors. Select the structure shadow and fix the shade of your cast shadow. You need to place the shadow at the right angle to make a beautiful design.
- Then, at that point in your item, you need to consider the structure shadow.
- Select the structure shadow (Use the Eyedropper Tool)
- After the determination of the structure shadow, it will show up as your frontal area color.
- Snap-on the new forefront twice to get the frontal area shading box.
- Change the splendor (i.e., hazier, or immerse by moving the shading field).
- When done, click ok.
Step-4: Adding a Photoshop Drop Shadow
- Select the distinctive object layer masks from the pop-up menu
- Click on the fx button after selecting the article (End of your layer range)
- Then, at that point, pick the drop shadow on the discourse box
- Set the shadow color to the closer view color (with the assistance of the Drop shadow exchange box),
- The distance, haziness, spread, and level of size are not that huge today since you can change all that later. However, in the screen capture underneath you can apply the qualities as a starting point.
- Click ok (When you feel delighted with your Drop shadow creation).
Step-5: Add a layer from your drop shadow
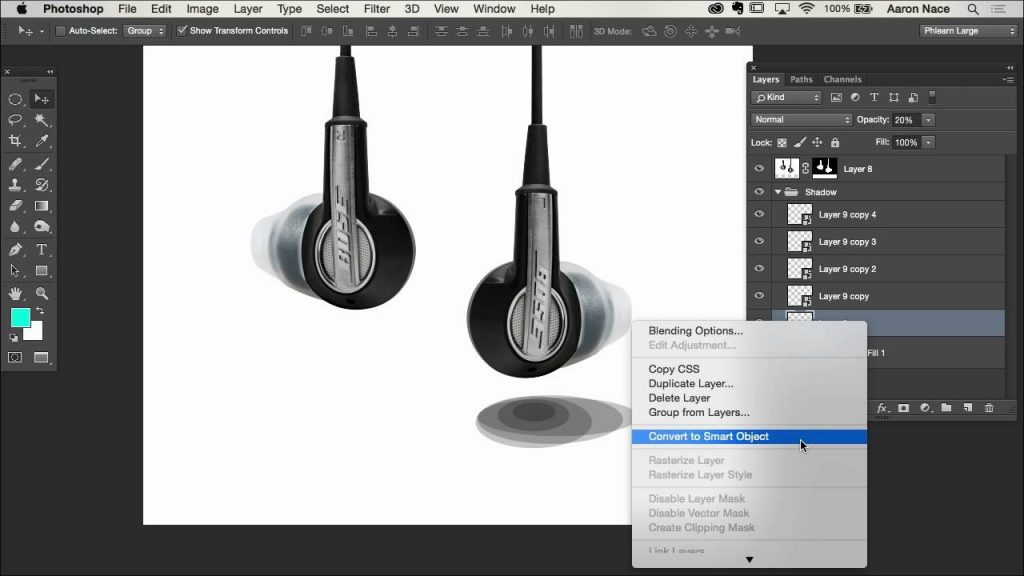
- Go to Layer>Layer class >Add Layer (assuming you need to Isolate your drop shadow from its layer)
- Accordingly, you can change the shadow of the item
Step - 6: Adjusting drop shadow Color
- Pick the recently added drop shadow layer (In your layers palette)
- Go for Edit>Change>color to draw your drop shadows under the floor.
- Select the space of your shadow you need to change.
- Apply the “Rectangular Marquee Tool”
- Presently Edit, change, and Distort/deviant to adjust the specific part of the shadow.
- Utilize the change and apply your Eraser tool and Paintbrush to settle any side of your shadows once you fulfill your change.
- Adjust the layer blend mode of the current shadow layer back to increment
- Additionally, bring down the “Fill” up to 75 percent (75%).
Step-7: Add an alpha-channel
- Go to Window>Channels
- Open the “Channel Palette”
- To pick another channel click on the range table.
Step-8: Add an inclination inside your alpha channel
- Select the Alpha-1 direct in your channel range since you would pick a layer. Presently for the whole mode, you need to guarantee that the look is flipped on.
- Select the inclination programming from the range
- Ensure that the background is fixed to white
- Furthermore, the front ground is fixed to a dark color
- Click on the external layer of your shadow (when you discover the slant setting is fine)
- Draw the incline or inclination to the specific space of your shadow which is near the object.
Step-9: Blur choice
- In your channel range click on the Top channel (either CMYK or RGB depending on the shading style of your photograph) to pick your shading channels and deselect your alpha channel.
- Go to the layers range to guarantee you have picked your drop shadow layer
- Go to Filter > Blur > Lens Blur
- You should look at the case. Pick the Alpha 1 under the profundity map from the source drop-down menu bar.
- Make the Blur Focal distance at 0, and close to transform tool genuinely take a look at the case.
- Press ok to leave various qualities at their defaults.
Step - 10: Add a layer cover
- Go to Select > Load selection. An exchange box will come, and it will give you huge command over your haze settings.
- Select Alpha-1 and guarantee the radio choice is tried.
- When done, click ok.
- In the alpha channel, you can track down the haziest piece of the inclination or slant you made.
- By composing Shift + Control + I or Choose backward by going to Select > select converse.
- Click on the Layer Mask choice in your layers range toward the finish of the range.
- While the veil is utilized, the shadow will look “blur” since it withdraws into the distance.
Step-11: Light source and clean up shadow
Utilize a Variety of Shadows
Frequently Asked Questions
What is the drop shadow effect in Photoshop?
Why can’t I see my drop shadow in Photoshop?
How does drop shadow work?
What is an inner shadow in Photoshop?
How do you add a shadow to a picture?
The most effective method to Add Shadow to Photos and Make Your Goods Look Excellent.
- Step 1: Remove the Background. PhotoScissors eliminates the foundation for you, this activity requires in a real sense few moments.
- Step 2: Drop Shadow.
- Step 3: Fine-Tune the Shadow and Save the Result.
- Step 4: Save the Result.


