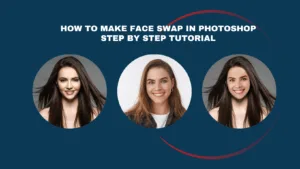
Have you ever been scrolling and seen a photo that just made you do a double-take? Something felt a little off, right? Well, there’s a good chance you’ve seen a face swap Photoshop in action. Today, we’re going to pull back the curtain on one of the coolest, most powerful tricks in the Digital Artist Toolkit: the Photoshop face swap.
So let’s start with a question. Just take a look at this photo right here. Seems pretty normal, yeah? But what if I told you that the face you’re looking at isn’t the one that was actually in the original picture? That’s exactly what we’re going to do in this Photoshop face swap tutorial. We’re going to completely demystify how to face swap in Photoshop. I’m going to walk you through a step-by-step face swap so you can create your own edits that are a totally seamless Photoshop face swap and convincing.
Let’s dive below!
Overview of Methods
So you’ve basically got two main paths you can take for a face swap in Photoshop. First, there’s the manual face swap. Think of this like being a digital sculptor; you have total, absolute control over every little detail to replace the face in Photoshop, but yeah, it takes a bit more time. Then there’s the automatic Face Swap Photoshop, where you basically let the Face Swap Photoshop AI act as your co-pilot. It’s way faster to Photoshop swap faces when you’re in a rush.
We’re going to cover both how to use Photoshop to swap faces manually and how to perform a face swap using Photoshop AI so you can pick the best tool for the job. Whether you need a simple head swap in Photoshop or a complex reconstruction, knowing how to head swap in Photoshop using these two methods gives you the ultimate flexibility.
Method 1: Manual Blending (Layer Masks)
All right, let’s dive right into method one, which I like to call the artisan’s approach. This is for all you perfectionists learning how to Photoshop faces. It’s all about precision, it’s all about control, and it’s perfect for when you need to get every single detail just right as you figure out how to replace a head in Photoshop.
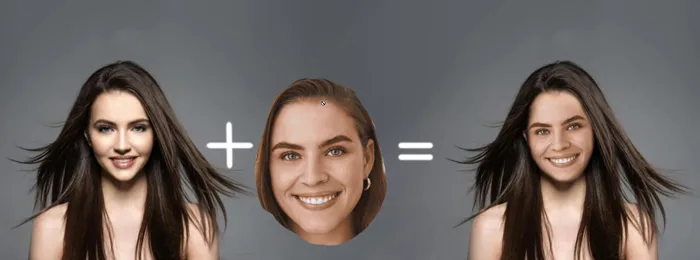
Okay, so first things first, we have to get our layers set up. You’ll bring in your photos and place the new face on a layer right on top of the original image. Then you’ll use the free transform tool to get your selection roughly scaled and positioned. And here’s a great little tip: just lower the opacity of that top layer. That way you can see both faces at once and line them up perfectly as you learn how to Photoshop a face onto another body. Now the real secret sauce to making a face swap look amazing is the layer mask.
The best way to think about it is like a magic mask. It lets you hide the parts of the new face you don’t want and reveal the original photo underneath. And what’s so great about a layer mask face swap is that it’s non-destructive. That means you can mess up, go back, and make changes, and you never, ever damage your original layers.
The Steps at a Glance:
- Open & Layer:
Put your main image and the new face image in the same Photoshop file, with the new face on a layer above the primary image.
- Align Faces:
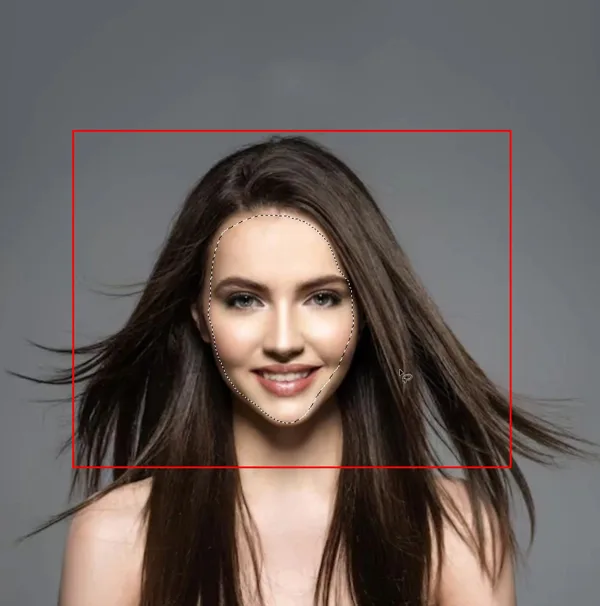
Using the Move Tool (V) and Free Transform (Ctrl+T/Cmd+T), you can approximately move and scale the new face over the old one. To see through, lower the opacity.
- Add Mask:
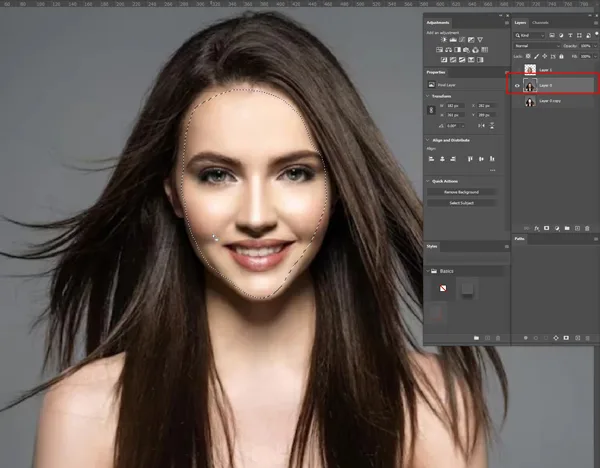
In the Layers panel, choose the face layer and click the Add Layer Mask button (rectangle with a circle) at the bottom.
- Paint & Blend:

Pick the Brush Tool (B) and use black to hide sections of the top face (showing the bottom) and white to bring them back. To make the transitions smoother, use a soft brush and a lower opacity.
- Refine:
Use the Clone Stamp Tool (S) and the Blur Tool (R) to make final adjustments, making sure that the skin tones and lighting match using Adjustment Layers (Hue/Saturation, Curves).
So once you’ve added that layer mask, you just grab a soft black brush tool and literally start painting over the edges of the new face. You’ll see it just start to melt away as you discover how to blend faces on Photoshop and blend right into the image below. It’s so satisfying. And hey, if you paint away too much, no big deal; just switch your Brush Tool to white and you can paint it right back in. To really polish the texture, you can even use the Healing Brush Tool later. It’s really that easy to learn how to change faces in Photoshop with total precision.
Method 2: Automated Blending (Auto-Align/Blend)
Alright, now for the fun part: the automated method. This is where we let Photoshop’s Face Swap AI do all the hard work for us. This is definitely the way to go when you’re in a hurry but still want a result that looks fantastic. But before we unleash the Adobe Photoshop Face Swap AI, there’s one super important little step we have to take.
We need to convert our new face layer into what’s called a Smart Object. What that does is it basically puts a protective little container around your image, which means you can stretch it, shrink it, and edit it all you want without ever losing image quality. OK, so once you’ve got your Smart Object, all you have to do is select both layers, the new face and the original. Then you’re going to head up to the Edit menu and hit Auto-Align Layers. The Face Swap Photoshop AI just figures it out.
After that, you go right back to that same menu and choose Auto-Blend Layers. I mean, with just a couple of clicks, Photoshop does all this complex analysis to ensure seamless tones and colors and creates a really seamless blend for you. It’s amazing how easy it is to learn how to use Photoshop AI to swap faces.
The Steps at a Glance:
- Prepare:
Open both pictures, choose the face you wish to switch, copy it (Ctrl/Cmd+J), and then paste it onto the other picture. Right-click on the face layer and choose “Convert to Smart Object.”
- Align:
Choose both the face layers and the body layer, then go to Edit > Auto-Align Layers and choose “Stack Images.”
- Blend:
Select two layers (or all three) and then go to Edit > Auto-merge Layers. Choose “Stack Images” to let Photoshop merge them automatically.
- Clean Up:
Use a soft black brush to clean out any sections you don’t want or sharp edges after applying a layer mask.
But you know, even with all this incredible AI power, that final human touch is what really sells it. Photoshop automatically creates a layer mask for you during the Auto-Blend Layers process. So you can just grab that soft black brush again and gently clean up any little edges to perfect those seamless tones and colors. It’s that final 10% that makes all the difference.
Pro Tips for Believable Results
So you’ve got the basics down for both methods, but what’s the difference between a pretty good face swap and one that’s just completely mind-blowing and believable? Let’s get into a few of those pro tips that will really take your work to the next level.
Honestly, the key to a believable edit is all in the details, and it starts before you even open Photoshop. Try to find source photos where you can match the angle and, crucially, where the lighting is already pretty similar; use the eyes as your reference point to get everything centered. That’ll save you so much work.
Then when you’re editing, use Smart Objects so you can transform and warp the features without losing any quality. You’ll want to blend colors using adjustment layers to perfectly match the skin tones. And of course, always, always focus on edge blending with a soft brush on your layer mask to get that smooth feathered edge that makes the whole thing look real. If you have gaps around the hair or neck, a quick hit with Content-Aware Fill can fix those spots in a snap.
At a Glance:
- Match Angle:
The best swaps happen when the faces in the images are in the same place.
- Use Smart Objects:
Keeps the quality of the image when it is scaled.
- Blend Colors:
To match skin tones and lighting, use Curves, Hue/Saturation, or Color Balance adjustment layers that are clipped to the face layer.
- Edge Blending:
Use a light brush and the mask.
So we’ve walked through all the technical stuff, right? The clicks, the tools, and how to blend faces in Photoshop, but let’s just zoom out for a second and think about the bigger picture here.
FAQs
How to make a face swap in Photoshop in 2026 on an iPhone?
Open the Photoshop Face Swap app on iPhone. Select the face with Face Swap Photoshop mobile tools. Align features using Face Swap Photoshop iPhone transform controls. The Photoshop Face Swap app for iPhone blends layers.
Is there a way to face swap in Photoshop for free?
You find Photoshop face swap free trials online. Adobe Express offers free Face Swap Photoshop credits. The Face Swap Photoshop free app version allows basic edits. Many users choose a face swap alternative.
What are the new features for face swap in Photoshop 2026?
The Face Swap Photoshop 2026 update adds partner models. You use Photoshop AI Face Swap for realism. Generative fill for face swap handles hair details. These Head Swap Photoshop 2026 tools work offline.
How does Photoshop AI improve face swap capabilities?
Modern Photoshop AI face swaps match skin tones. Face swap using Photoshop AI corrects lighting. The Adobe Photoshop Face Swap AI tool fills missing gaps. Every head swap photoshop AI looks natural.
Final Thought
Look, as this technology gets better and easier for everyone to use, whether you are using Photoshop CC 2019, Photoshop 2020, or the latest version, that line between what’s real and what’s fake is just getting blurrier and blurrier. You now have the tools, and you have the power of Photoshop to create your own reality. So the real question is, what are you going to do with it?
If you are unable to do the face swap using Photoshop, Zenith Clipping is here to help you with that!