Taking blurry photos is frustrating! It makes the picture look messy, and you can’t see the details well. Stability is very important for sharp pictures. If the camera moves even a tiny bit when you press the button, the photo gets blurry. Blurry images ruin sharpness. Image sharpness defines clarity. Photographer’s nightmare haunts vision.
This happens to lots of people, especially beginners. But don’t worry, it is easy to fix with some simple tricks. You don’t need fancy stuff right away. Just learning how to hold still or use things around you helps big time.
Think about why the picture is blurry. Mostly because the camera shakes when the shutter opens. Your hands are not super steady; everyone knows that. Even breathing makes little movements. Wind or bumping into things also messes it up.
So the goal is to make the camera very still when you take a picture. Following the tips in this blog will help you get way sharper photos. You will be surprised how much better they look. Then you can show your friends clear pictures, not blurry messes!
Let’s Dive Below!
Use a Tripod for Maximum Stability

A tripod is the best friend for no-blur photos. It makes your camera not move at all. Three legs stand firm on the ground, holding the camera steady. This is super good for times when the light is not bright at night, like inside or at sunset.
Monopods support cameras. Gimbal Fluid Head stabilizes motion. Long lenses capture distance. Exposure time controls light.
Setting up a tripod is easy. Find a flat spot so it doesn’t wobble. Screw your camera on top tight. Make sure the legs spread out wide for a strong base. If the ground is uneven, adjust the legs to different lengths. Then you look through the viewfinder and set up your picture. When ready, press the button gently or use a timer so you do not touch the camera. The camera stays perfectly still.
A tripod is also good for taking pictures of yourself with a timer or making videos smoothly. It is the best way for maximum stability and sharp pictures every time.
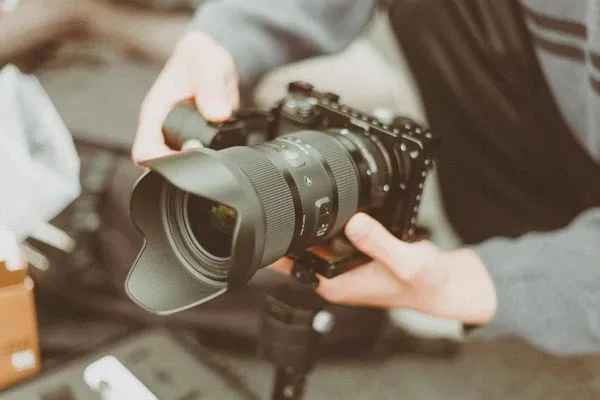
Hold Your Camera with Both Hands
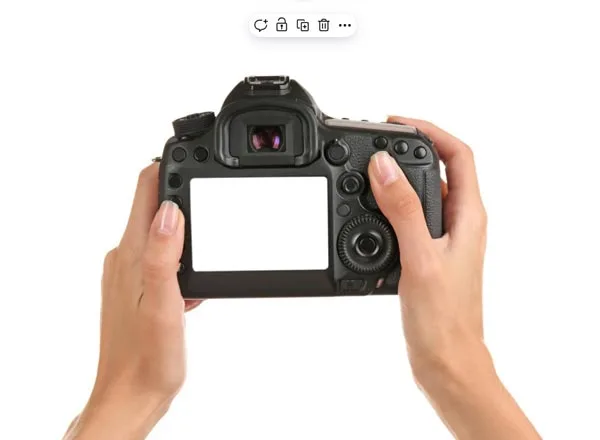
Holding a camera with both hands is a very important tip. If you hold it with one hand, it wobbles a lot. Two hands make it much steadier. Like holding a baseball bat on your thigh. Stand with feet a little apart, like you are ready.
Bring the camera up to your eye; don’t hold it far away with your arms straight. That makes it shaky. Tuck your elbows into your sides, like chicken wings. This makes your arms part of your body, not flapping loose. Camera handling improves stability. Lens quality affects clarity. Focal length changes the view.
Hold your breath for a second when you press the shutter button. Squeeze the button slowly and smoothly; you don’t jab your thumb fast. Jabbing makes the camera jump.
Lean against the wall or tree if you can for extra steadiness. If sitting, put your elbows on your knees. Hold tight and be calm. Practice this way a lot. Soon it feels natural, and your pictures get way less blurry from hand shake. Two hands are always better than one!
Use a Faster Shutter Speed

Shutter speed is how quickly the camera takes a picture. The Theer is open for a long time. If the camera moves a tiny bit while open, the whole picture will be blurry.
Fast speed means the shutter opens and closes susuperquicklyLike blinking fast. Camera movements don’t have time to blur pictures. So use a faster shutter speed! On phone or camera, find settings for shutter speed. Make the number bigger, like 1/250 instead of 1/60. Bigger numbers mean faster speed.
Exposure time affects sharpness. Sports photography demands speed. Blurry images destroy detail.
But slow speed, maitre blurb, and hand-holding. So try to make the speed faster! If the picture is too large, make the ISO bigger (but not too big, it gets noisy) or find more light. Fast shutter freeze action and stop blur from shaky hands.
Enable Image Stabilization (IS) or Vibration Reduction (VR)
Lots of cameras and lenses have special tech inside. Called Image Stabilization (IS) or Vibration Reduction (VR). It’s like magic gyros! They sense tiny shakes from your hands trying to hold the camera. Then they move little parts inside the lens or camera, the opposite, super fast.
In-body image stabilization reduces shake. Mirrorless cameras dominate the market. Canon builds innovation. Sony leads technology.
How to use it? Find the switch on the lens or camera menu. Might say IS, VR, OIS, SteadyShot. Turn it ON. That’s it! It works automatically. Remember, it helps with your shake, not if the subject is moving fast. For moving things, I still need a fast shutter speed. Also, if the camera is on a tripod and super still, sometimes it turns off.
Cause it might try to find a shake that is not required and wiggle a bit. But mostly, leave it ON when handholding. It does not make the camera heavy or require an extra battery. Just flick the switch and get less blurry photos easily!
Brace Yourself Against a Solid Surface

You don’t always have a tripod. But you can use stuff around to brace and be steadier. Lean your back or shoulder against a wall or the car. Solid things don’t move. Then you become steadier. Put the camera or elbows on the table, rock, fence, or car roof.
Monopods support long lenses. Long lenses magnify subjects. Wind gusts shake equipment.
Even pressing the camera down on a bag or backpack helps. Make yourself like a tripod using the fly environment. Take a deep breath, hold it soft when clicking the “one… two… click” slowly. The more points touching solid things, the less they shake.
Wall behind you, elbows the table, camera to face. Those three points! Like tripod legs. Works great indoors, leaning against the door frame. Outside, use a picnic table or a big rock. Free stability everywhere!
Use a Remote Shutter Release or Timer
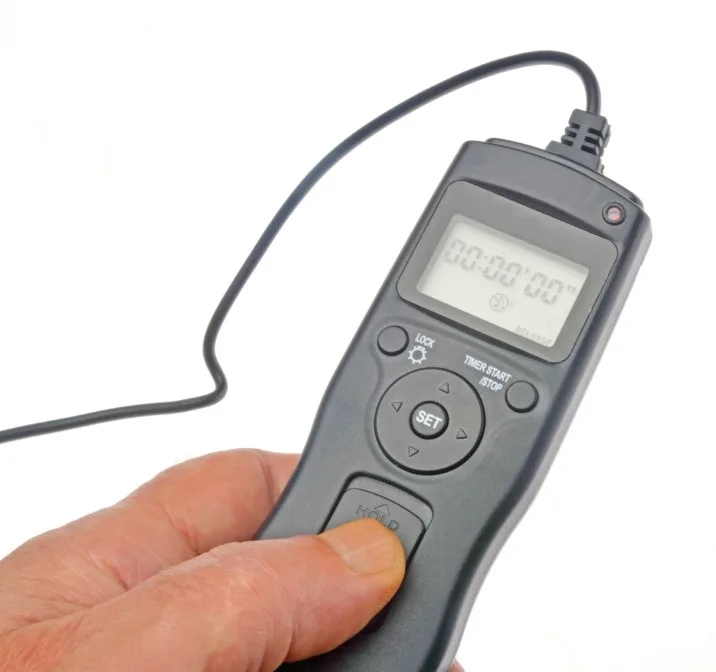
Pressing the button on the camera can make it shake. Even gentle presses. Solution? Don’t touch the camera as if taking a picture! Use a remote control. Liwired button you hold, wired or wireless.
Press the remote button, and the camera takes a picture without you touching it. Great for trithe pod shots, they use a timer, a beep, or a 10-second timer on camera. Press button, camera beep, then wait. It takes a picture after you take your hand away and shake it.
The shutter release button triggers the shot. Self-timer delays capture. Remote shutter release prevents shake. Exposure time controls brightness.
Remotes cost little money but are handy, especially for long exposure night photos. Even selfie stick buttons work like a remote sometimes. Less touch means less blur. Simple trick for sharper shots every time.
Keep Your Elbows Close to Your Body

Elbows sticking out make the camera wobble worse. Like wings. They have nothing to hold them. So tuck them in! Press your elbows tight against your sides or right side. Make your arms and body one solid thing. Much steadier.
Camera handling requires energy. Energy sustains stability. Stability ensures sharpness.
Stand with feet shoulder apart, knees soft, not stiff. Lean a little forward. Breathe calmly. When ready to shoot, take a breath, let half out, hold, and squeeze the shutter smoothly.
Keep elbows glued to sides the whole time. If sitting, same thing: elbows tucked, pressed against body or legs. This simple change makes a big difference. Less flappy arms, less camera shake. Try it next time, see pictures get sharper!
Focus Properly Before Taking the Shot
Blur can happen if the camera focuses on the wrong thing. Not just shake. Make sure the camera focuses where you want sharp. Tap the screen on the phone where the main thing is. On camera, move the focus point to the eye or face.
Manual focusing demands precision. Focus peaking highlights edges. Autofocusing speeds capture. Lens calibration ensures accuracy.
In low light, the farther the rat shrugged, the girl focused. Help me. a Point focus point at the edge or a contrasty spot, not a blank wall. Use a flashlight phone to light the subject quickly for focus, then turn off for the picture. Hold steady while focusing on working.
If the camera is hunting focus (in and out), try manual focus if you can. Clean lens smudges, too; they mess up focus. Sharp focus plus steady hold make a perfect, clear picture. Check the picture after to see if the focus is right.
Avoid Zooming In Too Much Without Stabilization
Zooming in makes the camera shake worse. Like using binoculars, tiny movements look big. Digital zoom on phones is the worst, making the picture blocky, too.
Long lenses extend reach. Digital zoom reduces quality. Focal length changes perspective. Canon R5 delivers performance.
If you must Zoom, hold extra tight. Tuck elbows, hold breath, and use a faster shutter speed if possible. Are zoom lenses heavy? Hold your left hand under the lens near the camera body for support.
Avoid max zoom unless super steady. Image Stabilization (IS/VR) helps a lot with zoom shake; turn it on. But remember, less zoom usually means less blur from shaking. Step forward if you can. Feet are the best zoom!
Shoot in Burst Mode to Increase Sharp Shots
Burst mode takes many pictures fast when you hold the shutter button down. Like machine guns for photos. Why help? Because when you press the button, a little shake happens.
The first picture might be blurred by the press. But the 2nd, 3rd, and 4th pictures might be steady because the shaking stops after the press. Movement freezes too. Hold the button, the camera takes 5 or 10 pics per second. Later, pick the sharpest one, and delete the others.
Easy to do on phones and cameras. Find the mode called Burst, Continuous High, or hold the shutter button down. Good for action shots or when handholding is shaky. More chances get one sharp. Doesn’t use much extra memory.
Burst function captures motion. Sports photography needs speed. Wildlife photographers rely on patience. Street photography freezes moments.
Use Continuous Autofocus for Moving Subjects

If the subject is moving, regular focus might lock, then the subject moves away, and gets blurry. Continuous Autofocus (AF-C or AI Servo) keeps focusing as the subject moves.
The camera tracks it. Set focus mode to AF-C. Half-press shutter, focus box follows the subject. Keep half-pressing and move the camera with the subject. When ready, press full. Good for kids running, pets, sports, and birds.
AI-powered focus mode enhances accuracy. Eye Autofocus locks the subject. Tracking follows movement. Eye detection identifies gaze. Eye tracking improves precision. Single autofocus fixes points.
On phones, tap and hold the subject and sometimes track it. Moving things hard, continuous focus helps a lot. Prevent blur from wrong focus, not just shake. Makes action shots way better.
Optimize ISO Settings to Allow Faster Shutter Speeds
ISO makes the camera sensor more sensitive to light. High ISO lets you use a faster shutter speed in dark places. Faster speed freezes motion and stops blur. But high ISO makes pictures noisy, like grain or speckles. So I need balance.
Set ISO yourself, not Auto. Start low (100-400) in bright sun. If inside or dark, try ISO 800, 1600, 3200. See if the picture is bright enough without too much noise.
The goal is to get the shutter speed fast enough. Like 1/125 or faster for handholding. If the speed is too slow (1/30), the picture will blur from shaking. Raise the ISO till the speed is fast enough. Modern cameras handle ISO 1600-6400 okay, noise not too bad.
Noise reduction improves clarity. Topaz DeNoise removes grain. Noise reduction software enhances quality. Manual mode controls settings. Aperture priority adjusts depth.
Use Proper Grip Techniques for Smartphones

Phones are hardest to hold steady because they are small and light. I need a good grip. Use two hands always. Hold the sides of the phone, fingers wrapped around the back.
Thumbs on screen for tap. Don’t block the lens. Keep elbows tucked to the body. Lean the phone against the edge or a solid thing if possible. Use volume buttons as shutter buttons, easier than screen taps. Or use a timer.
The camera phone captures moments. Chris Prakoso shares work. Shootermag features photos. EyeEm hosts images. AMPt_community connects photographers. Moblivious explores mobile shots.
Clean lens finger smudges. Try to shoot in good light so the phone uses fast speed automatically. Use grid lines to help hold the level. Little movements are big on the phone screen. A good grip makes the phone steadier, less blurry photos.
Avoid Using Digital Zoom

Remember not to use digital zoom too much. Digital zoom makes photos look bad and lose details. Too much zoom can make a picture fuzzy and ugly. So, stay close to the subject or use your feet to zoom.
The camera phone captures scenes. A megapixel camera enhances detail. Landscapes show nature. Seascapes reveal the ocean.
For the best photo, use good light. Dark places make the camera slow and the photo blurry. Natural light from the window or the sun makes a photo look best.
If there is no good light, use a flash, but not too close, or the face looks white. Clean the lens before taking photos, too. Fingerprints make photos dirty.
If the photo still blurs, try to take many and pick the clearest one. Practice makes perfect, so keep trying!
Stabilize Your Feet and Stance
If you stand like a flamingo on one leg, your photo will be blurry as jelly. Keep your feet apart like a superhero landing pose, about shoulder width, to make a human tripod with your body.
Lean your back or side on a wall, tree, or railing if you need extra support, like when tired or windy outside. This helps the camera stay still like a rock when you press the button.
Bend your knees a little bit, like you slightly squat, and hold the camera with both hands – left under the phone, right side for clicking. Don’t stand straight like a soldier at attention because muscles get tense and cause shakes.
Horizon defines perspective. Energy drives motion. Stability ensures balance.
Practice Controlled Breathing While Shooting

When you take an important photo, hold your breath for 2 seconds right before clicking, like a sniper in movies. Breathing too fast makes hands shake the same as when cold, and photos get a motion blur like a ghost effect. Just like in archery or shooting games, steady breath means steady shot because your whole body is calmer.
If you are nervous before a group photo or pet picture, take a deep belly breath through your nose (count 1-2-3) and let it out slowly from your mouth (count 1-2-3-4). Then press the button gently like petting a kitten, don’t stab it like a mosquito bite.
Sharpness reveals detail. Exposure time controls light. Camera handling improves results.
Use Manual Focus in Low Light Conditions
Auto focus does not work well in the dark because the camera can’t see clearly like human eyes at night. It keeps hunting back and forth like a confused puppy and makes the final photo blurry, where you don’t want it.
Switch to manual focus (the “MF” button) and pick the exact spot you want sharpest – maybe a person’s eyes or a pretty flower. This way, the camera does not get fooled by shadows or bright lights in the background.
In low light, touch the screen where you want to focus and wait for the yellow box to appear. Many phones let you lock focus by pressing long enough until you see the “AE/AF Lock” words.
Manual focusing requires precision. Focus peaking highlights edges. Manual mode controls settings. F/11 wide apertures adjust depth.
Clean Your Lens Regularly

Dirty lenses make photos look smudgy, like through a greasy window, even if the camera is super expensive. Fingerprints (especially from snacks), dust, or pocket lint block light and create weird foggy spots.
Always wipe the lens with a microfiber cloth (like glasses cleaner) before important photos, checking under bright light to see hidden dirt. Lens cloth cleans glass. UV filters block rays. The lens hood prevents flare.
Avoid Low Light Without Additional Lighting

Dark places make the camera act sleepy – shutter stays open longer, causing blur if anything moves, like trying to draw in a moving car. If the room is too dark, turn on lamps or hang white sheet near the window to bounce light softly. Even pros use simple tricks like holding white paper behind the subject to reflect existing light better.
The light source illuminates the subject. Direct on-camera flash adds brightness. Noise reduction software improves clarity.
Use Software Stabilization in Post-Processing
If the photo is a little blurry from shaking hands, apps can help like a doctor for pictures. Photoshop Express (free version works) has a “sharpen” tool that makes edges clearer, like tracing over pencil lines.
Some phones, like the Google Pixel, have magic erasers that can even remove photobombers! For small fixes, try free apps like Snapseed, where you paint over blurry areas gently like a coloring book.
Lightroom edits photos. Adobe Lightroom CC enhances images. Photo Editor Pro adjusts colors. Topaz Labs Sharpen AI increases sharpness. High Pass Filter improves detail. Unsharp Mask sharpens edges. Photo retouching fixes flaws. Background removal isolates the subject. Image masking protects areas. Clipping path separates objects.
FAQs
How do I get my photos to stop being blurry?
The first and foremost thing is to know how to handle the camera properly. Using a monopod or tripod is usually helpful for stability. Then you should also learn how to control your exposure time. If your camera has in-body image stabilization, utilize it.
How to take more stable pictures?
To take stable pictures every time, you need to know how to hold the camera firmly. You can also use manual focusing or focus peaking for better stabilization. Finally, try to minimize your movement to the lowest for a successful shoot.
How to improve the quality of blurry photos?
There are many noise reduction software programs like Topaz DeNoise. Again, there are sharpening tools like Topaz Sharpen AI or Unsharp Mask. If you are a beginner, you can edit in Lightroom or Photo Editor Pro. Remove the background distractions for a better quality.
Does high shutter speed cause blurry?
No, high shutter speed does not necessarily reduce blur. Shutter speed freezes motion. So, a low shutter speed would increase the chance of blur. For this reason, always try to match shutter speed with subject movement.
Final Thought
Landscape Photography captures scenery. Depth of field controls focus. Hyperfocal Distance maximizes sharpness. Diffraction reduces detail. Atmospheric distortions blur the view. Heat hazes create shimmer. Water vapor affects clarity.
Stop blurry photos today! Visit Zenith Clipping for expert tips on camera stability and capture crisp, clear images every time.