Since you are taking photos with water reflections, you should think about retouching them too. This extra work makes your photos look more professional and nicer. Outsourcing reflection retouching helps both people who take photos and those who buy them. Most photo deals give only some edited pics. But you might want more polished ones from the raw files. And if you are a photographer, getting someone else to retouch saves you time.
No worries about money! Retouching water reflections does not cost too much. Zenith Clipping, a big company for retouching, does it best. They give discounts if you order many. So, think about outsourcing reflection retouching as a good idea for better photos.
Benefits of Water Reflection in Photoshop
You can use water reflections to make your photos look more real. Not just any reflections, you should pick the ones that match your photo style. If your photo is of a lake, then soft and blurry reflections will look best. But if your photo is of a city at night, sharp and shiny reflections will be better.
Also, the colors in the reflection should match the real thing. If the sky is blue, the water must show blue too. If you change the color of the sky in Photoshop, don’t forget to change the reflection color also. This makes the photo look like it’s not fake.
You should think about the light, too, when adding reflections. If the sun is on the left side in the photo, the reflection must show light on the same side. If light comes from the wrong side, the photo will look weird, and people will notice it’s edited.
Adding small ripples in water can make the reflection look more real. Too smooth water looks like glass, not like real water. But too many ripples can make it messy. You must find a balance to make it perfect.
Lastly, practice makes perfect. Try different water reflection styles to see which one you like best. The more you edit, the better your photos will look!
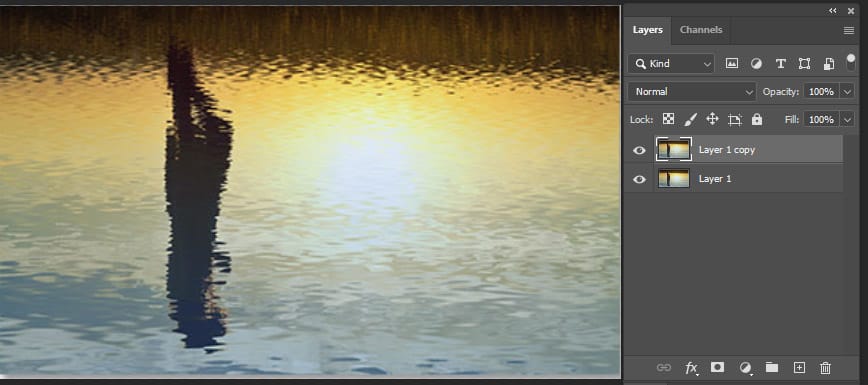
Duplicate the Background Layer
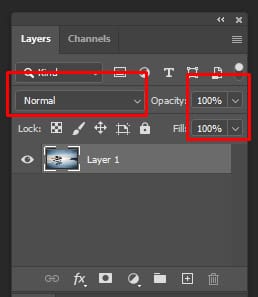
Water reflections look best when they match real life. But not all photos have perfect water. Some got ripples, dirt, or ad lighting. Duplicating the layer can help fix this and make the reflection look pro. Even if you are new to Photoshop, this trick is easy for boys and girls.
Purpose: Preserve the original image and work non-destructively.
Steps:
- Open your image in Photoshop.
- Press Ctrl+J (Windows) or Cmd+J (Mac) to duplicate the background layer.
- Rename the new layer to “Reflection Edit” for clarity.
First thing, you make a copy of your photo layer. This way, i you mess up, the original is still safe. Just right-click the layer and pick “Duplicate” or press Ctrl+J. Now you can edit the copy without worry. If you do the wrong thing, just trash that layer and try again.
Don’t make reflection too strong or too weak. If the reflection looks like a mirror, it is fake. If it’s too bright, nobody will see it. Play with opacity to get it just right. Also, we, a blur a little bit blurred if the water has small waves. But too much blur makes it look like milk, not water!
Some people think this is only for experts, but no. Even kids can try this. Use a smudge tool to fix edges or clone stamps to copy good parts. Just go slow and check lots. Too much editing makes photos look weird and not real.
Always look at the before and after. If the reflection looks better but still natural, you did good! Keep trying, and soon you will be a pro at water reflections.
2. Use the Clone Stamp Tool to Fix Imperfections
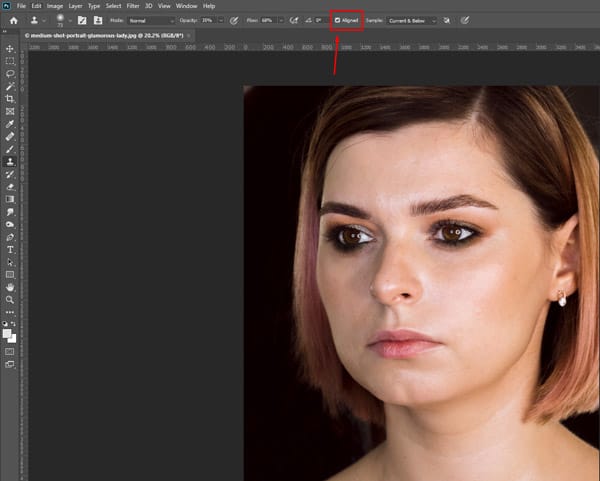
Press “S” to pick a clone stamp tool. Then hold Alt and click on the nice water area to copy it. Now paint over dirty spots or missing pieces in reflection. This works well fixing ripples that look too big or waves that break the reflection.
Try using a clone stamp near edges where water meets land. Sometimes these areas look messy with leaves or dirt. Copying clear water parts here makes the whole reflection look better. Just like how sitting on stairs makes nice downtown photos, fixing edges makes water photos look pro.
Purpose: Remove unwanted objects or distortions in the reflection.
Steps:
- Select the Clone Stamp Tool (S).
- Set the brush hardness to 0% for smooth blending.
- Hold Alt (Windows) or Option (Mac) and click to sample a clean area.
- Paint over ripples, debris, or any unwanted reflection elements.
Remember to use small brush sizes when fixing little spots. Big The bigsh can make water look fake and blurry. Change brush hardness too – soft brush for smooth fixes, hard brush for sharp edges. Keep trying different spots until the whole reflection looks natural.
Just like how rooftop photos show your neighborhood, fixed water reflections show a perfect mirror of sky and trees. With little practice, clone stamp tools will be your best friend for making water look amazing!
3. Apply the Liquify Filter to Adjust Shape
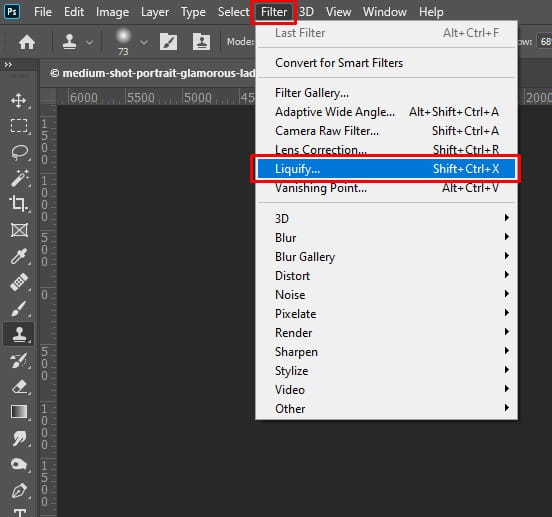
The liquify filter is the magic tool for making photos look perfect. This marks an important step, you need to fix shapes and make everything look just right. The changes you make with this tool are worth doing because they help your pictures look professional. Although many people just use auto-fix buttons on their phones, the liquify filter is rea best, whether you are editing faces or fixing objects in photos.
Purpose: Tweak the shape or flow of the reflection.
Steps:
- Go to Filter > Liquify.
- Use the Forward Warp Tool to push or bend the reflection to match the subject better.
- Be subtle to maintain realism.
- Press OK when you’re satisfied with the shape.
4. Adjust Opacity and Blur for Realism

Opacity and blur are the best tools to make edits look real. Whether you are new to editing or do it lots, the soft edges and see-through effects will make your pictures feel true and not fake. Normally, people use these tools when they fix photos to look more natural. So,o of course, you already kinda know how they work but don’t think about it.
Purpose: Simulate natural water reflection softness and transparency.
Steps:
- Lower the opacity of the reflection layer to around 60–80%.
- Go to Filter > Blur > Gaussian Blur, and apply a blur radius between 2–5 px depending on the image resolution.
- This mimics the natural diffusion seen in water reflections.
Never used an opacity slider before? That’s okay! Playing with these settings will help your pictures look pro and remind you how small changes make a big difference when you see them later. You can make the whole layer see-through or just blur little bits – both ways make photos better. Making some parts fuzzy or light helps match real life, where not everything is perfectly sharp.
5. Refine the Colors with Hue/Saturation
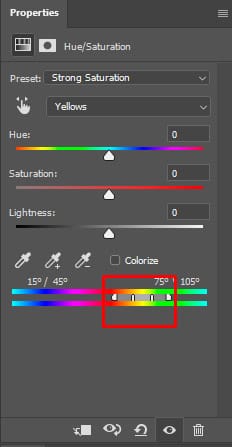
Hue and saturation are the magic buttons for making colors pop right. The color wheels and sliders in Photoshop are best friends for fixing too-bright or too-dull pictures. You can play with all colors or just pick one, make the sky more blue or the grass greener, and stuff in photos look better when colors match nicely.
Purpose: Match reflection tones with the environment.
Steps:
- Click on Image > Adjustments > Hue/Saturation or use an adjustment layer.
- Slightly desaturate the reflection (around -10 to -30) to make it look more natural.
- Optionally shift hue or lightness to match lighting conditions.
Slide a hue a little bit left or right to find the perfect color tone. Push saturation up to make colors strong, pull down to make it look soft and old. The best part is that you see changes right away, so it’s easy to know when it looks good. Don’t worry if you mess up – just click reset and start again!
6. Add Ripple or Water Texture (Optional for Artistic Effect)
You should try different water effects to make your pictures more special, like dreamy, fun, or artsy. Ripples, waves, and splash textures are the basic water styles. These simple effects can turn boring photos into wow photos when you mix them right. For nature pics, try a little ripple effect – this makes water look real but better.
Purpose: Enhance the water surface if it looks too smooth or fake.
Steps:
- Create a new layer above the reflection.
- Use a Ripple Texture Brush, or apply a Displace Map using an actual ripple texture:
- Go to Filter > Distort > Displace.
- Load a grayscale ripple texture (PSD format).
- Adjust the layer blending mode to Overlay or Soft Light, and lower opacity as needed.
If your photo has a lake or pool, the big wave texture makes it look exciting. For a soft, pretty look, try a light water blur on top. Front, si, d,e, or all-over water effects all make the picture different and cool. You can try many water things, like half ripple, full splash, or just little drops – so many choices!
7. Mirror the Subject for Missing Reflections
You can use mirror tricks to fix water pictures when the reflections are not good. Not all reflections need fixing; just pick ones where water looks wrong or missing. You copy-paste a person or thing to make a reflection, but water does not show it properly. If the photo has a boat but no boat in water, mirror tools help make it appear.
Purpose: If the reflection is incomplete or missing, create it manually.
Steps:
- Select the subject using the Lasso Tool or Object Selection Tool.
- Press Ctrl+J (Cmd+J) to copy the selection to a new layer.
- Go to Edit > Transform > Flip Vertical.
- Move the flipped layer down to align with the base of the subject.
- Apply a mask and use a soft black brush to fade out the bottom gradually.
- Lower opacity and blur for realism.
Also, think about what type it is when using a mirror. If water is calm like glass, the reflection should be clear. If water has waves, make the reflection a little bit blurry to match. Big splash moments need broken reflection pieces – this makes the picture look real, not fake.
8. Use Gradient Masks for Smooth Transition
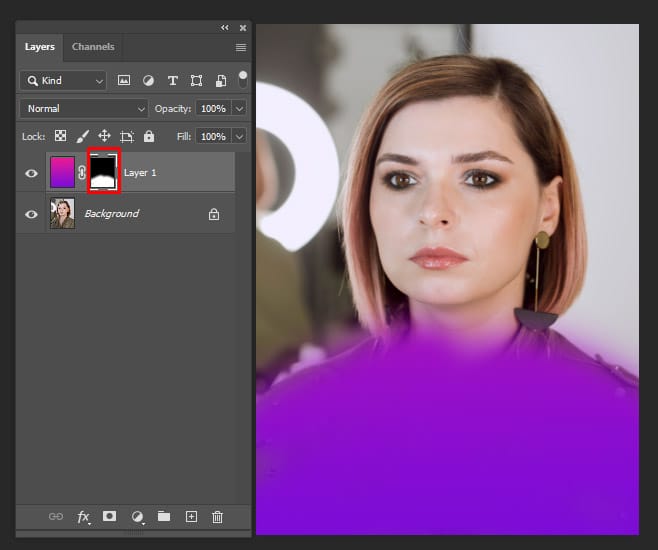
Since you are working on making water reflections look real, you should try using gradient masks too. This extra step makes your water pics look smooth like a mirror. Gradient masks help both new editors and experts. Most photo apps give you some gradient tools. But sometimes water needs more fixing to look perfect. And if you do lots of pictures, gradient masks save you time.
Purpose: Blend the reflection into the water for a more natural transition.
Steps:
- Add a layer mask to your reflection layer.
- Select the Gradient Tool (G) and choose a black-to-white gradient.
- Drag from the base of the reflection downward to create a fade-out effect.
No worries, it’s too hard! Gradient masks do not cost money – they are already in your program. Just click the gradient button and play with it. Start with a light touch, then go stronger if needed. Many free videos show how to do it easily. So think of gradient masks like helpers for water photos – little work makes a big change!
9. Enhance Lighting and Shadows
The lights and shadows you pick for water pics change how real and pretty they look. That is why most people ask first – ‘How do you make reflections not too shiny or dark?’
Good water photos need smart light fixes, not just fast filters. So you gotta remember where the sun was and what time it was when the photo was taken. Since water mirrors everything, lights and darks should look soft like nature, not too crazy.
Purpose: Match the reflection lighting with the main subject.
Steps:
- Use Curves or Levels adjustment layers clipped to the reflection layer.
- Adjust shadows/highlights to mimic the subject’s lighting.
- Optionally, paint soft shadows using a low-opacity black brush on a new layer.
Water pictures are better when the lights and shadows are done right. Think about your photo place – the ocean needs different light than a little pond. And morning light makes a different look than sunset time. Try to make the lights match what real water does outside.
10. Add Water Surface Highlights
Since you make water reflections look professional, you should add sparkle highlights too. This extra touch makes water look shiny and alive. Highlights important for both simple and fancy water pics. Most editing apps have highlight tools. But sometimes water needs special sparkles to look perfect. And if you do many water photos, highlights make them all look better quickly.
Not scared! Highlights do not cost extra money – tools are already in your program. Just pick a highlight brush and make little dots where the sun hits the water. Start with a few, then add more if needed. Many free lessons show how to do it easily. So think of highlights like magic dust for water – a little bit makes a big difference!
Purpose: Introduce realism with specular highlights or light streaks.
Steps:
- Create a new layer set to Overlay or Soft Light.
- Use a white soft round brush or ripple highlight brush.
- Paint lightly across where the light hits the water surface.
Good highlight tips: Make some big sparkles where the sun is strong, and add tiny sparkles all over. Don’t make too many or look fake. Match the highlight color to real light.
Try different highlight styles to see what you like best. Some water needs lots of sparkles, some just a few. Practice makes perfect!
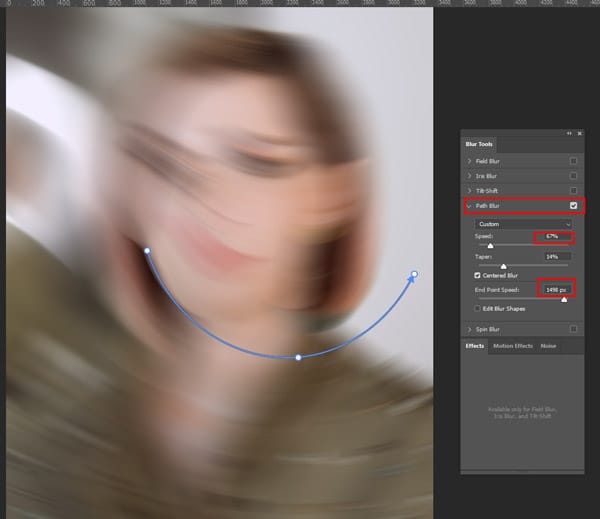
11. Use Motion Blur for Dynamic Water
Water pictures get more fun when you make them move! Motion blur makes water look like it is flowing fast or waving. This cool trick makes your water photos special and not boring. You see other people’s water pics look alive? Now you can do the same with a motion blur tool!
Here is a big guide for making water move in pictures. We tell you all things – what button to push, how much blur to use, when to make water look fast or slow. Even shows which water pics look best with a blur effect. Now you can make water dance in your photos easily!
Purpose: Simulate movement in the reflection (e.g., waves or ripples).
Steps:
- Select the reflection layer.
- Go to Filter > Blur > Motion Blur.
- Set the angle horizontally (0°) and adjust the distance to taste (10–50 px).
First time, no worry! Motion blur is easy to learn. Just pick a blur tool and slide left for slow water, right for fast. Try a little bit first, then more if you like. Soon you make water look like real ocean waves or rivers running!
12. Add Realistic Noise or Texture
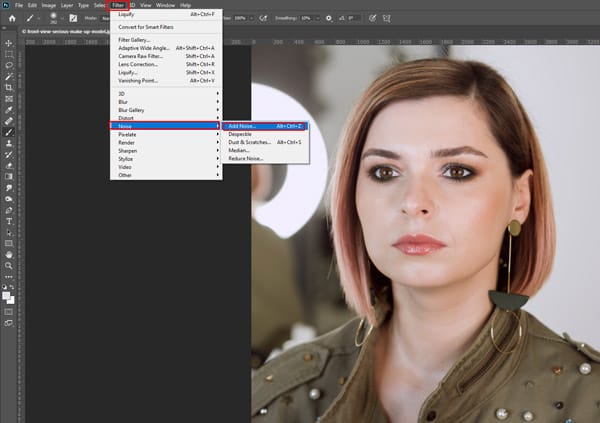
Water reflections look more real when you add a little noise or texture. The grainy bits and soft patterns make the water look like actual ponds or rivers. You can pick from different texture types – like gentle waves, rain dots, or foggy mist effects.
For the best water pics, match the noise to the weather. Calm sunny days want less grain. Stormy days need more rough texture. Add texture where water touches land, o p put light grain over the whole reflection. This makes water look alive, not fake smooth.
Purpose: Break the digital smoothness and enhance realism.
Steps:
- Go to Filter > Noise > Add Noise (use around 1–2%).
- Choose Gaussian and Monochromatic.
- This helps blend the reflection into the water surface better, especially for photos with texture.
Try different amounts to see! Start with a tiny texture, then add more if you want. Watch how grain makes flat water look deep and moving. Small changes make water photos look super pro!
Final Thought
If your photos suffer from dull or distracting water reflections, Zenith Clipping can transform them into visually stunning images with a professional touch. Our expert retouching services enhance water reflections to add depth, clarity, and a polished finish, perfect for photographers, brands, and creatives who want their visuals to stand out. Don’t settle for ordinary when your images can reflect true excellence. Try Zenith Clipping today and experience the difference with a free trial!