The things you don’t want in your nature photos can ruin the beauty and feeling of the picture. Because of this, the biggest question people ask before editing is, ‘How do I remove unwanted stuff from my photo?’
Nature photos look best when they are clean and natural, not messy. So, thinking about your photo’s background and what’s in it is very important before editing. Since nature photography is about real beauty, your editing should make the image look real but also perfect.
You don’t want weird things like trash or people in your nice nature shots. Picking the right tools to edit is just like picking the right clothes—it makes everything better. If you do it right, your photo will look amazing and show the true beauty of nature.”
Why Removing Objects Is So Useful Today

Since you take lots of photos, you should think about removing bad things from them too. This extra thing makes your photos look better and cleaner. Taking out stuff you don’t want is good for people who take photos and people who look at them. Most cameras take photos with things you don’t like in them. But you might want photos with no bad things in them. And if you take photos, letting someone else remove things can make your work easier.
Don’t be scared about money! Taking things out of photos does not cost too much. Zenith Clipping, a big company that fixes photos, can remove things easily. They give a cheap price if you get many photos. So, think about paying to remove things from photos as a good idea.
You get better photos and save time, too. No more bad things in your nice pictures!
Real Use Cases: Who Benefits?
Taking out bad stuff from photos helps lots of people. Whether you take photos for fun or work, clean pictures with no trash or wires make everyone happy. Usually, people try to fix photos on phone apps. But real photo fixing makes pictures look better.
- Designers refine ads, banners, and social content.
- Architects enhance renders by removing distractions.
- Historians restore damaged archival photos.
- Creators craft clean, eye-catching visuals.
- Marketers highlight products as the main focus.
Don’t know how to fix good photos? Is okay. Letting experts remove things makes your nature photos perfect forever. Every time you see a fixed photo, you remember how nice real nature is. You can take out water bottles from rivers or erase power lines in sky photos. Fixing small things or big things both make pictures look amazing.
Some people need this more. Like photographers who sell pictures. Or hotels that want pretty beach photos. Even normal people who want perfect vacation pictures. All get happy with clean nature photos!
When to Use What
You should try different tools to fix different problems in photos, like wires, trash, or people walking by. Clone stamp, healing brush, and content-aware fill are the basic fixing tools. These simple tools can make big changes when you use them the right way.
For small spots like bird poops on rocks, the healing brush works best. This is a classic tool everyone should use first. If you have big problems like trash cans or ugly signs, then content-aware fill makes them disappear easily. For harder fixes, try clone stamps to copy good parts over bad parts.
Close-up shots or wide nature pics all need different fixes. You can try different ways, like removing just one thing or cleaning the whole area. Some photos need a little fixing, some need a lot of work. But all can look nice after!
Content-Aware Fill

Taking good nature photos sometimes gets ruined by bad things in the way. The magic of making unwanted stuff disappear makes photographers so happy. This is a special tool that is worth learning to fix pictures. Are you tired of seeing perfect photos with no trash or wires? You can do this too and make nice, clean photos using content-aware fill.
Steps:
- Select the object using the Lasso Tool (L) or Quick Selection Tool (W).
- Navigate to Edit > Content-Aware Fill.
- Adjust the green sampling area if needed.
- Set options like color adaptation, scale, and rotation.
- Click OK—Photoshop fills the area on a new layer.
This is a full explanation about content-aware fill for beginners and experts. We put all the important things, like when to use it, how to use it best, and other smart tricks to make photo editing easy for everybody.
First, you select the bad thing, then click the magic button. The computer guesses what should be there instead. Sometimes it works perfectly, sometimes I need a little help. But always make photos look better than before!
Spot Healing Brush Tool

Taking nature pictures and fixing them go together like the sun and sky. Photos often have yucky spots that need a spot healing brush to clean them up. The normal problems are bird poop on rocks, dirt on leaves, trash on the beach and lots more.
Steps:
- Choose the Spot Healing Brush Tool (J).
- Set the brush slightly larger than the object.
- Click or paint over it—Photoshop fills it instantly.
Many free phone apps say they can fix spots well. But their fixing is not the same as a real spot healing brush tool in good computer programs. This is because pro editors use smart tools that look at pictures and know what to do. The brush fixes spots by itself, making everything look natural again. This smart fixing does not happen in free apps or quick auto-fix tools.
Spot healing brush is a magic wand for photos! Just click on the bad spot and poof – it’s gone! Works best for small messes in nature pictures. Bigger messes need different tools, but for spots, this brush is a hero!
Generative Fill
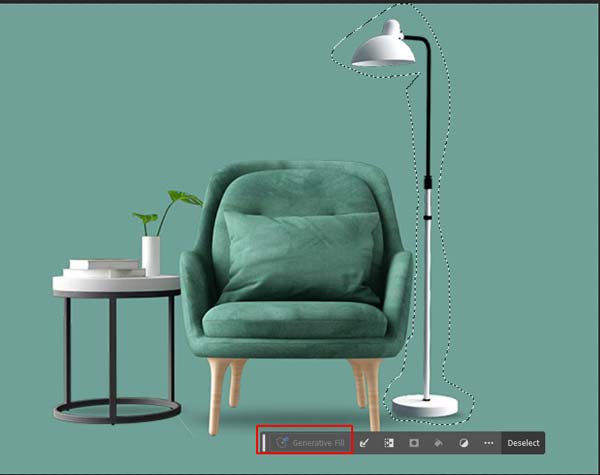
Taking perfect nature photos holds a special place in photographers’ hearts. The magic of removing ugly objects and replacing them with beautiful things creates amazing before-and-after moments. This is a powerful tool worth learning for all photo lovers. Are you jealous seeing others’ flawless nature shots? You can do this too by using generative fill, following our simple tips.
Steps:
- Select the object with any selection tool.
- Go to Edit > Generative Fill.
- Enter a prompt or leave it blank to remove the object.
- Click Generate and choose your preferred result.
This is a complete guide about generative fill for beginners and pros. We gathered all the important info – when to use it, how to get the best results, and smart tricks to make photo editing fun for everyone.
First, you select the bad area, a then type what you want there. The smart computer makes new picture parts that match perfectly! Sometimes it works like magic, sometimes it needs a few tries. But it always makes photos look way better than before!
Clone Stamp Tool

Beginners can start with the medium brush size, keeping the opacity at 50%. This is a classic clone stamp setting for starters.
If you have clean sky or plain walls in your photo, then the clone stamp will work super easily. For more tricky spots, try sampling from different areas or changing brush size. Zoomed-in or zoomed-out views will all help fix problems better. You can try different stamp tricks, like sampling nearby colors or using many small stamps instead of one big one.
Steps:
- Open your photo and select the Clone Stamp Tool (S).
- Hold Alt (Windows) or Option (Mac) and click to set the source.
- Paint over the object to remove it.
- Adjust the source point as needed for seamless texture.
Remember to pick a good sample spot first! The clone stamp copies whatever you choose, so pick pretty parts to cover ugly parts. If you pick the wrong spot, just undo and try again. Practice makes perfect with this tool!
Patch Tool

The patch tool is the magic wand of every photo editor’s toolbox. This marks a special helper you can use to fix big, ugly spots in your nature pictures. The power to clean up photos is worth learning through practice. Although phone apps these days have quick fix buttons, professional patch tool work is undoubtedly the best, whether you use it for landscapes or wildlife shots.
Steps:
- Select the Patch Tool (Shift + J to toggle).
- Outline the object.
- Drag the selection to a clean area.
- Photoshop auto-blends the replacement.
First, you draw around the bad spot like connect-the-dots. Then you drag it to a good area that matches. The tool blends everything like magic! Big spots might need a few tries, but are always worth it. Like giving your photo a band-aid that no one can see!
Moreover, the patch tool saves once-in-a-lifetime photos, the mistakes, and the perfect moments that got ruined by power lines or trash. Photographers love to share these fixed images with clients and friends, print them big as well, and keep them forever. Quick fixes or automatic tools are not ideal for making problems disappear or keeping nature looking pure.
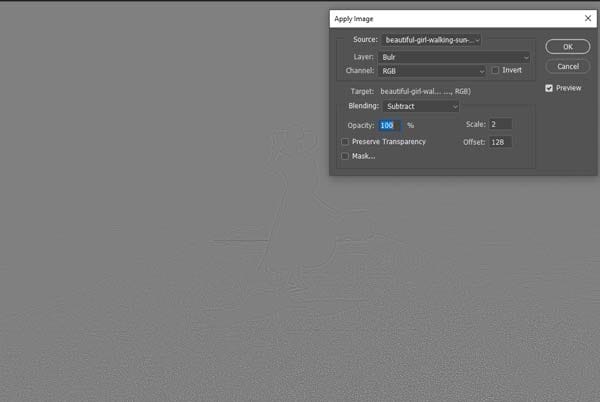
Frequency Separation
The way you edit skin in portraits affects how real and pretty the picture looks. That is why many people ask before retouching, ‘How to make skin smooth but keep details?’
Good skin editing uses smart layers, not just blur tools. S,o thinking about texture and color separately is important before starting editing. Since face photos need to look natural, your retouching should mix smooth skin with real pores, too.
Steps:
- You need to remove objects while keeping the natural texture
- You want smooth blending on skin or backgrounds
- Other tools leave noticeable marks
Fir, to make two layers – one for colors (low frequency) and one for details (high frequency). On the color layer, you fix spots and shadows. On the detail layer, you make the skin texture nice. This way, the face does not look plastic but still perfect!
The big secret is to use a soft brush and go little by little. Zoom in close to see pores not disappear. Check often by turning layers on/off. When done right, nobody can tell you edit, but the skin looks amazing!
Pen Tool + Layer Mask

Nature photos look real when edits are not shown. But not every photo has perfect edges. Some have fuzzy leaves, messy hairs, or hard shapes. The pen tool can fix these edges and make selections super clean. Though pen tools are mostly used by pros, beginners need to learn them too. A little practice with a pen tool makes selections sharp like tree branches or animal shapes.
Steps:
- Use the Pen Tool to draw a path around the object.
- Convert the path into a selection.
- Apply a layer mask to hide the object.
- Use Content-Aware Fill or other tools behind the mask for cleanup.
Remember not to make too many points. Lots of anchor points make selection wobbly and bad. Too few points make the curve not smooth. Best to use just enough points to follow the shape. Zoom close to put points in the right spots. After making a path, turn it into a selection and add a layer mask to hide or show parts.
For soft things like clouds, use fewer points. For hard things like rocks, use more points. Layer masks let you change your mind later if you want to hide different parts. Black paint on the mask hides, white paint shows. This way, you do not ruin the original photo!
Sky Replacement

Do you like taking outdoor photos? Try changing the boring sky to make the picture more wow! The new sky in your photos makes you remember how pretty nature can be.
Steps:
- Open Edit > Sky Replacement.
- Select or upload a sky.
- Tweak brightness, warmth, and placement.
Sky replacement works best when the original photos have a plain white or gray sky. Find a nice sunset or stormy cloud picture to put behind your photo. Make sure to match colors so the new sky does not look fake. If tree branches are in front, you need to be careful not to cover them with a new sky.
For best results:
Pick a photo with a clear line between land and sky, choose replacement sky with a similar light direction, adjust colors to make everything match, and use a soft brush to blend edges.
Now your boring photo has an amazing new sky! Can make a sunny picture into sunset or add a rainbow. So fun to try different skies!
Final Thought
Nature photography should capture the beauty of the wild, uninterrupted and pure. But sometimes, unwanted objects like litter, people, or distractions sneak into the frame. At Zenith Clipping, we specialize in expertly removing those distractions to bring out the true essence of your landscape shots. Let your photos tell the story you intended, clean, captivating, and professional. Try our object removal service today and get started with a free trial to see the difference for yourself!