
Merging layers is important in Adobe Photoshop. It makes your pictures simpler and less complicated. This skill is essential in 2026. It makes your workspace look organized. Too many layers create confusion. This is a complete layering tutorial.
We provide different methods to try. You will learn the photo merging process easily. Merging layers is not difficult at all. It helps create one composite image. You can then produce amazing images and stunning visuals. You will soon be an expert at handling any project with layers.
This is a complete tutorial on how to merge layers. We tell you everything you need to know. We have different methods that you can try. If you have never merged layers before, that is okay. This tutorial will help you learn and make it easy. You will see that merging layers is not so hard, and it can be even fun. Soon you will be an expert at it.
Let’s dive below for a detailed explanation!
Merging and Blending Techniques
Merging combines selected layers into one pixel layer permanently. It reduces file size clutter. This is a destructive editing workflow function. Blending uses non-destructive methods for visual interaction. Merge Selected Layers uses Ctrl/Cmd + E shortcut.
It consolidates finished content. Merge Down combines an active layer with the one beneath it. Merge Visible combines only visible layers easily. Stamp Visible creates a new merged stack. It leaves original layers untouched for additional adjustments.
Programs use blending mode to adjust the document’s screen. The idea is to apply a patch to enhance the quality. Each source offers different methods to achieve this. The patch refines the blending mode for a better result.
Flatten Image merges everything for the final output. Blend Mode changes layer interaction effects. Layer Masks achieve non-destructive transitions between images. These are core advanced editing techniques.
Essential Tools and Features
Merging layers is a feature, not a dedicated tool. The Layers Panel is the primary interface. You access it via F7 easily. Layer selection uses Ctrl/Cmd Shift keys. The Layer Menu gives access to merge options. Keyboard Shortcuts boost efficiency. Ctrl/Cmd + E merges selected layers. Shift + Ctrl/Cmd + E merges visible layers.
Shift + Ctrl/Cmd + Alt/Option + E creates a new merged layer. This leaves layers intact. The History Panel allows undoing merge actions. Rasterize Layer converts text Smart Objects for merging. Saving a .psd retains original layers untouched. These are the Essential Tools for layer management.
Method 1: Merge selected layers

First, you select the individual layers to merge. Look at your layers panel carefully. Click the first layer you want to combine. Hold Ctrl on Windows or Cmd on Mac. Click the other layers needed. To select a continuous range, use the Shift key.
Click the first layer and hold Shift. Click the last layer in the sequence. All layers in between are selected. This chooses many layers at one time. They are now ready for merging. You maintain their current position. This simplifies the relationship between layers.
Merge the layers
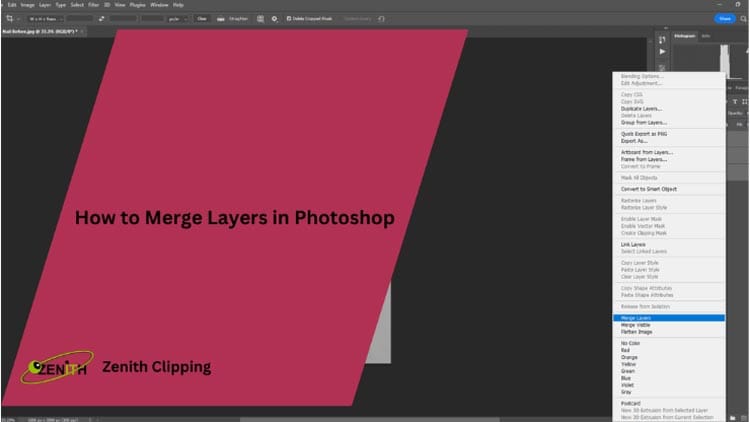
Now you perform the merge action. There is a quick shortcut to complete the process. Press Ctrl + E on a Windows computer. Press Cmd + E on a Mac computer. This command makes the layers become one. Another method uses the layer menu. Right-click on one selected layer. A menu will appear easily. Select Merge Layers from this list. The layers will then combine. Both methods achieve the same result. You can follow these simple step instructions.
Merging simplifies your workspace efficiently. It makes the editing process smoother. This skill gives you peace of mind. It allows for greater productivity flexibility. Remember, these Expert Techniques help your work. It is a win-win situation.
Use the shortcut

Use the keyboard shortcuts to merge layers fast. Press Ctrl E on a Windows computer. Press Cmd E on a Mac computer. Push these buttons at the same time. This is the fastest method possible. The layers combine immediately afterward. You will see one layer in the panel. This helps you work quickly and efficiently. It is a very useful shortcut to learn.
Photoshop provides various layer options. The chain icon links layers. The object is editable. Use the patch tool for content-aware fill. Separate layer adjustments can be applied. The layers link option is useful for grouping.
Use the menu

You can merge layers using the menu. This is an alternative to the shortcut. Move your mouse over a selected layer. Right-click the layer with your mouse. A context menu will appear instantly. This dropdown menu shows many options.
Find Merge Layers on this list. Click this option to combine layers. This tells Photoshop to merge your selection. This method works well for beginners. It performs the same job as the shortcut. You can also find merge options in the main menu bar.
Method 2: Merge all visible layers

This method merges only visible layers. You have some layers that are hidden layers. First, check which layers you can see. Look for the little eye icon next to each layer. The eye icon means the layer is visible. Visible layers will be merged now. No eye icon means the layer is hidden. Hidden layers will not be merged. Ensure all layers to combine have the eye icon on. This is a very important first step. You select only the Observable Layers.
Click the eye icon
To make a layer visible, you click in the little box where the eye icon should be. If the eye is not there, you click in the empty box, and the eye will appear. This means the layer is now visible. You do this for every layer you want to include in the merge.
If you see a layer that you don’t want to merge, you should click on the eye icon to make it go away. This will hide that layer. Now only the layers with the eye icon will be merged. This gives you control over what gets combined. It is a good way to keep some layers separate.
Merge visible layers
Right-click on any of the visible layers and select “Merge Visible”. You can also use the shortcut Shift + Ctrl + E (Windows) or Shift + Cmd + E (Mac).
After you check all the eyes, you are ready to merge. You can right-click on any layer that has the eye icon. Then you choose “Merge Visible” from the menu that pops up. This will combine all the visible layers into one new layer.
There is also a shortcut for this. On Windows, you hold Shift and Ctrl, and the E key all at once. On a Mac, you hold Shift and Cmd and the E key. This is a little harder to remember, but it is very fast. Once you do it, all the visible layers will become one single layer.
Method 3: Flatten all layers

Flattening merges every single layer easily. It creates just one background layer. This is the simplest way to proceed. It combines all layers, including hidden layers. You should only flatten when your editing is finished.
Be careful with this action. You cannot easily unmerge the layers later. This is a permanent difference from merging. Flattening significantly reduces file size. It also reduces clutter in the workspace. Do not make a mistake by flattening too early. The flattened image is the default for final output.
Level errors can occur due to small details. The reasons for these errors are often related to Photoshop settings. The object is editable in Photoshop. The patch tool’s content-aware fill can fix certain errors. Layers can be linked to streamline the process.
Flatten the image

To flatten your image, use a simple technique. Right-click any layer in the panel. The context menu will appear instantly. Select the Flatten Image option from this list. Photoshop will combine every layer. They become a single background layer.
All original layers disappear now. This makes your image very simple. This is a permanent approach to merging. Remember, you cannot edit layers separately afterwards. This is a big decision for your file. This is an alternative to merging selected layers.
Use the shortcut
You can also use the shortcut Alt + Shift + Ctrl + E (Windows) or Option + Shift + Cmd + E (Mac).
There is a special shortcut for making a new layer that is a flattened copy. On Windows, you press Alt, Shift, Ctrl, and E all together. On a Mac, you press Option, Shift, Cmd, and E. This is a lot of buttons to press at one time.
When you press these buttons, it makes a new layer on top that looks like a flattened image. But all your old layers are still there underneath. This is a safe way because you keep your layers, and you get a flat copy too. It is a very useful trick to know.
Pro Tips: Lightroom Mobile offers a quicker method for sky replacement. Alternative methods exist for edits. The auto-save feature ensures edits are secure. Method descriptions highlight pros. Future adjustments can be made easily. The workspace is efficient for positioning exposures. The progress is tracked continuously.
Lightroom Mobile’s sky replacement method is efficient. Edits are secure with auto-save. Method description outlines key pros. Unexpected crashes are rare but possible. The workspace remains efficient for quick edits. You can share edits with friends easily.
Impact of AI in Merging Layers in Photoshop
Photoshop generative AI changes compositing fundamentally. AI automates complex visual matching easily. This makes layer blending faster and more realistic. AI impacts the quality of the composite image. Harmonize automatically matches color tones and shadows. Intelligent Selections isolate elements quickly.
Generative Fill expands and fills content smartly. This improves the project structure greatly. AI encourages non-destructive workflows beforehand. It uses Smart Objects effectively. AI increases performance efficiency significantly. Creators focus more on creativity now. AI achieves enhanced realism for complex, detailed images. This offers many advantages to users.
FAQs
How to merge layers in Photoshop without losing layers?
It’s important to make a backup before merging layers in Photoshop so you don’t lose them. This makes sure that your changes are safe in case of mistakes or crashes that you didn’t expect. Before merging, you can make copies of your layers by right-clicking on them and choosing “Duplicate Layer.”
Merge layers in Photoshop shortcut key?
Press Ctrl + E (Windows) or Cmd + E (Mac) to merge the layers you chose in Photoshop. This puts together the layers you chose into one. Before using the shortcut, make sure to choose the layers you want to combine.
How to merge layers in Adobe Photoshop?
In Adobe Photoshop, to combine layers, click on the layers you want to combine in the Layers panel. To merge layers, right-click and choose “Merge Layers,” or press Ctrl + E (Windows) or Cmd + E (Mac). This will combine the layers you chose into one layer.
How to merge layers in Photoshop Mac?
To combine layers in Photoshop on a Mac, choose the ones you want to combine and then press Cmd + E. You can also choose “Merge Layers” from the menu that appears when you right-click on the selected layers. This combines the layers into one, which makes your workspace easier to use, just like an article that compares the original price to the current price.
Final Thought
Learning to merge layers is a major benefit. It improves your Photoshop workflow efficiency. This skill keeps your projects organized easily. We showed several tried-and-true methods. You can practice each one now. Practice makes you a better user.
Zenith Clipping offers professional image editing services that can help you improve your Photoshop skills.


