Rotoscoping has become a fancy word used everywhere wherever we talk about video editing and video animations. So, you would be familiar with this word if you are in the field of video editing or video animation. Animators and video editors are using marvelous techniques for converting videos into animation with rotoscoping.
The technique of rotoscoping was used on glass panels a few years ago. At that time, those animators were projecting live-action images onto the very technically crafted glass panels. Then, they beautifully trace them over the images. However, the new technology has changed those ancient techniques. Nowadays, animators rotoscope on designated computers. They capitalize on very advanced tools and technologies.
Let’s expand our guide about what it is and how to rotoscope a video into animation.
Rotoscoping Defined

Rotoscoping, a technique used in animation and visual effects, defies a singular definition. Its meaning shifts depending on the perspective of the professionals. It reflects the diverse goals and expertise of animation artists and VFX specialists. According to my analysis, rotoscoping adapts to the context like a shape-shifter. This dynamic nature makes it a fascinating and complex technique to explore.
Rotoscoping is often seen as a creative tool for animation artists to achieve realistic motion and fluidity in their work. It is a means to infuse life into static images and breathe vitality into characters and scenes. In contrast, VFX artists view it as a problem-solving technique that integrates visual elements into live-action footage. For them, it is a process of tracing and replicating movements to achieve photorealistic results.
Want to know more about the difference?
In simple words, the VFX artists look at it as a process of isolation. They carefully extract foreground elements (characters, objects, or textures) from the background. They try to integrate and manipulate the visual elements within live-action footage. On the flip side, animators take it as an exercise of patience and dedication. They trace live-action footage frame by frame.
See the difference?
This dichotomy highlights the versatile nature of rotoscoping – a technique that resists a one-size-fits-all definition. The meaning of rotoscoping will likely evolve as professionals continue to push boundaries and explore new applications. It truly reflects the dynamic interplay between artistry and technology.
Here is an example of how to convert video into animation with rotoscoping technique: Source.
Rotoscoping Classification
Rotoscoping has evolved into various forms over the years. It is adapted from the changing needs of filmmakers and it is giving rise to many applications. So, each variant offers a unique set of possibilities to bring creative visions to life from traditional frame-by-frame tracing to automated algorithms.
It has become necessary to look at the types of rotoscoping used in the film industry. I’m also going to give a few examples too. So, let’s dig into it if you want to rotoscope your next YouTube video.
1. Reference-Based Rotoscoping
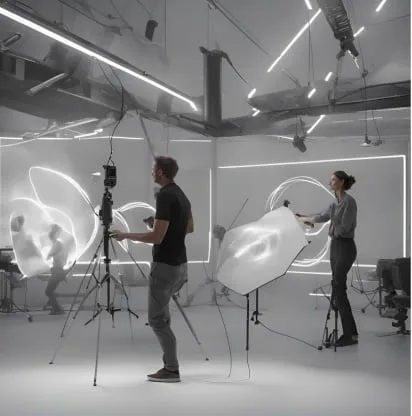
We can use rotoscoping for reference to bring characters to life with unmatched authenticity. Walt Disney is a good example of it. Instead of drawing directly from live-action footage, we use the footage as a guide. We capture the nuances of movement, expression, and even the subtle interplay of light and shadow.
Moreover, we can create characters that feel organic and believable if we study the reference footage. Every detail can be informed by real-world observation from the way a character walks to the way they tilt their head. This approach not only gives accuracy but also adds a layer of depth and realism to our video animations.
Examples:
Disney’s appreciative work in rotoscoping has left a lasting legacy. Disney artists have created characters that are both visually stunning and emotionally resonant. They use reference footage to inform their animations.
So…their approach continues to inspire animators today!
More interestingly, the beautiful dance sequences and graceful movements of Prince Charming in Disney’s animated film were actually inspired by real-life performances. I’m talking about ‘Snow White and the Seven Dwarfs’. That’s right! Most of the memorable scenes of this film were created using this video editing technique. This involved tracing over live-action footage to give the animated characters a more realistic and lifelike appearance.
Then, the movie “Alice in Wonderland” wasn’t just a figment of imagination. Disney animators used the same rotoscoping method to capture the actor’s body movements and facial expressions. This technique added a layer of realism and depth to the animation. Even more impressive, Disney’s efficiency didn’t stop there. In 1973’s “Robin Hood,” the studio cleverly reused rotoscoped scenes from previous video animations.
2. Rotoscoping – Partial:

Rotoscoping, once a revolutionary technique, has become a staple in animation and VFX. Partial rotoscoping, in particular, is used to create realistic movement by tracing over live-action footage. The level of detail applied depends on the desired final product. So, they demonstrate the versatility and effectiveness of this sophisticated method.
For example, animators often combine rotoscoping with caricature to create a human-like animated character. They can emphasize the unique proportions and movements of cartoon characters. So, they are tracing over live-action footage and exaggerating certain features. This technique not only ensures precise video animation but also preserves the distinctive style of the drawing.
Filmmakers often use rotoscoping to create visual effects, particularly when isolating elements like characters or objects. So, the animators generate a matte or mask that gives seamless integration into a different background. For this purpose, they trace around the desired element. This technique is essential for creating realistic compositing and special effects.
Furthermore, filmmakers often use rotoscope techniques to recolor elements within a scene. This is a valuable technique in the world of visual effects. This versatile tool allows for the creation of scenes that would be difficult, expensive, or even impossible to achieve through traditional methods.
Examples:
The Lord of the Rings trilogy (2001-2003) used the partial rotoscope methods to create the eerie and realistic movements of the Nazgûl, or Ringwraiths. These animators achieved a chilling blend of realism and fantasy They traced over live-action footage of horses and riders.
The Curious Case of Benjamin Button (2008) is another good example. The visual effects team employed partial rotoscoping to create the reverse-aging process of the characters. They traced live-action footage of Brad Pitt’s performances at different ages. This method helps them to create a seamless and captivating portrayal of Benjamin Button’s unique condition.
Why Rotoscope Videos?

Some video editing experts ask about this new technology: Why Rotoscope videos? There is no doubt that it is a wonderful solution for many filmmaking drawbacks. It’s also a very creative and unique tool to leverage your casual real-life videos. Plus, you can deploy it for multiple creative works. For example, you can add special effects, troubleshoot shots, and add a fun flourish to your video.
Let’s overview a few important reasons why to rotoscope videos into animations.
1. Creates Special Appeal:

Hollywood movies often feature breathtaking action sequences. They made it possible by a combination of rotoscoping, green screen, and motion picture technology. Particularly, editors rotoscope to isolate elements from one shot and seamlessly integrate them into another. It creates fantastical worlds that captivate audiences on the big screen.
A large number of content creators have embraced rotoscoping as a powerful tool for crafting unique compositions and videos. The YouTube channel Corridor Crew is a prime example. They frequently utilize rotoscope methods and other VFX techniques to recreate trailers and enhance film clips. Thus, their innovative approach demonstrates their versatility and creativity. You can also bring it to your content creation methods.
2. Gives You a Unique Style:

Converting videos into animation with rotoscoping is a fascinating tool and a unique method too. It creates a distinctive visual style in films and videos. Remember the unique aesthetic of Richard Linklater’s 2006 film “A Scanner Darkly”? The film’s rotoscoped animation gave it a dreamlike and otherworldly quality. This demonstrates the potential of this technique to transform the appearance of films.
Moreover, the rotoscope process is a fantastic way to add animated flourishes to your projects. It doesn’t matter whether they are commercials, music videos, presentations, or showreels. You can highlight movement and create visually striking effects if you trace over live-action footage and add hand-drawn elements. This technique is a fabulous choice for adding a unique and artistic touch to your work.
3. Fix and Upgrade Shots:
Video editing through the rotoscope technique is a lifesaver when you are dealing with unwanted elements in your video footage. It can be a stray coffee cup or a misplaced prop. It helps you to carefully remove these distractions and create a cleaner and more polished composition. Additionally, it is used to add elements or enhance existing ones if you notice something missing from a shot.
As a result, you get a cohesive and visually appealing final product. Sometimes, a shot is technically perfect but it can be used to creatively enhance its appearance. Many YouTube content creators leverage this technique to add elements to TV shows and movies. They are transforming the original footage into something entirely new and exciting.
How to Rotoscope Videos?
Now, you have easily grasped the idea of what it is and why you need to avail of it. So, it is the perfect time to test your artistry. Remember, the specific steps you will follow to convert videos into animation with rotoscoping depend on two things:
- The specific software you are deploying
- The specific project you are working on
However, I have some general steps that will help you to follow to rotoscope the video. Let’s dig into the very general steps:
1. Capture and Examine the Reference Film:
Before starting your project, it is essential to identify the specific elements you want to isolate or manipulate. This may involve a prop, character, or even a background element. Once you have determined your target, search for relevant scenes in the reference film that showcase the desired elements in action.
Then, pay close attention to the details, such as movement patterns, lighting conditions, and interactions with other elements. This analysis will provide valuable insights for converting videos into animation with a rotoscoping process.
Let’s follow a Few Worth Taking Tips:
Let’s take account of a few tips and tricks to rotoscope a video.
Use Necessary (Fewer) Items:
You can get a digital camera in order to shoot a scene if you don’t have a film camera or other products. You can also shoot a series of sequences that contain fewer props, costumes, and sets. Why is it so? It will make tracing easier if you have fewer items and simpler backgrounds.
Capture Your Reference Footage:
When shooting your reference footage, showcase the element or person you intend to rotoscope. Pay close attention to changes in direction or if the main subject becomes obscured by other elements as the scene unfolds. These details are crucial when creating a precise and accurate mask during the process.
So, having a digital camera and a clear understanding of your video footage is significant. It impacts the timeline and approach of your rotoscoping project.
2. Choose the Necessary Tools and Software:
If you try to look at a perfect software to rotoscope a video into animation, you will see there are many options in the market. You can select any software according to your preferences and designated projects. Plus, always select the software that is the most comfortable one for you. Let’s have a look at a few examples of software that will leverage your video editing techniques:
- Adobe After Effects
- Adobe Photoshop
- Fusion 9
- Nuke by Foundry
- Blender
- Silhouette FX
- Autodesk Combustion
- Imagineer’s Mocha
All of this software is one in a million. You can choose any one of these software according to your requirements and ease.
3. Let's Start Drawing Over the Reference Film:
Now, it is time to lay out the footage after selecting the software. Then, trace the expressions or movements you want to rotoscope in that film. Follow the following steps if you are using Adobe Photoshop:
Step 1: Preparing Your Video Timeline:
- First of all, access the video timeline.
- For this, move to Photoshop’s Window menu.
- Then, select “Timeline” to unlock the door to your video editing journey.
Step 2: Optimizing Your Timeline’s Frame Rate
- In this step, choose a frame rate that balances smoothness and efficiency. Remember, too few frames can result in a jerky animation. On the flip side, too many can lead to unnecessary workload and time consumption.
Frame Rate Guidelines:
- For web and social media, 15-20 fps is sufficient
- For film and high-end productions, 24-30 fps is standard
- For intricate details and slow-motion, 30-60 fps may be necessary
You will ensure a seamless animation process and optimize your workload if you select the right frame rate.
Step 3: Import Your Video Footage
- Let’s start creating a new blank video layer. It will serve as the foundation for your rotoscope animation. This layer will eventually become your final exported masterpiece.
- Now, import your video footage into this new layer. Then, start setting the stage for the rotoscoping process.
Step 4: Tracing the Path to Rotoscoping Mastery
- Let’s begin tracing over the video frames. But, use a minimalist approach with control points. By using only what is necessary, you will maintain a clear overview and achieve a smoother outline.
- What if you face intricate forms? Break them down into individual elements that move independently. Isolate body parts, like arms or legs, to create a more precise and accurate video animation. It will avoid the limitations of a single or rigid outline.
Step 5: Laying the Foundations with Black
- Create a sleek and defined canvas to rotoscope your art. For this, set the foreground color to black.
- Next, grab the Brush tool and start carefully crafting outlines for each frame.
- Build the silhouettes that will pulse with life in your final animation.
Next step?
4.Don’t Forget to Add Final Touches and Supplementary Elements:
Now, you have laid the groundwork with tracing. It is time to bring your animation to life with the power of software tools.
Photoshop Software:
Here are some game-changing tools to explore if you are working in Photoshop:
- Color Fill:
Flood your outlines with vibrant colors. It will add depth and emotion to your animation.
- Masking:
Refine your silhouettes and create crisp edges and subtle transitions.
- Warping:
Bend and shape your characters. It will add fluidity and movement to your scene.
- Blending:
Merge layers and textures. It will create a rich and immersive atmosphere.
These tools will help you transform your rotoscoped outlines into a stunning and cinematic experience.
Steps for Photoshop Users:
Follow the following steps to do it:
- Create a new blank video layer. Fill each frame of outlines with vibrant colors using the brush tool. It will define your characters and objects.
- Leverage the blending tool to build and set up textures. It will add tactile depth and visual interest to your animation.
- Inject scenery into the background. For this, transport your animation to new and exciting environments.
- Use the blending tool to seamlessly transition between two successive scenes. It will create a cohesive and engaging narrative
These steps will transform your outlines into captivating animation that draws the viewer in.
After Effects Software:
If you are using After Effect software, you can add intricate details and refine your masks for a more sophisticated animation:
- Hair-Raising Details:
When rotoscoping hair, utilize the blur tool to subtly blur the edge of one part of the mask. It will create a soft and natural-looking effect that adds depth and reality.
- Masking Mastery:
Add multiple masks to enhance your animation. It will fine-tune each element for a seamless blend of motion and detail.
- Refining Edges:
Use After Effects’ advanced tools to feather, blur, or adjust the edges of your masks. You’ll get a more organic and captivating visual effect.
Steps for After Effect Users:
Follow the steps below in order to execute this in After Effects:
- Add a second mask to the same layer. It will give greater control and precision in your animation.
- Turn down the second mask’s opacity to 0% to make it disappear from the scene. It will create a seamless transition or reveal a new element.
- Adjust the feathering to soften the mask’s edge. You will get a more subtle and natural-looking blend with the surrounding environment.
By mastering these multi-mask techniques, you’ll add depth, complexity, and visual interest to your projects. Mostly, feature films use these tools and techniques to rotoscope their films.
How to Create a Rotoscope Animation from Video?
Let’s have a look at the process of creating an animation from video:
Step 1: Converting Videos into Series of Images
- Choose a media player that supports video-to-image conversion, such as VLC Player (free).
Step 2: Importing Images into a Graphics Program
- Bring your image sequence into a graphics program of your choice, such as:
- Photoshop (industry standard)
- PowerPoint (unexpected but effective!)
- Other layer-based programs (e.g., GIMP, Illustrator)
- Take advantage of layer functionality to streamline your tracing process
- In PowerPoint:
- Place each image on a separate slide
- Utilize the Selection Pane to manage object visibility and organization
Step 3: Tracing Each Image with Precision
- Devote time and attention to detail, as this step is the foundation of your rotoscoping project.
- Trace with purpose, using tools like Bezier curves, vector shapes, or freehand drawing.
- Refine your tracings to get consistency and quality throughout the sequence.
Take breaks to maintain focus and avoid burnout – this process can be time-consuming.
Step 4: Saving Your Masterpiece as an Animated GIF
- Compile your traced and refined images into a cohesive sequence.
- Save the sequence as an animated GIF, optimizing for:
- File size
- Image quality
- Frame rate
- Embed the animated GIF into your storyline.
Lastly, share your captivating animation with the world!
Final Word on Convert Your Videos into Animation with Rotoscoping?
In conclusion, we found that rotoscoping is an old-age technique of video editors to transform videos into animations. But, its hype is getting more wild these days due to its smashing outcomes in the animated videos. The entertainment industry has been taking full benefit of this technique for decades. Now, it’s time when every content creator needs to rotoscope their videos.
So…let’s get high-quality and stunning results from this useful method of editing videos into animation!


