If you are seriously into learning a quick method to edit your photos, “Photoshop Actions” is the best way to do that. Let’s get delusional and imagine you click a photo once and get dozens of edits done simultaneously. I know this sounds too much but it’s possible with the help of using Actions. This is how smartly these tools work and give you edited images within nanoseconds. So…are you fully interested in learning Photoshop Actions? I have expanded this topic and shared what Photoshop Actions do and how you can master them easily. Let’s just follow in the footsteps of this Photoshop tutorial and become a pro in Actions.
What are Photoshop Actions?

Have you heard about efficiently editing photos in Photoshop with Actions? So, what exactly are Photoshop Actions?
Actually, Photoshop Actions are customizable shortcuts. In simple words, they allow you to record a sequence of edits and apply them to a single image or an entire batch with just one click. They are similar to having your own “personal assistant” or “personal macro” in Photoshop. Their sole purpose is to streamline your workflow and save you time. Interestingly, you can create an Action in Photoshop and turn your edits into a time-saving blueprint. This is a reusable script that lets you apply the same steps to multiple images with ease. As a result, it eliminates the drudgery of manual repetition of photo editing steps. With actions, you can zip your tedious tasks/actions in no time. You achieve consistent results without the hassle of redoing each step by hand. So…do you have a signature style to apply to every other photo in Photoshop? Let’s turn your go-to photo edits into a one-click editing. If you always find yourself boosting brightness, contrast, and color balance, save those steps as an action. Then, whenever you want to give your photos that same editing, just apply the action and let Photoshop work freely on its own saved actions.
Where to Use Photoshop Actions?
Actions in Photoshop are super helpful tools in various common scenarios. They are actually effort, energy, and time savers for Photoshop editors in all sorts of situations. I’m going to walk through the most scenarios where it comes into action:
1. Batch Processing:

- Watermarking: You can add a watermark on multiple photos in one action. It’ll safeguard your creative work with less effort.
- Resizing Images: With a single Photoshop action, you can resize multiple images to the same dimensions. You post online or create tiny thumbnails that are perfectly proportioned.
- Editing Multiple Images: Apply consistent tweaks to multiple photos simultaneously. Adjust brightness, contrast, and color balance with ease, and transform your images into a harmonious visual story. No more editing one by one!
2. Repetitive Tasks

- Applying Filters: Actions in Photoshop are useful in applying complex filter combinations efficiently across different photos.
- Noise Reduction: Quickly eliminate noise and imperfections from multiple photos at once.
- Sharpening: Achieve clarity, consistency, and uniformity across your entire photo collection with a single click.
3. Creating Consistent Effects:
- HDR Effect: Photoshop Actions can simulate a stunning High Dynamic Range (HDR) effect that amplifies detail and contrast.
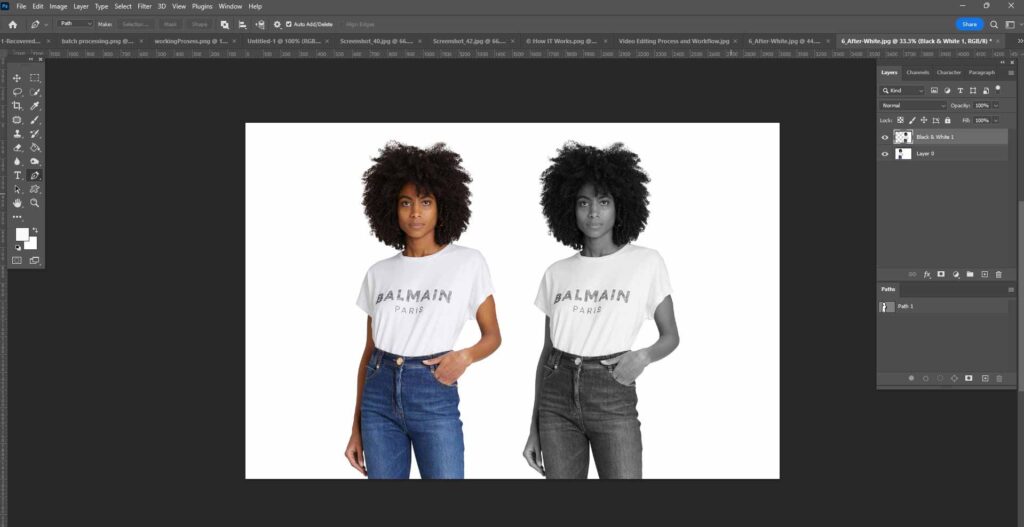
- Black and White Conversion: Turn your entire collection of color images into stunning black and white photos with a consistent tone.
- Vintage Look: You can infuse your photos with a cool vintage vibe. So, let’s apply a consistent aesthetic that adds a touch of nostalgia and character to your entire project or portfolio.
4. Preparing Images for Web or Print
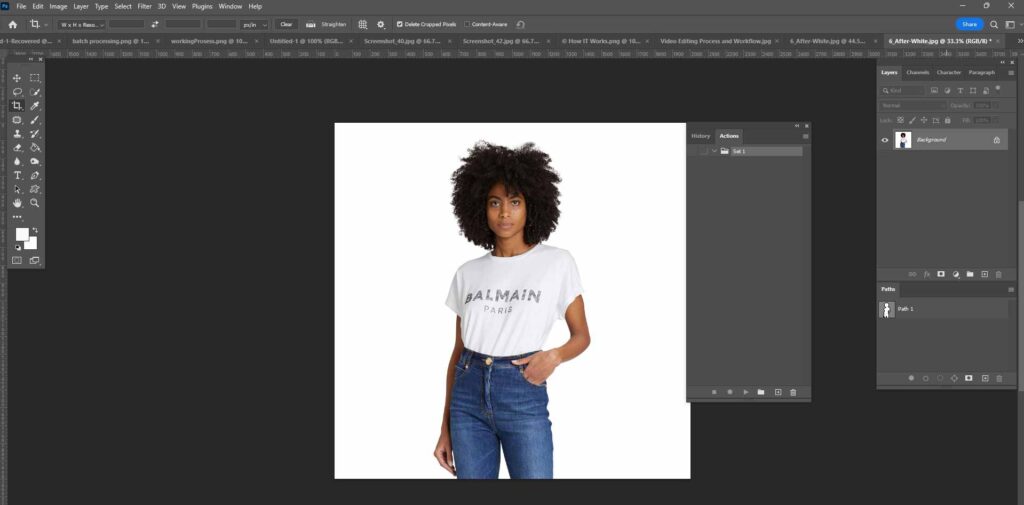
- Print Preparation: With the help of Photoshop Actions, you can set up images for printing. For example, you can adjust resolution, add bleed, and convert to the correct color profile, and so on.
- Optimization for Web: You can boost your website’s speed and performance with a simple yet effective optimization technique. I’m talking about compressing and shrinking your images to reduce file size. It’s a real quick fix!
In addition to the above uses of the Actions tool, you can use it for collage creation, mockups, and special effects. Plus, you can do basic routine adjustments like portrait retouching, basic corrections, etcetera.
How to Set Up Photoshop Actions?

Let’s dig into the steps of setting up Actions of Photoshop. Don’t skip any step.
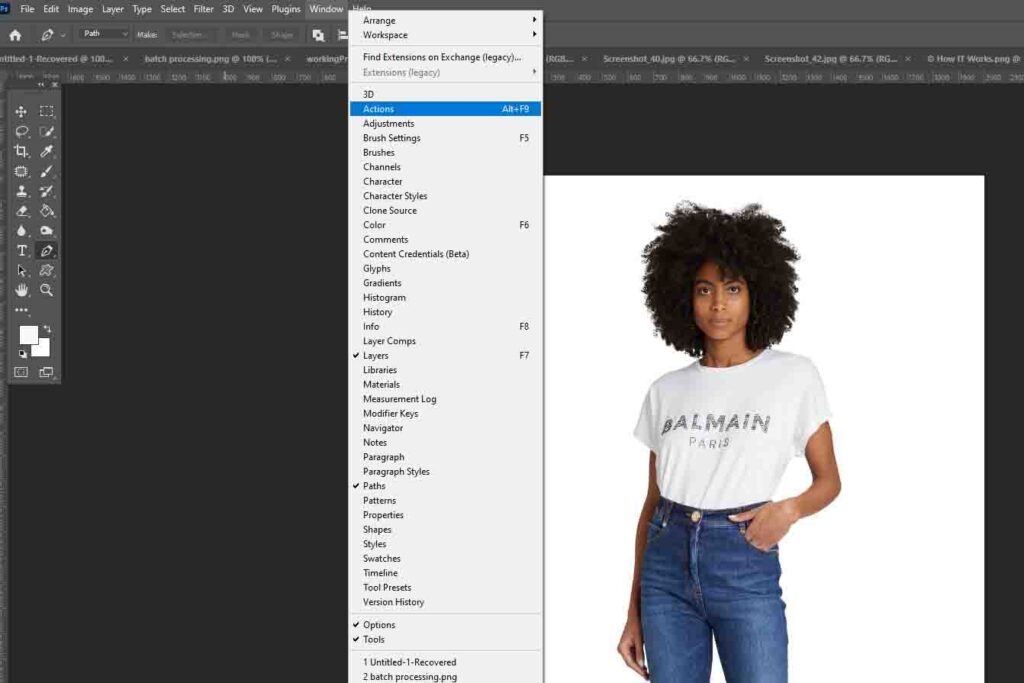
Step 1: Access Actions
- First of all, start by opening/launching Adobe Photoshop on your computer/Mac system.
- Then, simply go to the top menu in Adobe Photoshop.
- Select the “Window” option.
- Now, choose “Actions” from the dropdown menu.
- First of all, start by opening/launching Adobe Photoshop on your computer/Mac system.
- Then, simply go to the top menu in Adobe Photoshop.
- Select the “Window” option.
- Now, choose “Actions” from the dropdown menu.
The Actions panel will now be displayed. Here, you can manage and access all your actions.
Step 2: Loading Actions
1. Downloading Actions:
- Locate the actions you want to download from the internet.
- Make sure the downloaded file is in the correct .atn format (Photoshop Action file).
- Save the .atn file to a designated location on your computer.
Now, you can easily load the downloaded actions into the Actions panel in Adobe Photoshop.
2. Loading Actions:
- Go to the Actions panel in Adobe Photoshop.
- Click on the menu icon (three horizontal lines) in the top-right corner.
- Select “Load Actions” from the dropdown menu.
3. Selecting File:
- Navigate to the location where your downloaded .atn file is stored.
- Select the desired .atn file.
- Click the “Load” button.
- The actions from the selected file will now be imported and displayed in the Actions panel.
Your new actions are now ready to use and manage within the Actions panel.
Step 3: Creating New Actions:
1. Create a New Action:
- For creating new Photoshop Actions, go to the Actions panel in Adobe Photoshop.
- Locate the Create New Action button at the bottom of the panel.
- Click on the “Create New Action” button (represented by a square icon with a folded corner)
2. Naming Your Action:
- A dialog box will appear when creating a new action.
- Enter a descriptive name for your action in the “Name” field.
- Choose a set to organize your action from the “Set” dropdown menu.
- Optionally, assign a function key shortcut for easy access.
- Click the “Record” button to start recording your action.
4. Performing Your Edits:
- Perform all the desired edits in Photoshop whenever the Photoshop Action recording starts.
- Execute each step or command you want to include in the action
- Photoshop will capture and record each step, including:
- Menu commands
- Tool selections
- Adjustments
- Layer modifications
- And more
- You should continue recording until you’ve completed all the desired edits.
4. Stopping the Recording of Action:
- Last but not least, click the Stop button (represented by a square icon) at the bottom of the Actions panel.
- This will end the recording session and save your new action.
- Your action is now complete and ready to use.
- You can find your new action in the Actions panel, listed under the set you chose earlier.
You can now play back your action to automate the edits you recorded or modify it as needed.
Step 4: Organizing Actions:
1. Creating Action Sets:
Let’s group your actions into sets to keep them organized:
- First of all, go to the Actions panel in Adobe Photoshop.
- Click the Create New Set button (represented by a folder icon) at the bottom of the panel.
- A dialog box will appear, prompting you to name your new set.
- Enter a descriptive name for your set.
- Click OK to create the new set.
- Your new set will now appear in the Actions panel. It will allow you to organize and group related actions together.
- Also, you can now drag and drop actions into your new set to keep them tidy and easily accessible.
2. Moving Actions into Sets:
Here are the steps to move actions into sets:
- Go to the Actions panel in Adobe Photoshop.
- Select the action you want to move.
- Drag and drop the action into the desired set.
- Release the mouse button to place the action in the set.
- Repeat this process to move multiple actions into sets.
- Actions can be moved into existing sets or new sets can be created as needed.
Organizing actions into sets helps keep your Actions panel clutter-free. After all, this step will make it easier to find and use your actions.
How to Use Photoshop Actions?
The easy steps to use Actions are given below.
Step 1: Applying Actions
1. Opening Your Desired/Required Image:
- Let’s begin the use of Actions by opening a photo in Photoshop by going to “File” > “Open.”
- Then, select the desired image file from your computer.
2.Selecting the Photoshop Action:
- In the Actions panel, find and click on the action you want to apply to select it.
3. Playing the Action:
- Then, click the Play button (represented by a triangle icon) given at the bottom of the Actions panel.
- This step will execute the selected action.
- Also, Photoshop will automatically apply the recorded edits to your image.
4. Reviewing and Adjusting Changes:
- Review the results of the action on your image.
- Make any necessary adjustments or the required edits as needed to achieve the desired outcome.
Step 2: Batch Processing
1. Let’s Prepare Your Photos:
- You need to gather and organize all the images you want to edit. You can do this by placing them in a single folder.
- This step will make it easy to access and batch-process those photos using Photoshop actions.
2. Opening the Batch Command:
- Let’s access the Batch command by navigating to File > Automate > Batch in the Photoshop menu.
- It will allow you to apply actions to multiple images at once.
3.Setting Up the Batch:
- Action: In the Batch dialog box, select the action set and specific action you want to apply to your photos.
- Source: Under the “Source” section, select “Folder.” Then, click the “Choose” button to navigate to. Now, select the folder containing the photos you want to process with the batch action.
- Destination: In the “Destination” section, choose where to save your edited photos. You can select either “Save and Close,” “Folder,” or “File Naming” options. These options will allow you to specify the output location, file naming conventions, and overwrite or save options for the processed images.
4. Running the Batch:
- Lastly, click on the “OK” button to initiate the batch processing.
- Photoshop will automatically apply the selected action to each image in the designated folder.
- It will effectively, accurately, and efficiently process all photos one by one without requiring further intervention.
Step 3: Customizing Actions in Photoshop
1.Expanding the Photoshop Action:
- In the Actions panel, click the disclosure triangle (›) beside an action.
- This step will reveal its underlying sequence of individual commands and edits.
- Also, it’ll allow you to view and customize the specific steps within the action.
2. Customizing Action Steps:
- In this step, double-click on a specific step within the action to access its editable parameters.
- It will enable you to refine settings such as blending mode, opacity, or other attributes to change the action’s behavior. In the end, it will help you get your desired outcome.
3.Extend the Action:
- Initiate new edits by performing the selected action for additional tasks or adjustments.
- Then, click the Record button to capture these new steps and seamlessly integrate them into the existing action.
- This step will expand its capabilities and functionality.
4. Reorganize Action Sequence:
- You can drag and drop individual steps within the action to rearrange their order.
- It will help you to resequence the edits and adjust the workflow to achieve the required outcome (or improve efficiency).
5. Deleting Action:
- First, select the unwanted step.
- Then, click the Trash icon to remove it from the action sequence.
(The trash icon is given at the bottom of the Actions panel.)
Step 4: Using Actions with Adjustment Layers
1. Create Adjustment Layers:
- It should be your priority to use adjustment layers (e.g., Levels, Curves, Hue/Saturation) when you are recording actions.
- Also, avoid making direct image adjustments to enable non-destructive editing.
2. Edit Adjustment Layers:
- Revisit and adjust the settings of adjustment layers after the action has been successfully applied.
- Make changes to the adjustment layers’ settings to get more flexibility without re-recording the action.
That’s all about the easy use of Actions using various functionalities. For better results of Photoshop tutorials, always preview Actions, save your original files, and use the descriptive names of Actions.
How to Manage Photoshop Actions?
Here is how to effectively manage Actions in Photoshop:
Step 1: Organizing Photoshop Actions:
1. Create Actions Set:
- Organize Actions: As I have mentioned before, you can create sets of Actions. It will keep your Actions panel easy to use and simpler to locate specific actions.
- How to Create a New Set?: For this purpose, click the folder icon at the bottom of the Actions panel. Enter a name for your set. Click OK to create a new set.
- Add Actions to Set: Simply drag and drop existing actions into the new set to categorize and organize them.
2. Renaming Actions and Sets:
- Rename for Clarity: Give actions and set descriptive names to clearly understand their functions and purposes.
- Rename an Action/Set: Just double-click the current name in the Actions panel.
Then, type a new name and press Enter to update.
Step 2: Editing Actions
1. View Action Steps:
- Click the arrow icon next to an action’s name in the Actions panel to expand and view its individual steps.
2. Modifying Step Settings:
- Double-click on a specific step in the Actions panel to edit its parameters.
- Adjusting values in a Levels adjustment or changing settings in other types of steps are two common modifications.
3. Reorder Action Steps:
- Drag and drop steps within the Actions panel to rearrange their sequence.
- Just change the order in which they are executed.
4. Adding New Action Steps:
- Select the action in the Actions panel.
- Click the Record button.
- Perform the desired edits.
- Click Stop to save the new steps and add them to the action sequence.
5. Delete Unwanted Steps:
- Select the step that you want to remove in the Actions panel.
- Then, click the Trash icon to delete it. That’s all.
Step 3: Deleting Actions
1. Select Action for Deletion:
- Choose the action you want to delete given in the Actions panel.
2. Delete Selected Action:
- Click the Trash icon located at the bottom of the Actions panel.
- Delete the selected action and confirm the deletion if prompted to ensure it is removed.
Step 4: Saving and Exporting Actions:
1. Save Actions:
You need to save Photoshop Actions to prevent loss and enable sharing with others or transferring to different devices. Here is how to do it:
- Access the Actions panel menu by clicking the three horizontal lines.
- Select “Save Actions.”
- Choose a location to save the file.
- Save the action set as a .atn file.
2. Export Actions:
Export Actions for Sharing:
- For this, save actions as a .atn file.
- Then, you can share the file with others.
Export Actions for Cross-Device Use:
- Save the .atn file to a cloud storage service or external drive.
- Load the .atn file into Photoshop on another computer to access your actions on a different device.
Step 5: Backing Up Actions
1. Backup Actions for Security:
- Regular backups prevent the loss of custom actions due to computer crashes, software updates, or accidental deletions.
2. Backup Procedure:
- Periodically save your actions to:
- External drive
- Cloud storage
- Dedicated backup folder on your computer
This ensures your custom actions are safe and can be easily restored whenever needed.
Conclusion:
So, that’s all about Photoshop tutorials about Photoshop Actions. They are definitely lifesavers in this quick tech world! They help you to do your photo editing projects easily and quickly. Also, you will get awesome results. All you need to do is learn Actions, use them in the right way, and fix your problems. Thus, there is so much fun using Actions waiting for you.
Let’s revolutionize our old school editing process with the newest Photoshop Actions!


