

Studio photography feels technically complex initially. It is actually a very controlled environment. This guide simplifies complicated concepts easily. We walk through everything you need to know. We cover camera settings like shutter speed and aperture.
We explain white balance and ISO use. Proper settings optimize exposure greatly. Understanding f-stop controls depth of field. You must use manual mode for strobes. These tips help you shoot clean, consistent photos. You can walk into your next session confidently and easily.
Let’s dive below for a detailed explanation!
1. Shooting Mood: Manual (M) for full control
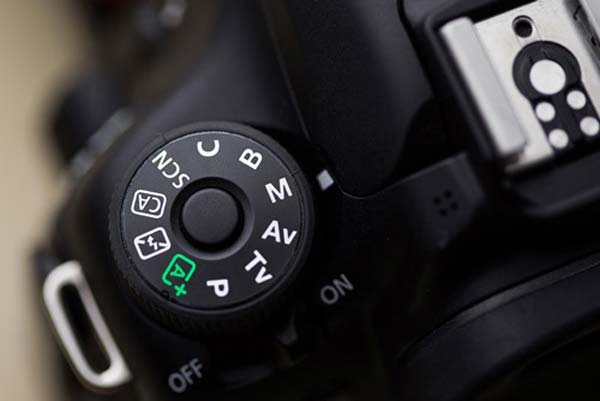
Shooting in manual mode is highly recommended. It gives you complete technical control. You set the three core elements of exposure. Use aperture to control the depth of field. Use f/8 to f/11 for sharp products. Adjust the shutter speed to control light.
Keep ISO at its lowest setting. This minimizes image noise and maximizes detail. Manual mode ensures every shot is uniform. This is vital for professional catalogs. You should avoid auto mode completely. You can also use focus stacking for extreme sharpness.
Know More: Natural light creates soft shadows. It enhances colors. A good lighting setup makes a huge difference. Softboxes distribute light evenly. Reflectors bounce light to highlight shadows. Diffusers soften harsh light. Lighting equipment plays a vital role.
DSLR cameras capture high-quality images. Backdrops set the scene. Props add character. Artificial light adds dimension. A white background creates contrast. JPEG images store high-quality photos. Contrast helps define edges. Color cast affects color accuracy.
2. ISO: Set to the lowest possible
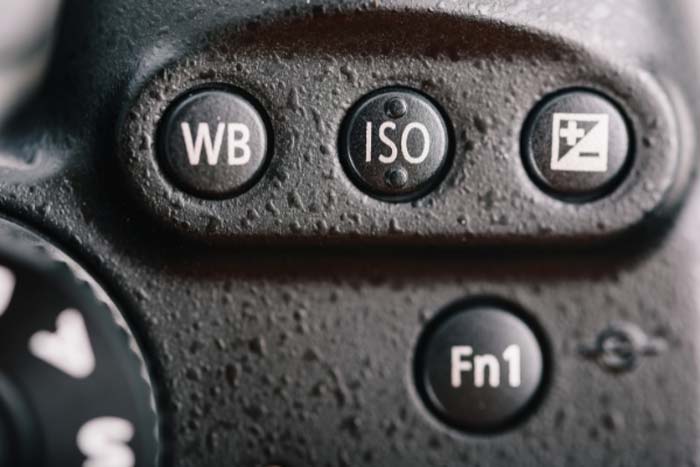
Setting the ISO to its base value is common. This achieves the highest image quality easily. The lowest ISO means the camera sensor uses less electronic amplification. This produces minimal noise grain. It allows maximum dynamic range effectively.
It also ensures the best color accuracy. You should use the lowest ISO whenever possible. This is true for bright scenes in studio photography. Low ISO requires a slower shutter speed. You must use a tripod for stability.
Know More: White foam reflects light. LED lights illuminate subjects. Mirrorless cameras are portable. A 50mm lens ensures sharp focus. Lifestyle shots show real moments. The Exposure Triangle controls light.
Continuous lighting ensures consistency. A DSLR camera delivers clear photos. The rule of thirds improves composition. Branding adds identity. Image size affects quality. Studio lights create professional lighting. LED panels distribute light evenly.
3. Aperture: Aim for an aperture between f/7.1 and f/16
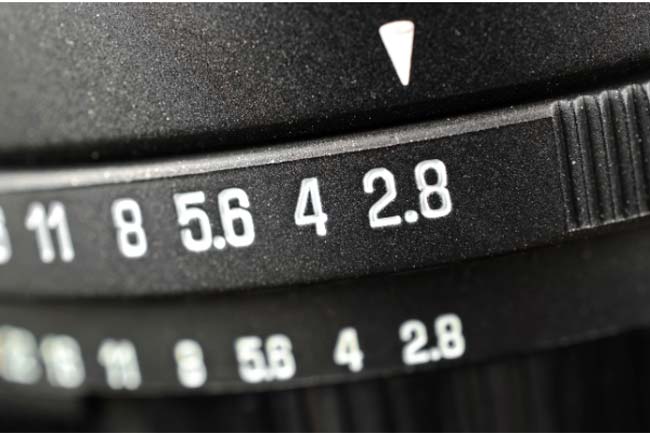
Aim for this aperture range. Achieve maximum depth of field. Keep the scene sharp. Produce optimal sharpness.
A higher f-number increases focus. This creates clear photographs. It balances depth and sharpness. Smaller apertures reduce light. This prevents bright light overexposure. This range suits many scenarios.
Know More: Visual content captures attention. The focal point directs focus. Adobe Photoshop enhances images. Social media platforms share photos widely. A photo studio offers controlled lighting. JPEG files store images with compression.
Zoom effects add depth. Color gels change light hues. White bounce cards reflect light. A soft box diffuses light smoothly. Lighting ratios balance highlights and shadows. Canon DSLR captures high-quality photos. Ecommerce product photography showcases items clearly.
Pixelz enhances ecommerce images. Cookies track user activity. Performance affects site speed. Personalization boosts engagement. Functionality drives interaction. Third parties add features. CCT range adjusts light color. Consent settings manage data.
4. Shutter Speed: Use a slow shutter speed
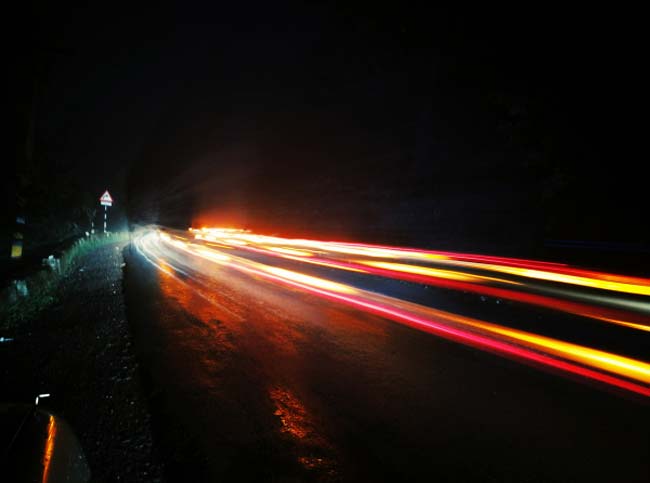
A slow shutter creates motion blur. It conveys movement. It captures low-light detail. It exposes the sensor longer. This produces creative effects.
You can capture motion blur with moving subjects. This technique conveys speed energy. It is essential for low-light photography. Use a tripod for stability critically. A tripod prevents unwanted camera shake. Use a remote release timer to avoid shaking. Neutral-density filters allow a slow shutter speed in bright daylight.
Know More: A product gallery displays items clearly. Ecommerce websites showcase products efficiently. Ghost mannequins display clothing naturally. A seamless background keeps focus on the product. Retouching tools perfect images.
The Clone Stamp removes imperfections. The Healing Brush smoothens flaws. Alt tags improve SEO. A studio with its own gear ensures consistency. Auto focus sharpens subjects. Grid lines guide composition. Clipping path isolates subjects. Soft boxes soften shadows. RGB panel lights add color effects.
VSCO enhances photo filters. Client testimonials build trust. WooCommerce powers online stores. WooThumbs adds image zoom features. WooThumbs for WooCommerce improves product displays. Mainstream Multimedia provides diverse content.
5. White Balance: Use the preset white balance
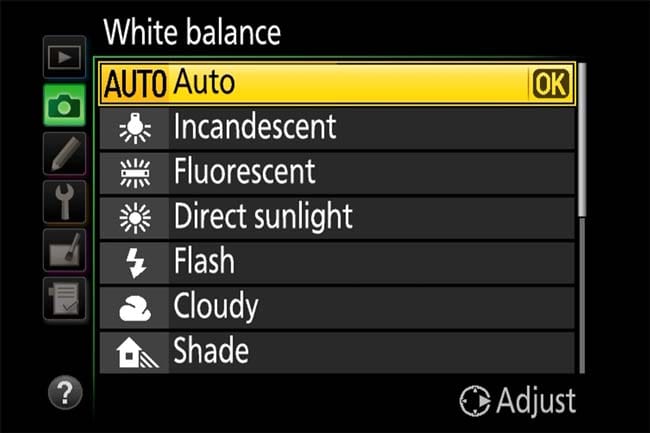
Using a preset white balance is better. Setting it manually ensures accurate color representation. Auto White Balance often fails in tricky lighting. Presets match common light sources effectively. Tungsten adds blue to neutralize yellowish light.
Cloudy adds warmth to cooler light. Manual White Balance provides ultimate color accuracy. This is preferred for professional photography. You need a gray card for manual setting. The camera uses this reference point. This results in the most natural-looking colors possible.
How to set manual white balance:
- Place a neutral reference object (a gray card, a white piece of paper, or a white balance calibration tool) in the same lighting conditions as your subject.
- Navigate to your camera’s custom white balance setting in the menu.
- Take a picture of the gray card or white object, filling the frame.
- Use that image as the reference point for the camera’s manual white balance setting.
RAW files offer more post-processing control. This makes high-quality images. Avoid glare in your image. Natural lighting or artificial lighting can work. Studio Lighting helps product photography. The photographer can use a lightbox.
Know More: A photo box controls lighting. The SIRUI B15R tripod stabilizes shots. The SIRUI C150X Lite offers flexibility. Medium-format cameras capture high detail. A 24mm lens widens scenes. Lens combinations expand creativity.
Image variations showcase different perspectives. The mobile shopping experience is enhanced with clear photos. A studio-ad setting adds professionalism. A full-screen lightbox highlights products. Photo editing apps improve image quality. Adobe Lightroom Mobile enhances photo adjustments. Snapseed offers quick photo edits.
FAQs
What is the product photography trend?
Product photos focus on minimalism and bold lighting. Natural settings attract the customer. Realistic high-quality images reflect true product details. Product photographers use 3D and AR integration. These tools enhance the online shopping experience.
What are the best camera settings for product photos?
Sharp product photos require specific camera settings. Use a low ISO 100-400. This avoids noise. A narrow aperture f/8 to f/16 provides maximum depth of field. A moderate shutter speed of 1/125s works well.
What is the future of photography?
AI will heavily influence photography. Computational photography advances will be significant. Cameras will automatically adjust settings for optimal resolution. Post-production tools will become intuitive. Virtual reality, augmented reality 360-degree imaging will gain momentum. Autofocus improves image optimization.
What is the 20-60-20 rule in photography?
The 20-60-20 rule is a composition guideline. It creates visually appealing photos. This rule divides the photo into three sections. Key elements occupy 20% in the foreground. They take 60% in the middle ground. They also use 20% in the background.
Final Thought
Choosing the right camera settings is key. Post-production truly creates magic easily. Zenith Clipping enhances your product images. We use professional photo editing.
We ensure clear, bright photos. We remove backgrounds. This improves your visuals. We will fulfill your vision. These images are vital for online stores. Lens lighting quality is essential.


